© Safe Fleet | 2020 | All rights reserved | Part #: 700-1213 R1
DH4C Installation Guide
p. 16
DH4C Administration
DH4C Administration
Accessing the On-screen Display
Video Conguration, Playback, and Archiving
There are two ways for Installers and System Technicians to access DVR conguration, playback and archiving features:
• Locally, via the On-screen Display (OSD) and portable video monitor, as described in this tutorial.
• Remotely, via a Web browser interface and wireless or Ethernet connection. For more information, nd the vMax Web
User Guide on the Safe Fleet Community.
For full-featured video review, searching, and archiving, we recommend Evidence Manager. The software is supported on a
Windows-based computer. For more information, see the Evidence Manager User Guide on the Safe Fleet Community.
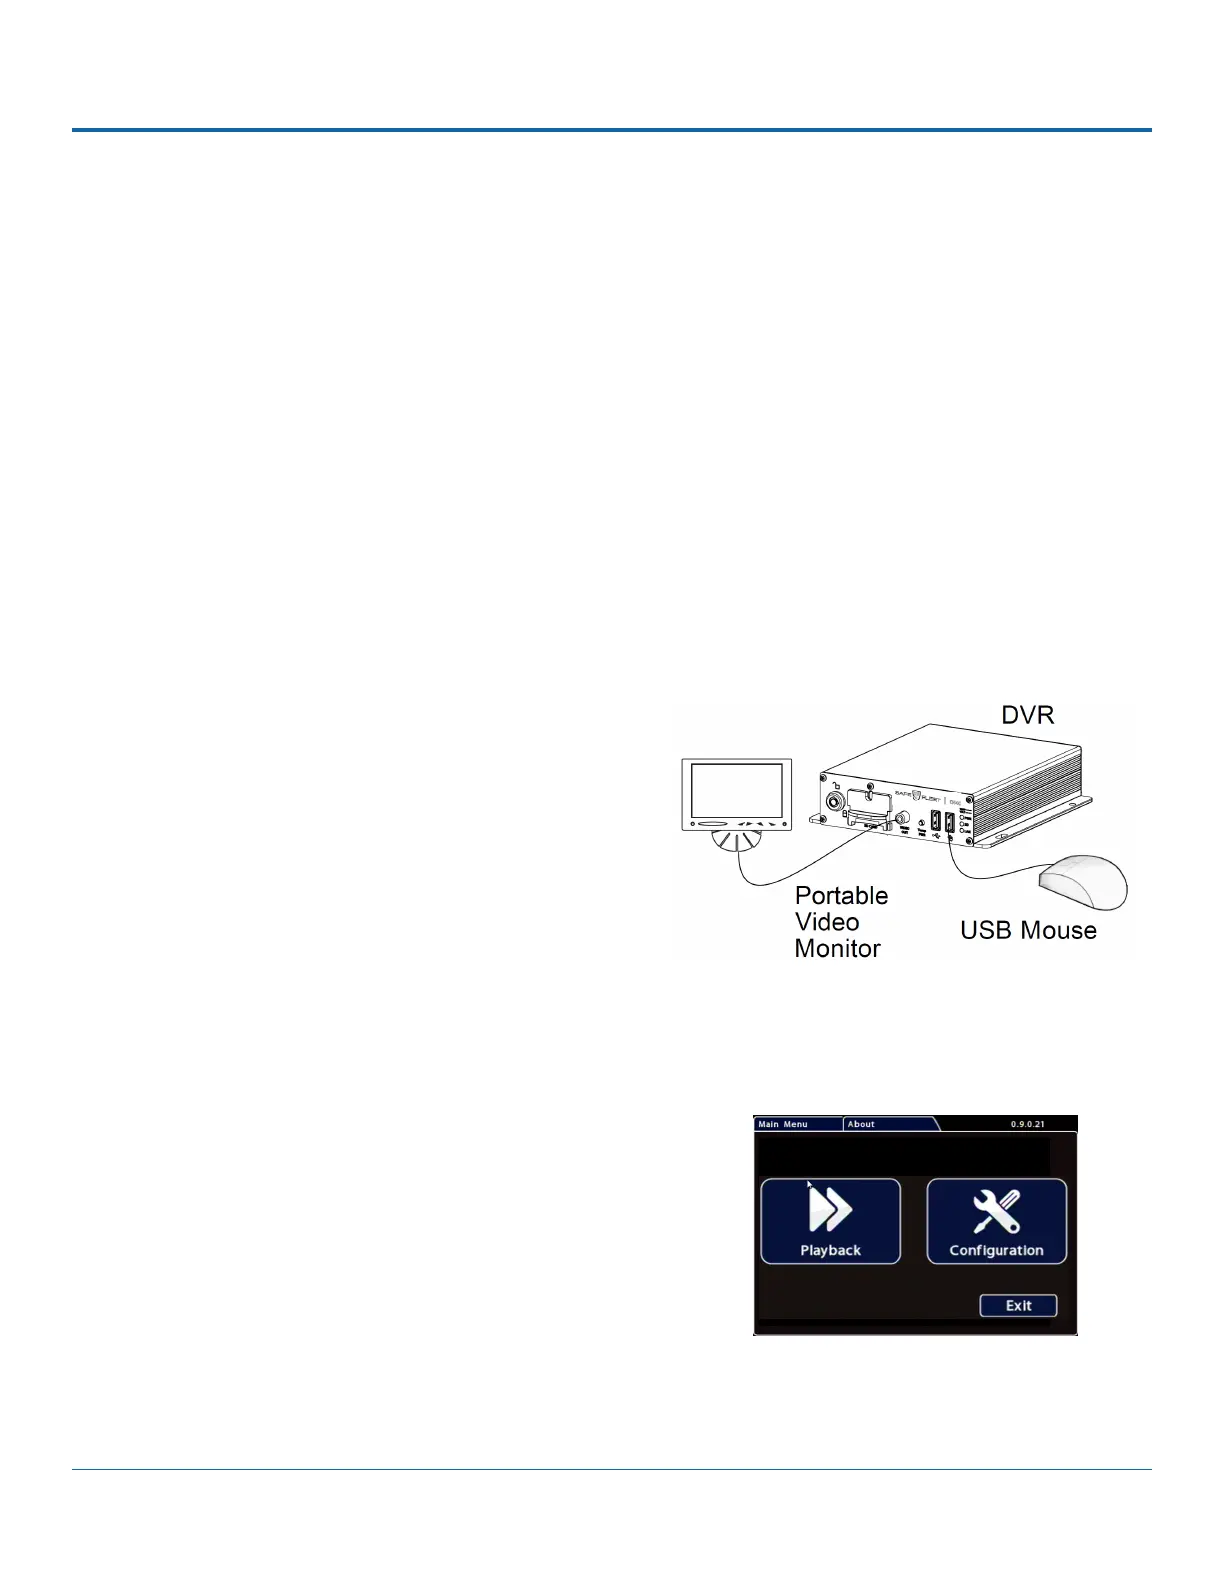
To use the On-screen Display:
1. Connect a portable video monitor to VIDEO OUT on the
DVR front panel.
2. Plug a USB mouse in a USB socket on the front of the DVR.
3. Power up the DVR. The DVR splash screen appears briey.
The system displays live camera feeds, as described below
in the following section Live View.
Right-click anywhere in the OSD screen to view the Main
Menu:
• Conguration - access DVR menus to set up the
system.
For more information, see DH4C Conguration: Setting
up the DVR.
• Playback - Search, Playback, and Archive video directly
from the DVR.
For more information, see DH4C Administration:
Working with Video.
Using the On-screen Display