© Safe Fleet | 2020 | All rights reserved | Part #: 700-1213 R1
DH4C Installation Guide
p. 39
DH4C Advanced Conguration
Built-in WIFI Settings
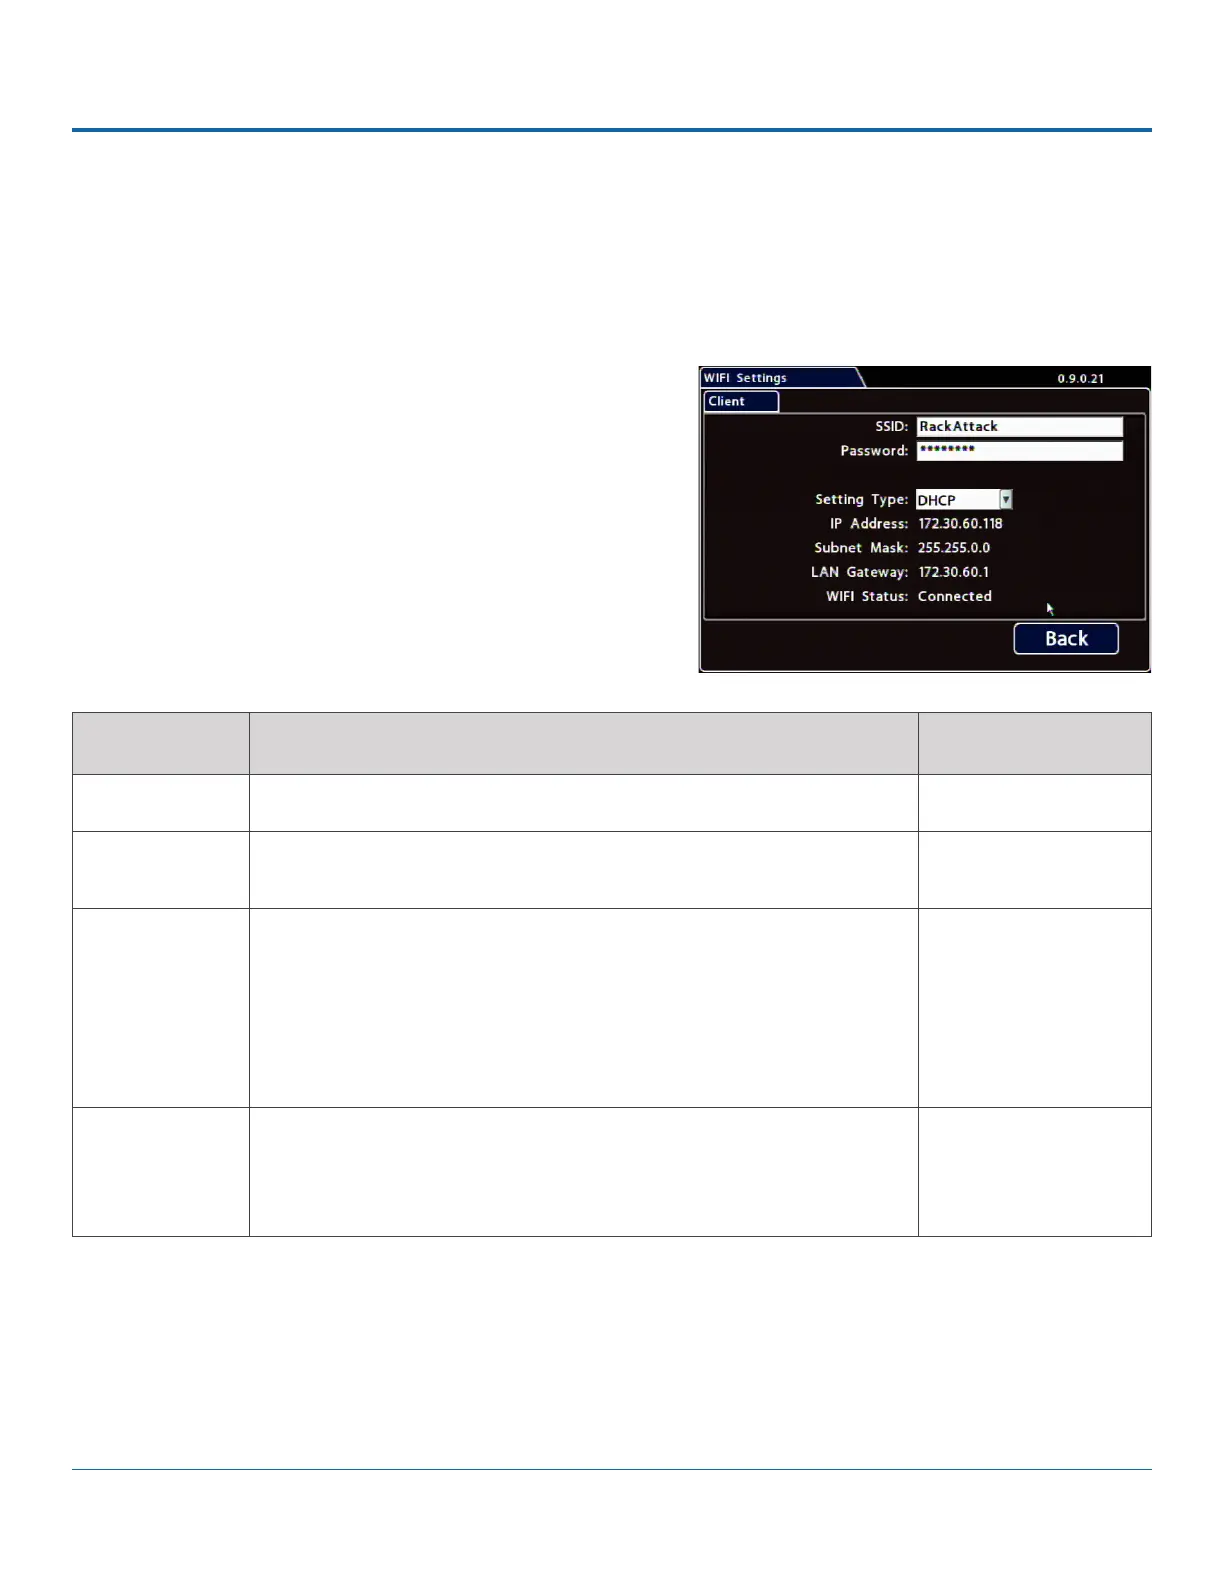
Use these settings to congure the DH4C's built-in WIFI and connect the DVR to an access point on the customer network.
For information on supported applications, see the vMax Web, Depot Manager, and Commander documentation available
on the Safe Fleet Community.
To congure built-in WIFI:
1. Select Network Advanced WIFI to open the tab.
2. Congure settings as required.
For details, see Menu Options, below.
3. Click Back to save settings, then click Back again (twice) to
return to the Conguration menu.
ITEM DESCRIPTION VALUE [DEFAULT]
SSID Enter the WIFI network name, as dened by the network administrator. n/a
Password Enter the WIFI network password as dened by the network
administrator.
n/a
Setting Type Choose Static IP or DHCP to enable built-in WIFI.
Contact the network administrator for the required Setting Type.
Static IP uses a permanent address on the network, assigned by the
administrator. DHCP (Dynamic Host Conguration Protocol) automates
IP address assignment.
OFF disables built-in WIFI capability.
[OFF], Static IP, DHCP
IP Address,
Subnet Mask,
LAN Gateway,
WIFI Status
When the DVR is connected to an access point, the network details
appear automatically, and WIFI Status displays Connected (otherwise
Not Connected).
n/a
Menu Options