31
Dynamic gamma
Set the level for Dynamic gamma correction. Select from the
following options:
Off . . . . . Disable dynamic gamma correction
Low . . . . Small correction
Mid . . . . . Medium correction
High . . . . Large correction
✔Note:
•Oneoftheaboveoptionsaredisplayeddependingontheselected
imagemode.
3D-Y/C
Optimally separates the color and brightness signal to reduce
cross-color and dot interference. Press the Point
7 8 buttons to
change the 3D-Y/C mode.
Off . . . . 3D-Y/C mode is “Off”
On . . . . 3D-Y/C mode is “On”
✔Note:
•3D-Y/Cmaynotappeardependingontheinputsignal.
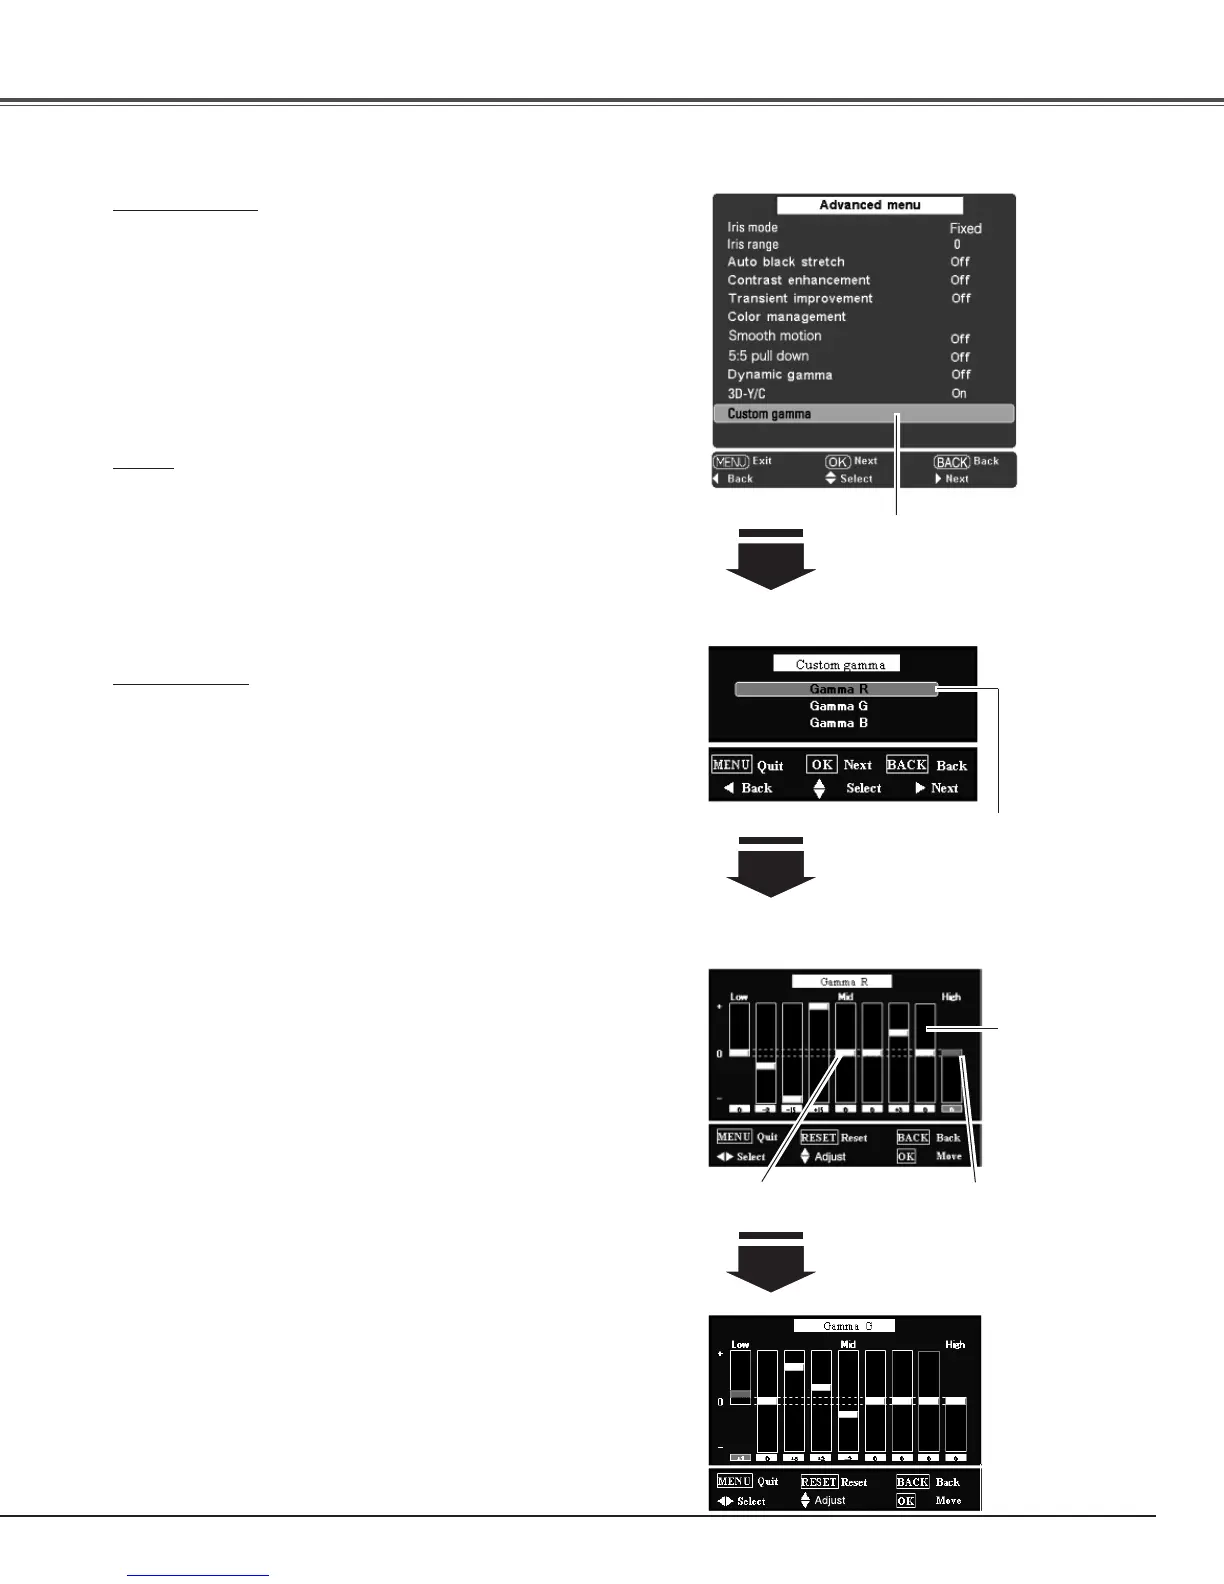
Custom gamma
Adjust R, G, B to get the desired balance of contrast.
Select Custom gamma in the Advanced menu and press the
Point
8 or OK buttons. The custom gamma window appears. Use
the Point
ed buttons to choose the desired item from Gamma
R, Gamma G, and Gamma B and then press the Point
8 or OK
buttons to display the gamma adjustment window. The colored
gamma pointer indicates where you are making an adjustment.
The white gamma pointer indicates where the value is set.
✔Note:
•Defaultpositionofthegammapointerislocatedinthecenter
ofthegammabar.Onceyoumakeanadjustment,thegamma
pointerremainswheretheadjustmentismade.
•Thevaluesaresetto0whennoadjustmentismade.
Use the Point 7 8 buttons to move the colored gamma pointer
between the gamma bars (9 bars) to select a desired gamma bar.
Use the Point
ed buttons to move the colored gamma pointer
within the gamma bar (from -15 to +15 except for the left and right
end bars) to adjust the gamma value. The adjustment you make
reflects on the screen as you change the adjustment value.
✔Note:
•WhenthePoint8buttonispressedattherightendofthegamma
bar,thenextgammacoloradjustmentwindowappears(R ➜ G
➜ B ➜ R ➜
• • • •
).WhenthePoint7 buttonispressedattheleft
endofthegammabar,thenextgammacoloradjustmentwindow
appears(R ➜B ➜G ➜R ➜
• • • •
).
CUSTOM GAMMA
Image Adjustment
Press the Point 8 or OK buttons
to access the selected item.
The custom gamma window is
displayed.
Use the Point ed buttons to
select the desired item and
press the Point
8 or OK buttons.
The gamma adjustment widow
is displayed.
GAMMA ADJUSTMENT
White gamma pointer
Gamma bar
Colored gamma pointer
When the Point 8 button is pressed
at the right end of the gamma bar in
Gamma R, the Gamma G with the
colored gamma pointer on the left
end gamma bar appears.

 Loading...