32
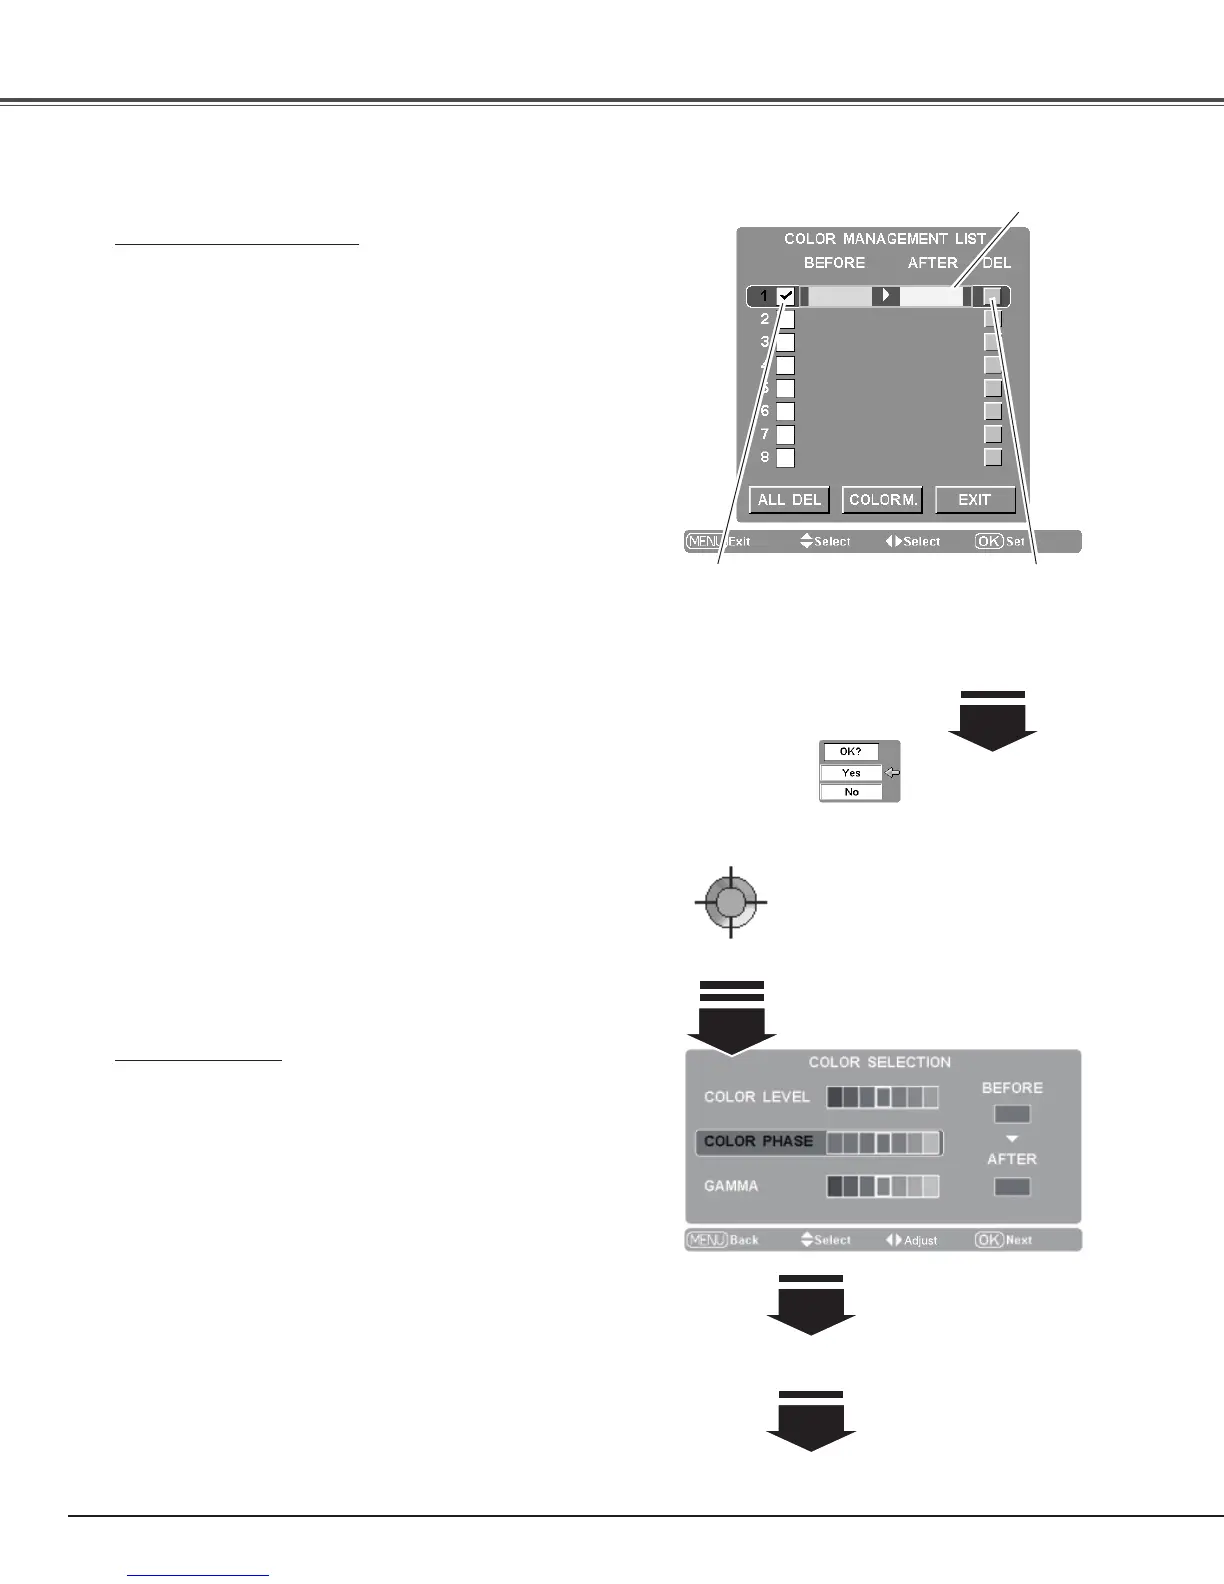
COLOR MANAGEMENT LIST
Clear the check mark if
you do not want to apply
this adjusted color data
to the projected image.
Select [Yes] to delete
the selected color data.
Select the DEL box
if you want to delete
the adjusted data.
A confirmation box
appears.
COLOR MANAGEMENT
COLOR MANAGEMENT LIST
Select Color management in the Advanced menu and then
press the Point
8 or OK buttons. The COLOR MANAGEMENT
LIST appears. You can store up to eight (8) color management
data in the list.
In the COLOR MANAGEMENT LIST, the adjusted color data
are check marked reflecting the changes in the image. You can
choose whether to apply the data in the list to the image.
Clear the check mark if you do not want to apply the data; select
the check mark and then press the OK button. The check mark
disappears.
If you want to readjust the color, select a color data box in the
list and press the OK button. The COLOR SELECTION window
appears and you can readjust the color. See below for color
selection.
If you want to delete a particular data in the list, select the DEL
box and then press the OK button. A confirmation box appears.
Select [Yes] and then press the OK button.
Press the OK button when selecting the following items.
ALL DEL . . . . . . Delete all the data in the list. Press the OK
button and a confirmation box appears. Select
[Yes] and press the OK button.
COLOR M. . . . . Go to COLOR SELECTION.
EXIT . . . . . . . . . Exit the Color management mode and return
to the Advanced menu. To store the adjusted
data, see “Store” on the next page.
Press the MENU button when you want to return to the
Advanced menu.
COLOR SELECTION
Press the OK button when “COLOR M.” in the COLOR
MANAGEMENT LIST is selected. The COLOR MANAGEMENT
LIST disappears and the Color management pointer appears.
Use the Point
ed 7 8 buttons to move the pointer to a
spot where you want to adjust the color and then press the
OK button. The image freezes and the COLOR SELECTION
window appears. (Note that when certain colors are chosen, an
exclamation mark is displayed indicating that these colors are not
adjustable.)
Use the Point
ed buttons to select COLOR LEVEL, COLOR
PHASE, or GAMMA and the Point
7 8 buttons to adjust
them. While adjusting, the changes are reflected in the image
accordingly. If you press the MENU button while operating the
color selection, the Color management pointer will be reset.
After adjusting, press the OK button to go to the COLOR
MANAGEMENT LIST.
COLOR SELECTION
Color management pointer
Use the Point
ed 7 8 buttons to move
the pointer to a spot where you want
to adjust the color and then press the
OK button. The COLOR SELECTION
window appears.
Go to the COLOR MANAGEMENT LIST.
After adjusting COLOR LEVEL,
COLOR PHASE, and GAMMA,
press the OK button.
To store the adjusted data, exit
the Color management mode
and go to “Store” in the Image
adj. Menu (see page 33).
Color data box
Image Adjustment

 Loading...