39
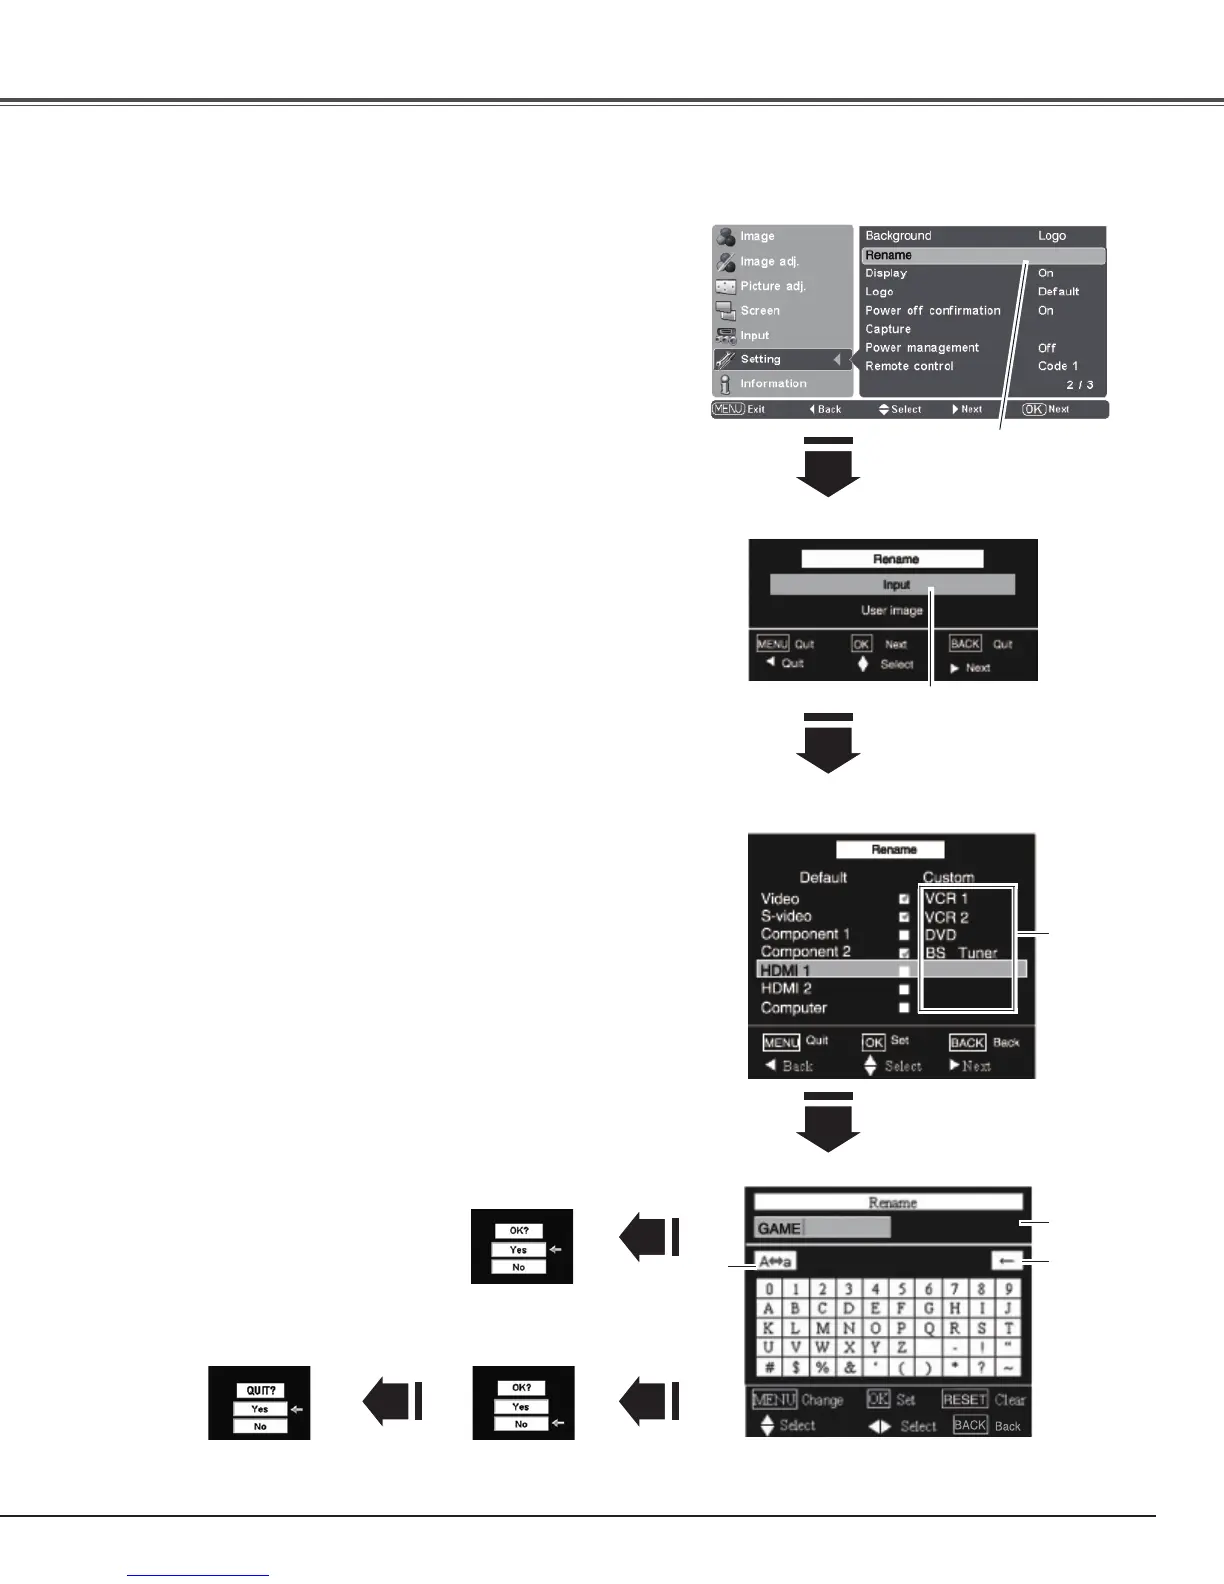
Rename
This function is used to change the name of the Input or the User
image. Select Rename and press the Point
8 or OK buttons. The
Rename window appears. Use the Point
ed buttons to choose
either Input or User image and then press the Point
8 or OK
buttons to display the rename item selection window.
Use the Point
ed buttons to choose a desired item and press the
Point
8 button to display on-screen keyboard.
✔Note:
•Customisblankandcheckmarkcannotbeplacedwhenanitemis
notrenamed
Use the Point ed7 8 buttons to select a desired character or
function. Left-arrow key moves the cursor one position backward
or deletes the preceding character. Convert key converts between
uppercase and lowercase letters. The selected key will be framed
red. Press the OK button to execute your selection. Press the
RESET button to clear your entry.
To complete the naming entry, press the MENU button. The
confirmation dialog box appears. Select [Yes] and press the OK
button, then the custom name is registered. The rename item
selection window with a newly registered name under custom
field appears.
To cancel the naming entry, press the MENU button. The
confirmation dialog box appears.Select [No] and press the OK
button to continue. Another confirmation dialog box appears, and
select [Yes] to cancel your entry.
To return to the on-screen keyboard to change the custom name,
press the MENU button. The confirmation dialog box appears.
Select [No] and press the OK button to continue. Another
confirmation dialog box appears, and select [No]. The on-screen
keyboard with a newly entered custom name in the text field
appears. You can correct or change the custom name.
✔Note:
•Youcannottypecharacterswhenthelengthofthenameexceeds
thetextfieldlimit.Maximumlengthofthecharacteryoucantype
variesdependingontheitemorthetypeofcharacters.
•Customnamecannotberegisteredwhenthetextfieldisfilled
withspacesandnocharactersareentered.
Rename
Select Rename and press the
Point
8 or OK buttons. The
Rename window appears.
Use the Point ed buttons to
select Input or User image and
Press the Point
8 or OK buttons
to display the rename item
selection window.
RENAME WINDOW
RENAME ITEM SELECTION WINDOW
ON-SCREEN KEYBOARD
Left arrow
key
Convert
key
Custom
field
To complete the naming entry,
press the MENU button. The
confirmation dialog box appears.
Select [Yes] and press
the OK button to register
the custom name.
Select [No] and press the
OK button, then another
confirmation box appears.
Select [Yes] and press the
OK button to cancel the
naming entry.
Text field
Setting

 Loading...