Date Code 970103 Communications 3-1
SEL-251, -2, -3 Instruction Manual
SECTION 3: COMMUNICATIONS
INTRODUCTION
The relay is set and operated via serial communications interfaces connected to a computer
terminal and/or modem, an SEL-2020, or an SEL-PRTU. Communications serves these
purposes:
1. The relay responds to commands spanning all functions, e.g., setting, metering, and control
operations.
2. The relay generates an event record for assertions of the TRIP output, for an event triggering
command, or for pickup of any relay element that triggers an event record.
3. The relay transmits messages in response to changes in system status, e.g., self-test warning.
It is impossible to disable any relaying or control functions via communications, unless a user
enters erroneous or improper settings or logic with the SET or GROUP commands.
Note: In this manual, commands to type appear in bold/upper case: OTTER. Keys to press
appear in bold/upper case/brackets: <ENTER>.
Relay output appears boxed and in the following format:
Example 21.6 kV distribution feeder Date: 04/01/93 Time: 01:01:01
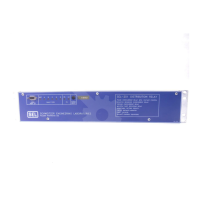
SERIAL PORT CONNECTIONS AND CONFIGURATIONS
Port 1 and Port 2 are EIA-232 serial data interfaces.
Port 1 is located on the rear panel and is generally used for remote communications via a modem,
an SEL-PRTU, or an SEL-2020.
Port 2 has connectors on both the front and rear panels, designated Port 2F and Port 2R,
respectively. Port 2F has priority over Port 2R. These ports are generally used for local
communications. Port 2R is typically connected to a printer, SEL-RD, or SEL-DTA. Port 2F is
typically used for temporary communications via a portable terminal.
When a device is plugged into Port 2F, the relay automatically begins addressing Port 2F and
discontinues communication with Port 2R. When a device unplugged from Port 2F, the relay
automatically resumes communication with the device connected to Port 2R.
The baud rate of each port is set by jumpers near the front of the main board. You can access
these jumpers by removing either the top cover or front panel. Available baud rates are 300, 600,
1200, 2400, 4800, or 9600.
Caution: Do not select two baud rates for the same port as this can damage the relay baud rate
generator. The relay is shipped with Port 1 set to 300 baud and Port 2F/2R set to
2400 baud.