14
SETUP
WHEN THE NETWORK EXPANSION KIT IS
INSTALLED
This describes how to install the software for a machine which is equipped with a network expansion kit.
• Installing the printer driver for a machine connected to the network: this page
• Installing the printer driver for a machine connected by USB cable: page 16
• Installing the PS printer driver or PPD printer driver: page 18
• Installing the Print Status Monitor: page 19
• Installing the scanner driver: page 20
Installing the printer driver
When the machine is connected to a network
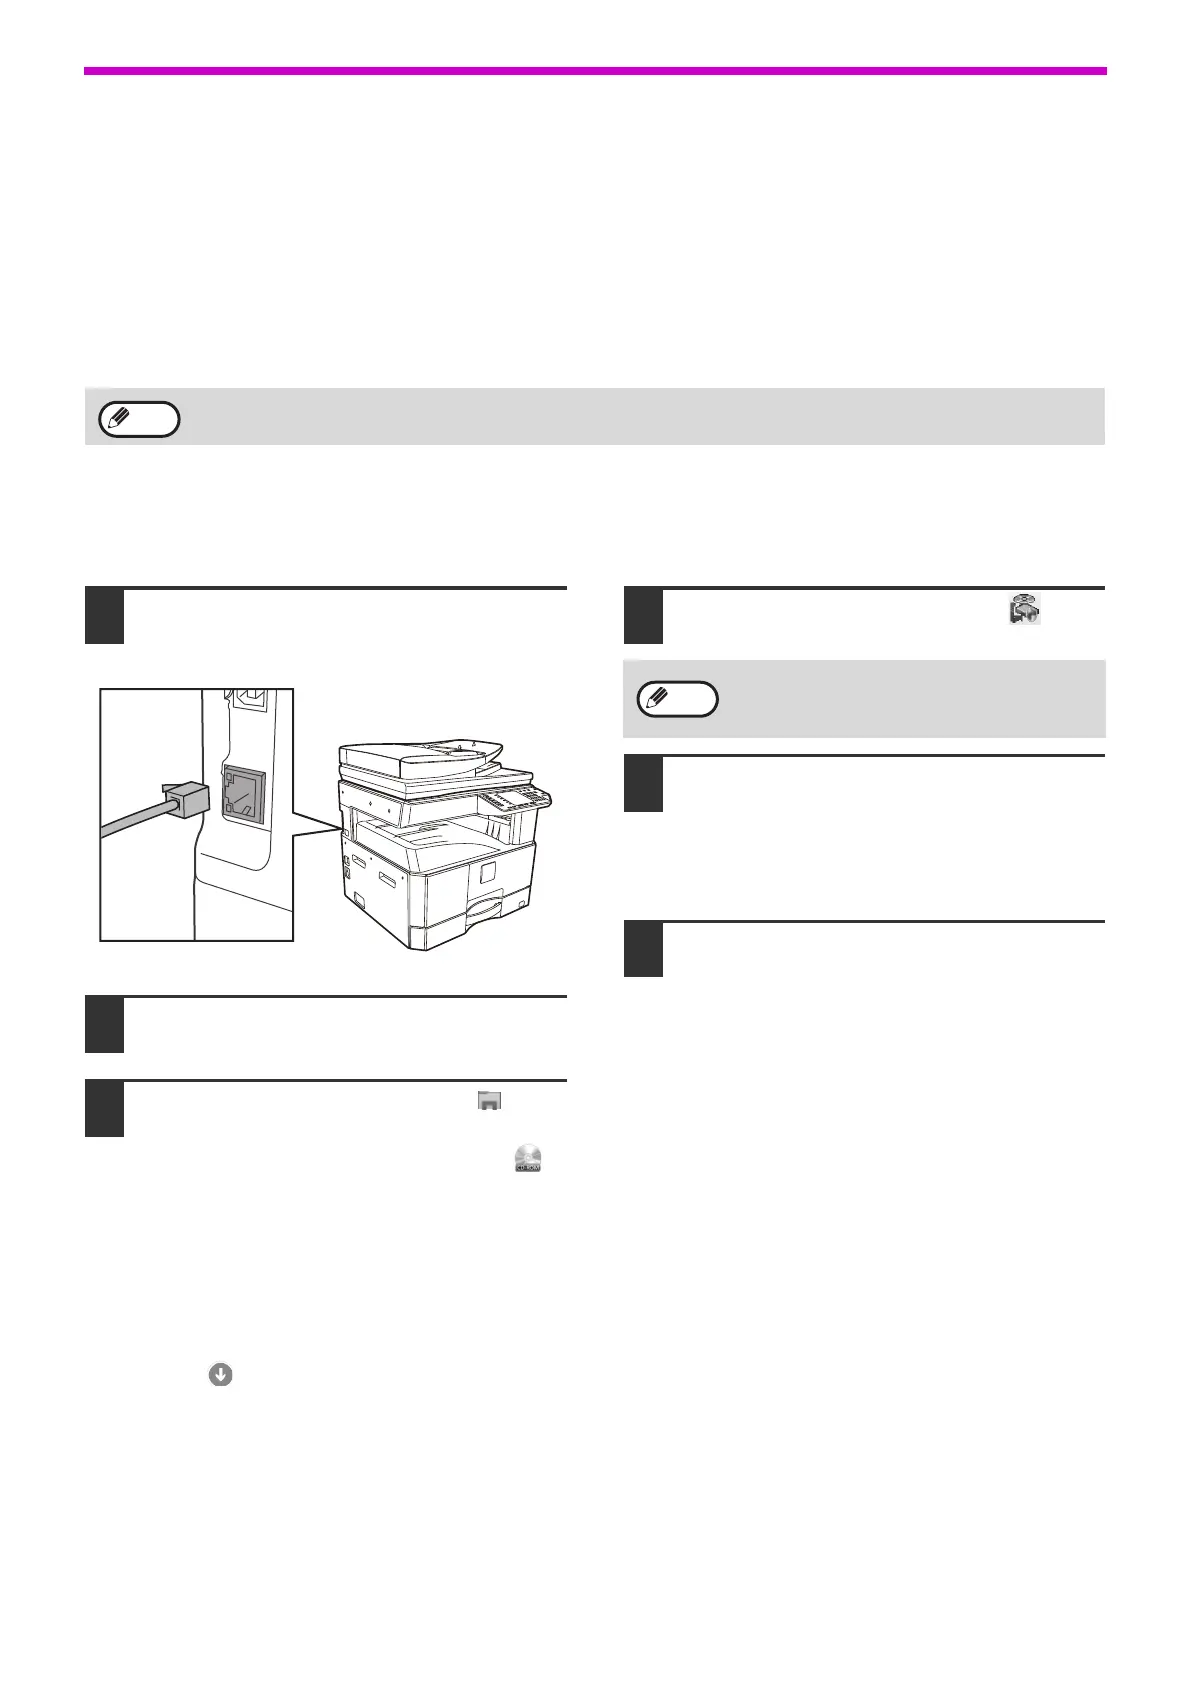
1
Insert the LAN cable into the LAN
connector on the machine.
Use a network cable that is shielded.
2
Insert the CD-ROM into your CD-ROM
drive.
3
Click the "File Explorer" icon ( ) on
the tool bar, then click "This PC" and
double-click the "CD-ROM" icon ( ) .
• In Windows 8.1/Server 2012, double-click the
"CD-ROM" icon.
* If no icon is displayed in Windows Server
2012, right-click in the Start screen (or swipe
upward from the bottom edge), then select
the App Bar → "All apps" → "Computer" and
then double-click "CD-ROM".
* If no icon is displayed in Windows 8.1, click
the ( ) icon in the Start screen and then
double-click "CD-ROM" icon.
• In Windows Server 2012 R2, right-click the
"Start" button, then click the "File Explorer"
icon, then click "This PC" and double-click the
"CD-ROM" icon.
4
Double-click the "Setup" icon ( ).
5
The "SOFTWARE LICENSE" window
will appear. Make sure that you
understand the contents of the
software license, and then click the
"Yes" button.
6
Read the message in the "Welcome"
window and then click the "Next"
button.
If installing a PCL driver, install it while referring to the procedure given on this page.
(The machine must be equipped with the network expansion kit and the printer expansion kit.)
If a message screen appears asking you for
confirmation, click "Yes" or "Allow".
Note