22
SETUP
INSTALLING THE PS DISPLAY FONTS
Fonts that can be used by the PS printer driver are contained on the "PRINTER UTILITIES" CD-ROM that
accompanies the PS3 expansion kit. Install these fonts as needed for the PS printer driver.
1
Insert the "PRINTER UTILITIES"
CD-ROM that accompanies the PS3
expansion kit into your computer's
CD-ROM drive.
2
Click the "File Explorer" icon ( ) on
the tool bar, then click "This PC" and
double-click the "CD-ROM" icon ( ) .
• In Windows 8.1/Server 2012, double-click the
"CD-ROM" icon.
* If no icon is displayed in Windows Server
2012, right-click in the Start screen (or swipe
upward from the bottom edge), then select
the App Bar → "All apps" → "Computer" and
then double-click "CD-ROM".
* If no icon is displayed in Windows 8.1, click
the ( ) icon in the Start screen and then
double-click "CD-ROM" icon.
• In Windows Server 2012 R2, right-click the
"Start" button, then click the "File Explorer"
icon, then click "This PC" and double-click the
"CD-ROM" icon.
3
Double-click the "Setup" icon ( ).
4
The "SOFTWARE LICENSE" window
will appear. Make sure that you
understand the contents of the license
agreement and then click the "Yes"
button.
5
Read the message in the "Welcome"
window and then click the "Next"
button.
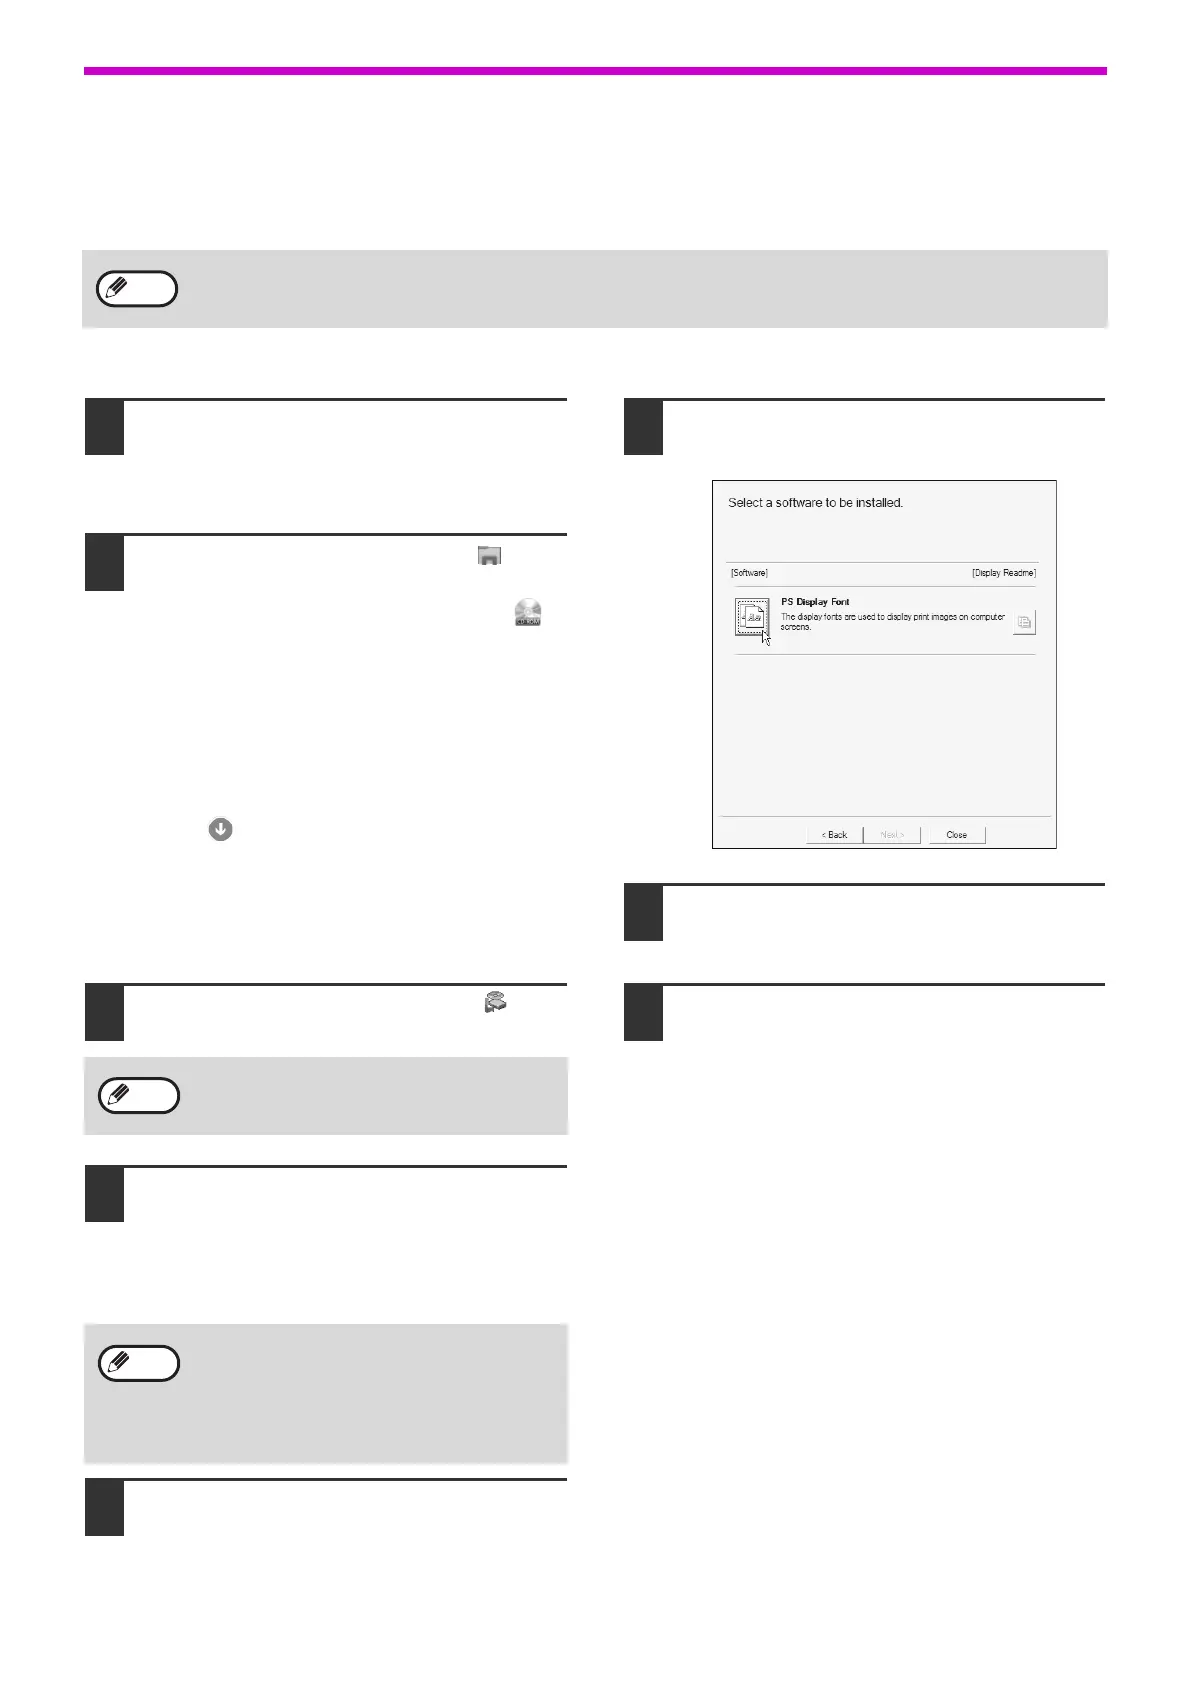
6
Click the "PS Display Font" button.
7
Follow the on-screen instructions.
8
Click the "Close" button in the screen
of step 6.
To install on Mac OS, see ReadMe on the “PRINTER UTILITIES" CD-ROM that is included in the PS3 expansion
kit.
If a message screen appears asking you for
confirmation, click "Yes" or "Allow".
You can show the "SOFTWARE LICENSE" in
a different language by selecting the desired
language from the language menu. To install
the software in the selected language,
continue the installation with that language
selected.