52
Press MENU and the MENU screen displays.
1
Press
b/c/d
to select “Option”.
3
Ordinarily you can easily adjust the picture as
necessary to change image position using Auto Sync.
In some cases, however, manual adjustment is needed
to optimise the image.
Press
a
/
b
to select a specifi c adjustment
item among “H-Pos.”, “V-Pos.”, “Clock” and
“Phase”.
7
Press
c
/
d
to adjust the item to your desired
position.
8
NOTE
• For resetting all adjustment items to the factory preset values, press
a
/
b
to select “Reset”, and then press ENTER.
• Images may not be displayed properly depending on the settings
and/or input signals.
Press MENU and the MENU screen displays.
1
Press
b/c/d
to select “Option”.
3
This function enables the screen to be automatically
adjusted to its best possible condition when the
analogue terminals of the TV and PC are connected
with a commercially available RGB cable, etc.
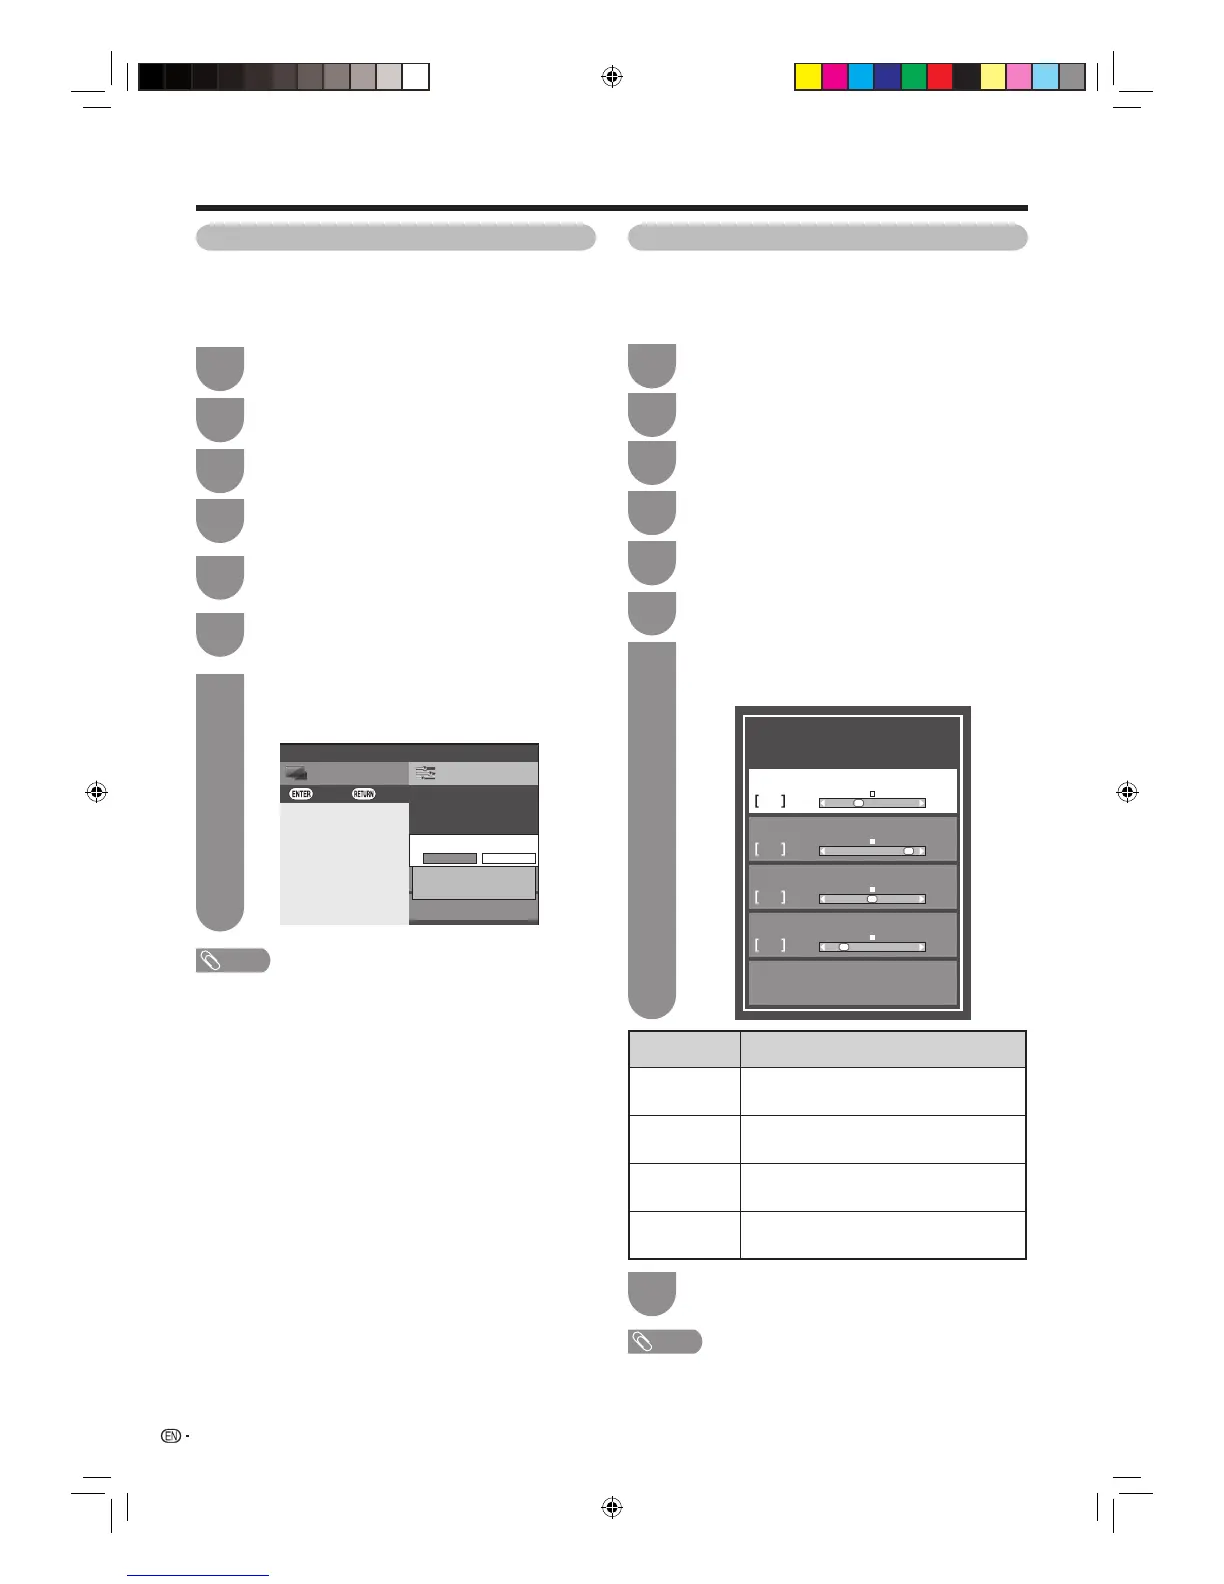
Selected item Description
H-Pos. Centres the image by moving it to the left
or right.
V-Pos. Centres the image by moving it up or
down.
Clock Adjusts when the image fl ickers with
vertical stripes.
Phase Adjusts when characters have low
contrast or when the image fl ickers.
Adjusting the PC image automatically Adjusting the PC image manually
Connecting a PC
Press
c
/
d
to select “Yes”, and then press
ENTER.
• Auto Sync. starts.
7
NOTE
• Auto Sync. is likely to succeed when an input PC image
has wide vertical stripes (e.g. pattern with high contrast
stripes, or cross-hatched).
It may fail when an input PC image is solid (low contrast).
• Be sure to connect the PC to the TV and switch it on
before starting Auto Sync.
Press
a
/
b
to select “Auto sync.”.
6
Press
a
/
b
to select “Fine sync.”, and then
press ENTER.
6
SetupCH list
Menu
:Back:Enter
Audio select
PC input
Τerminal setting
[Video + Audio]
Auto sync.
Auto adjustment of image display
paramefers
Yes No
Fine sync.
Image position adjustment, etc.
0
H-Pos.
0
-39
+87
V-Pos.
-22
+3
0
Clock
-90
+90
-12
Phase
Reset
-20
+20
Press c/d to select “Setup”.
2
Press
a
/
b
to select “Terminal setting”, and
then press ENTER.
4
Press
a
/
b
to select “PC input” and then
press ENTER.
5
Press c/d to select “Setup”.
2
Press
a
/
b
to select “Terminal setting”, and
then press ENTER.
4
Press
a
/
b
to select “PC input” and then
press ENTER.
5
40LX710H_en.indd 5240LX710H_en.indd 52 2010/04/15 16:12:472010/04/15 16:12:47