65
Link operation
AQUOS LINK setup
AQUOS LINK control
[On]
Auto power on
[Auto]
Selecting recorder
Audio return channel
Selecting channel key
Using genre info
On Off
Setting auto power on by AQUOS
LINK
AQUOS LINK
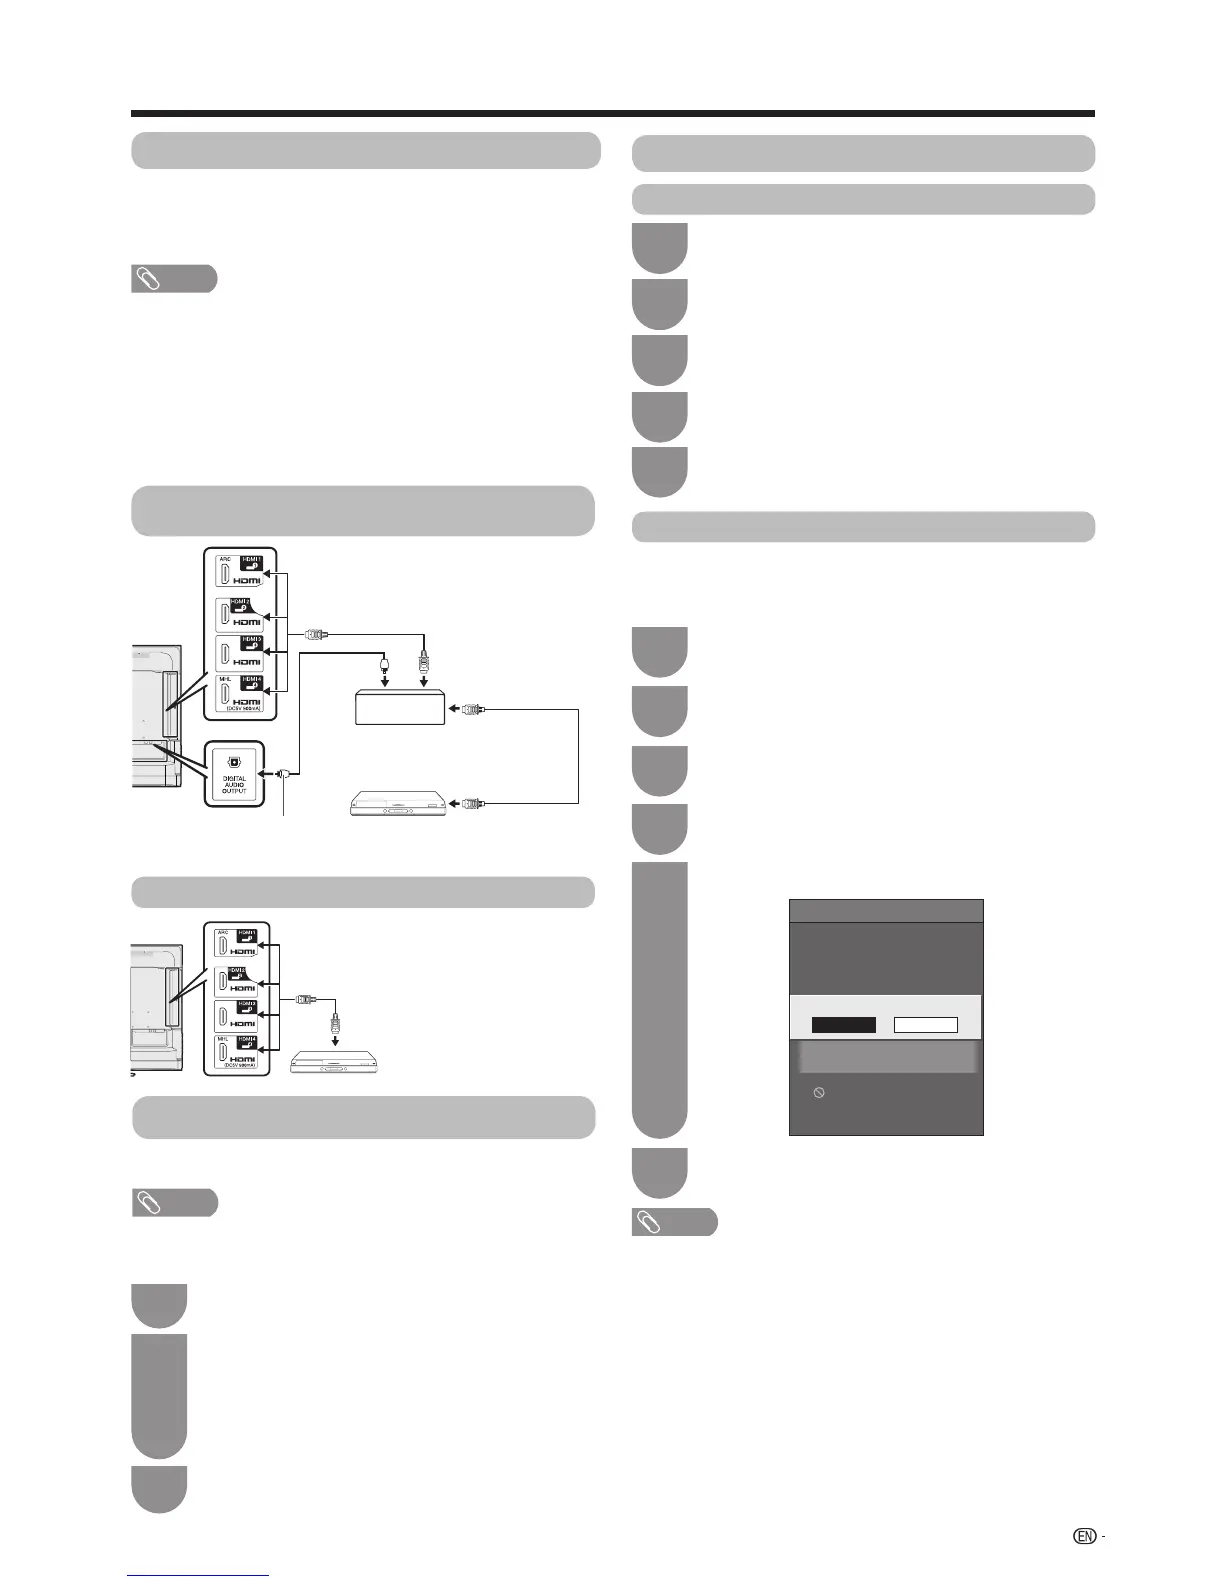
AQUOS LINK connection
FirstconnecttheAQUOSLINK-compatibleaudiosystem
oranAQUOSBDplayerthatsupportstheHDMICEC
protocol.
NOTE
• Refertotheoperationmanualofthedevicetobe
connectedforfurtherdetails.
• Afterunpluggingconnectioncablesorchangingthe
connectionpattern,rstturnonthepoweroftheTVwith
allrelevantdevice’spowerturnedon.Changetheexternal
inputsourcebypressing
TV/VIDEO
,selecttheappropriate
inputsourceandverifytheaudiovisualoutput.
• Thecablesillustratedinthefollowingexplanationare
commerciallyavailableitems.
Connecting an AQUOS BD player via the
AQUOS LINK-compatible audio system
Connecting an AQUOS BD player only
Opticalbrecable
(commerciallyavailable)
HDMI-certied
cable(commercially
available)
HDMI-certied
cable(commercially
available)
AQUOS BD player
AQUOS LINK-compatible
audio system
AQUOS BD player
AQUOS LINK setup
Press
MENU
andtheMENUscreendisplays.
1
Press
a
/
b
toselect“AQUOSLINKsetup”,
andthenpress
ENTER
.
3
AQUOS LINK auto power on
Ifthisisactivated,theOneTouchPlayfunctionisenabled.
WhiletheTVisinstandbymode,itautomaticallyturnson
andplaysbacktheimagefromtheHDMIsource.
Regarding “Select recording device”
Selectthedeviceforrecordingfromconnecteddevices.
NOTE
• ThisfunctionenablesyoutoselecteithertheUSBstorage
deviceforUSBrecordinguseortheHDMIdevicewithCEC
protocol.
Press
a
/
b
toselect“Autopoweron”.
5
Press
c
/
d
toselect“On”.
4
Press
MENU
toexit.
6
NOTE
• Thefactorydefaultforthisitemis“Off”.
Press
MENU
andtheMENUscreendisplays.
1
Press
a
/
b
toselect“AQUOSLINKsetup”
andthenpress
ENTER
.
3
AQUOS LINK control
Press
a
/
b
toselect“AQUOSLINKcontrol”.
4
Press
c
/
d
toselect“On”.
5
Press
c
/
d
toselect“Linkoperation”.
2
Press
c
/
d
toselect“Linkoperation”.
2
1
3
2
Go to “Menu”
s
“Setup”
s
“View setting”
s
“Select recording device”.
Select the device for recording using the
REC
E
on the remote control unit.
•Select“USBstorage”whenusingthe
REC
E
for
USBrecording.
•Select“HDMIdevice”whenusingthe
REC
E
for
recordingtotheHDMIdevice.
Press RETURNtoendtheoperation.