84
USB recording playback (continued)
Playbackrecordedscenesoftheprogrammebeing
recorded.
Press
d
during recording.
•
Press
REC STOP
H
toreturnthescenethatis
broadcasting.
NOTE
• Youcanalsooperatefromthecontrolpanelby
pressingCONTROL.
• USBrecordingplaybackmaytakeawhiletostart.
• USBrecordingplaybackwillstopandtheTVwill
returntonormalbroadcastingwhenaprogrammeis
fast-forwardedtoascenethatisneartothescene
currentlybeingbroadcast.Thetimingatwhichit
returnsdependsonthespeedoffast-forwarding.
w
Display information regarding USB
recording
E
Channel display
ChannelinformationdisplaysbypressingDISPLAYon
theremotecontrolunit.
View setting
w Auto input selection
Youcanchoosewhetherornottoswitchtheinput
sourceautomaticallywhenreceivinganAQUOSLINK
compatiblesignalontheTVduringUSBrecording
operations.
Go to “TV Menu”
s
“Setup”
s
“View setting”
s
“USB REC setting”
s
“Auto input selection”.
Selected item
Description
Enable
ReleaseUSBrecordingwhenreceivingan
AQUOSLINKcompatiblesignal.Switch
inputsourceautomatically.
Disable
USBrecordingcontinuestowork.TheTV
doesnotswitchinputsourceautomatically
evenwhenreceivinganAQUOSLINK
compatiblesignal.
w Jump time setting
Youcansetthetimeintervalforplaybacktoresume
afterjumpingbackwards/forward.
Go to “TV Menu”
s
“Setup”
s
“View setting”
s
”USB REC setting”
s
“Jump time setting”.
• Atimeintervalfrom10sec.to99min.50seccan
beselected.
NOTE
• Youcanusethetimeintervalyousetusingthe or
buttons.
w Device registration
YouneedtoregistertheUSBHDDfortheUSB
recording.
Go to “TV Menu”
s
“Setup”
s
“View setting”
s
”USB REC setting”
s
“Device registration”.
• RefertoUSB HDD registration (Page81).
NOTE
• OnlyoneUSBHDDcanberegisteredforUSB-
recording.RemoveallUSBHDDsexcepttheone
usedforUSBrecording.
• AtleastUSBHDDswithmemorybetween100GB
and2TBandunderarerequiredforUSBrecording
toregister.
• SomeUSBHDDs,suchasoneswhichhavemultiple
drives,etc.,cannotbeusedforUSBrecording.
w Device format
You can format all data on the USB HDD.
Go to “TV Menu”
s
“Setup”
s
“View setting”
s
”USB REC setting”
s
“Device format”.
NOTE
• Onceformattinghasbeencompleted,datacannot
berestored.
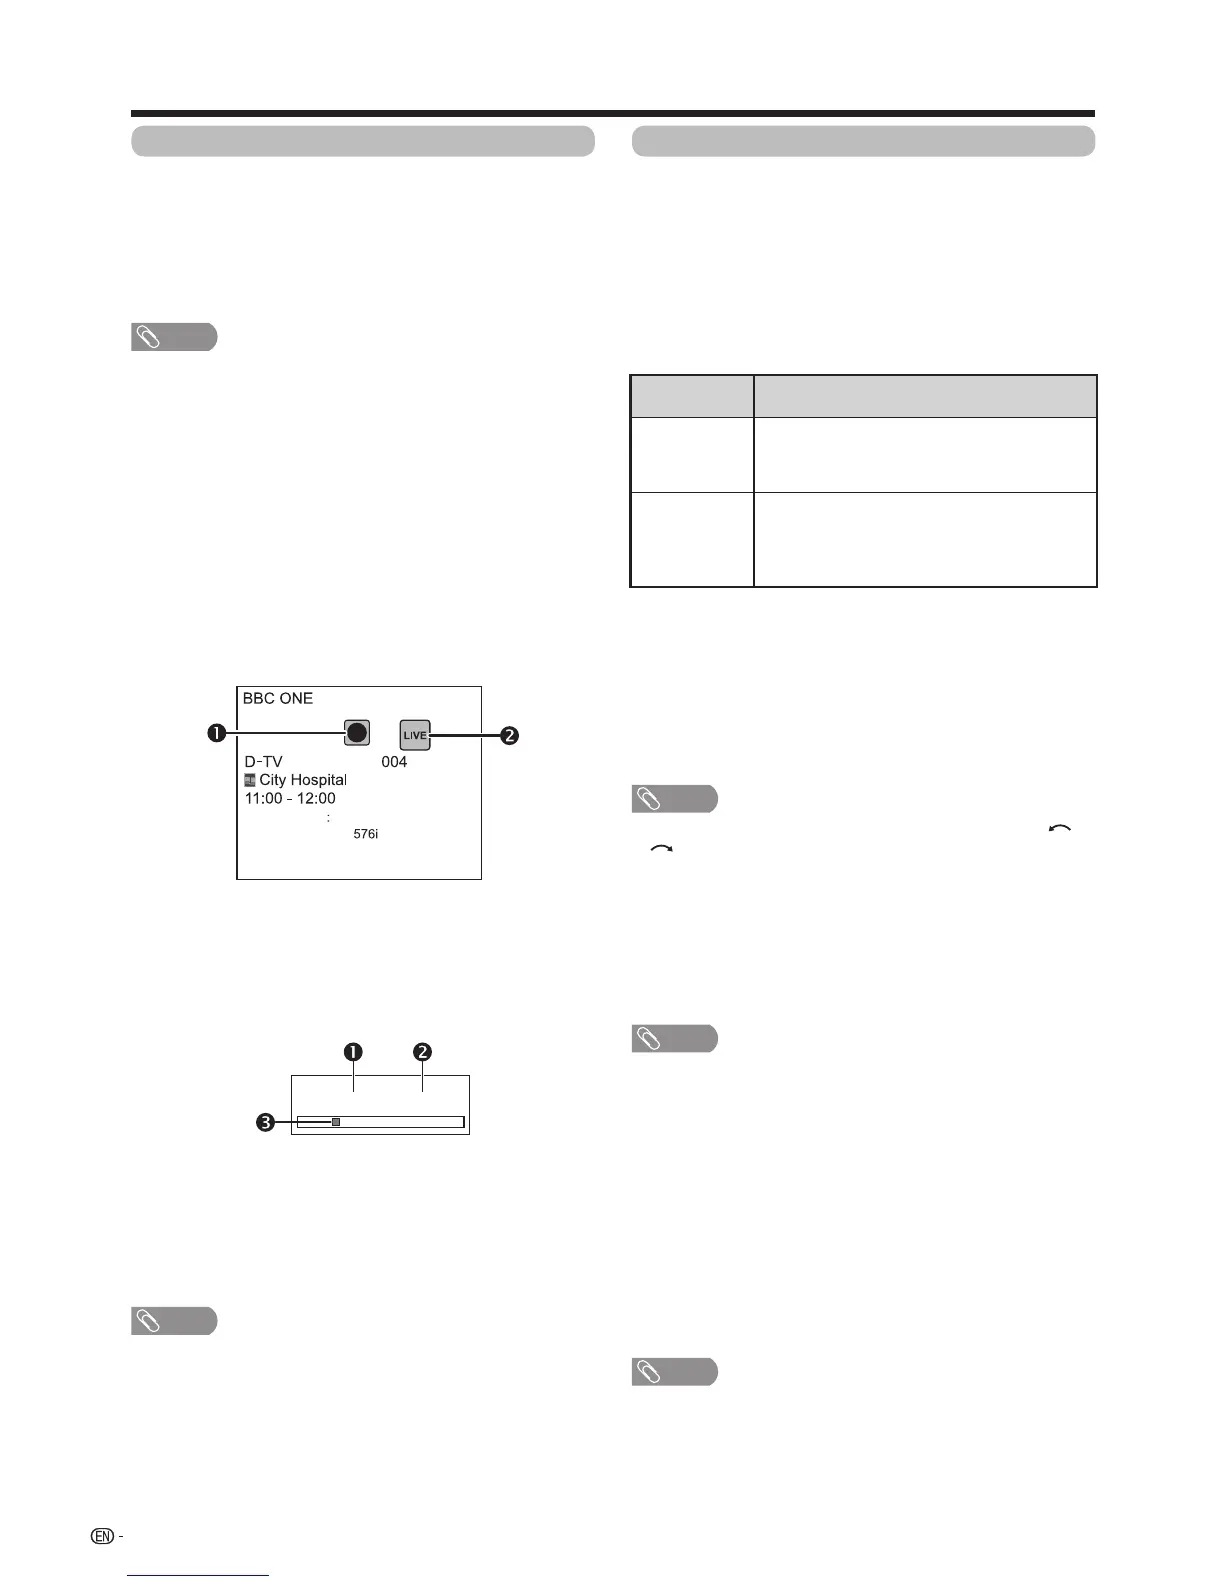
Therecordingiconshowsupwhen
REC
E
is
pressedandtheTVisrecordingtheprogramme.
Thestatusiconshowsupdependingonwhatis
shownonthescreen.
E
Counter
Thecounterdisplaysonthescreenwiththecontrol
panel.
Currentplaybacktime.
•Hiddenduringrecording.
Totalplaybacktimeofthecontent
Theyellowbarshowshowmuchtimehas
progressed.
•Hiddenduringrecordingorplayback-during-recording.
• Youcanalsocalluptheinformationaboveby
pressingCONTROLontheremotecontrolunit
orselect“Control(USBREC)”from“TVMenu”>
“Setup”>“Option”>“Optionforview”.
Other useful features
00:02:38/00:08:18
NOTE
Audio (ENG) STEREO
Video
Subtitle Off
>> New information