8014865/ZUJ3/2018-11-29 • © SICK AG • Subject to change without notice 15
Mounting
5 Mounting
5.1 Mounting the ultrasonic sensor
NOTE!
Distance measurement is not possible within the blind
zone of the ultrasonic sensor. → See Page 42,
Chapter 11.2.
NOTE!
→ For mounting accessories, see Internet
"www.sick.com/um18", Accessories.
1. Select the mounting location for the ultrasonic sensor according to
the requirement. Keep in mind the specications in the technical
data, such as the detection range. → For dimensions, see Page 41,
Chapter 11.1. → For detection range, see Page 46, Chapter 11.9.
2. Insert the ultrasonic sensor through the hole in the mounting bracket.
3. Tighten mounting nuts using a maximum torque of 15 Nm.
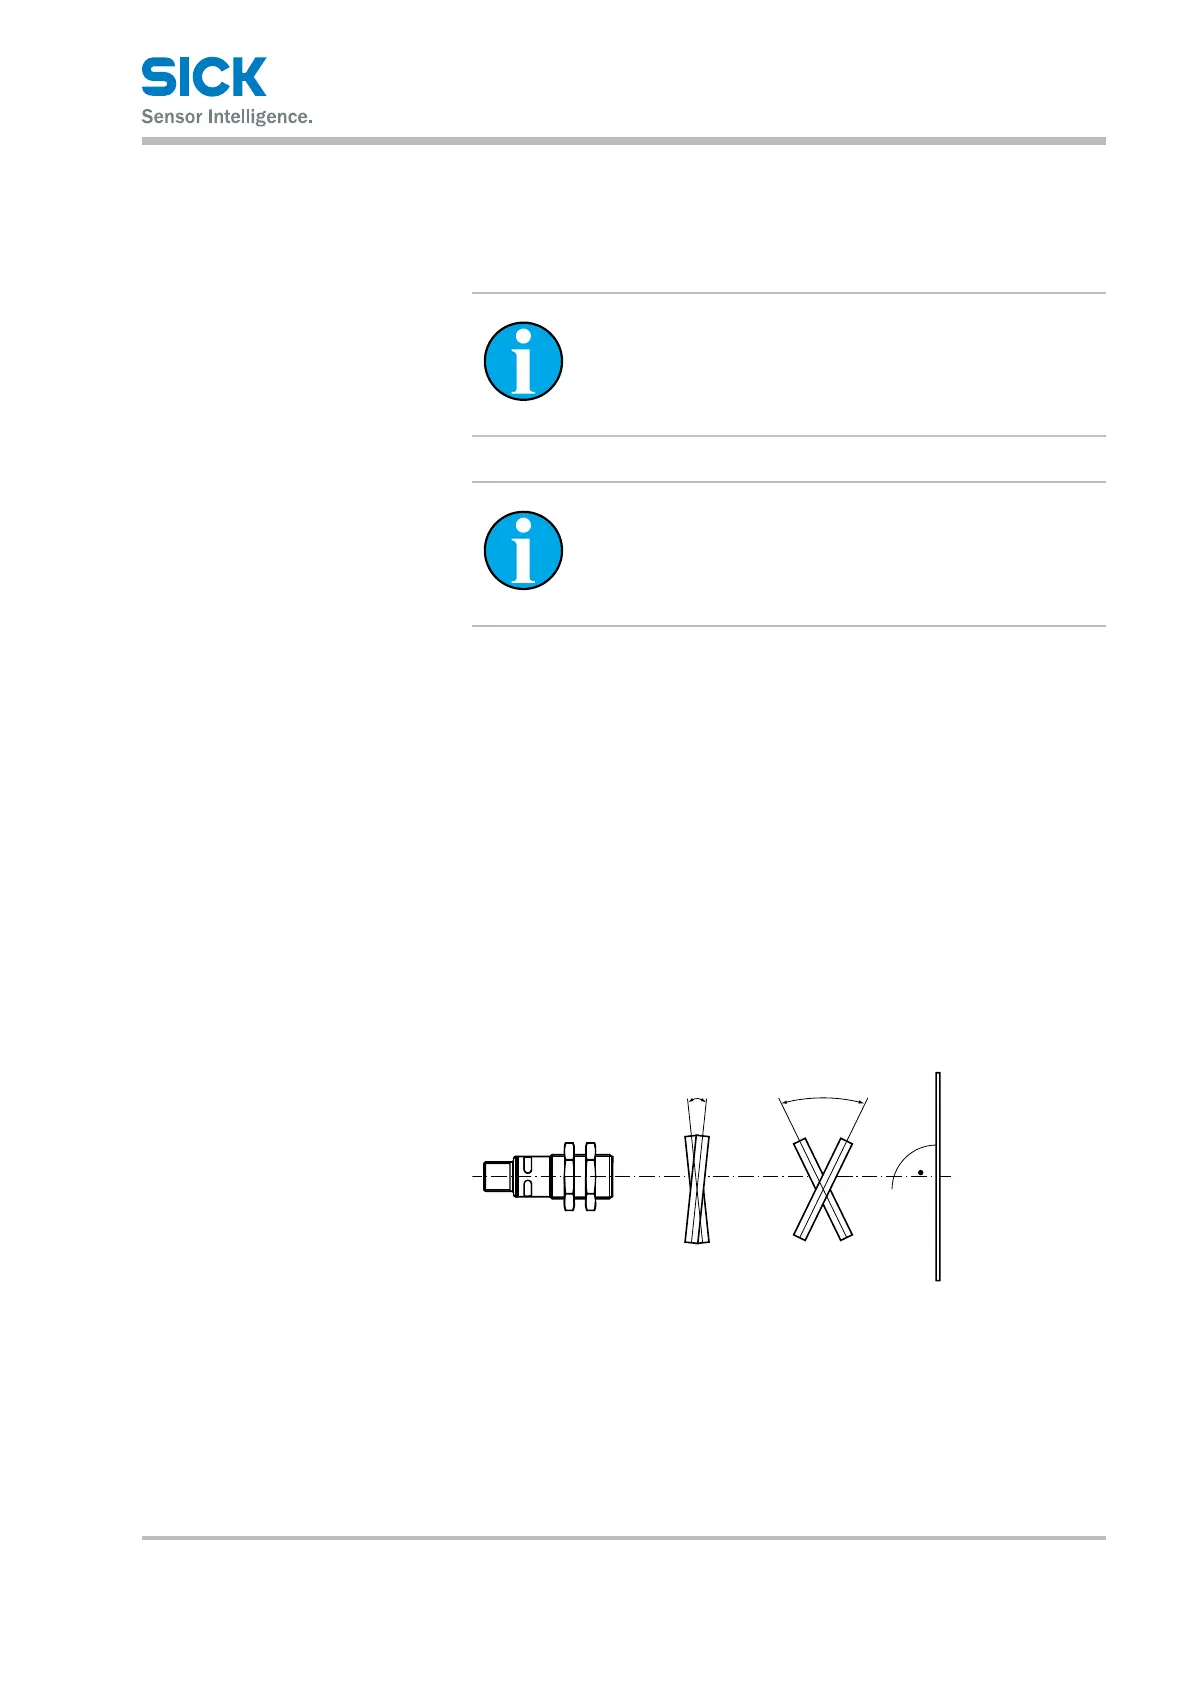
5.2 Smooth object surfaces
For smooth object surfaces, we recommend an angle of 90° ± 3° between
the sensor axis and the object surface. A larger angle is possible for rough
surfaces.
≤ ± 3° ≥ ± 3°
Fig. 3: Alignment of the sensor for smooth and rough object surfaces
1 Alignment for smooth object surfaces
2 Alignment for rough object surfaces