92
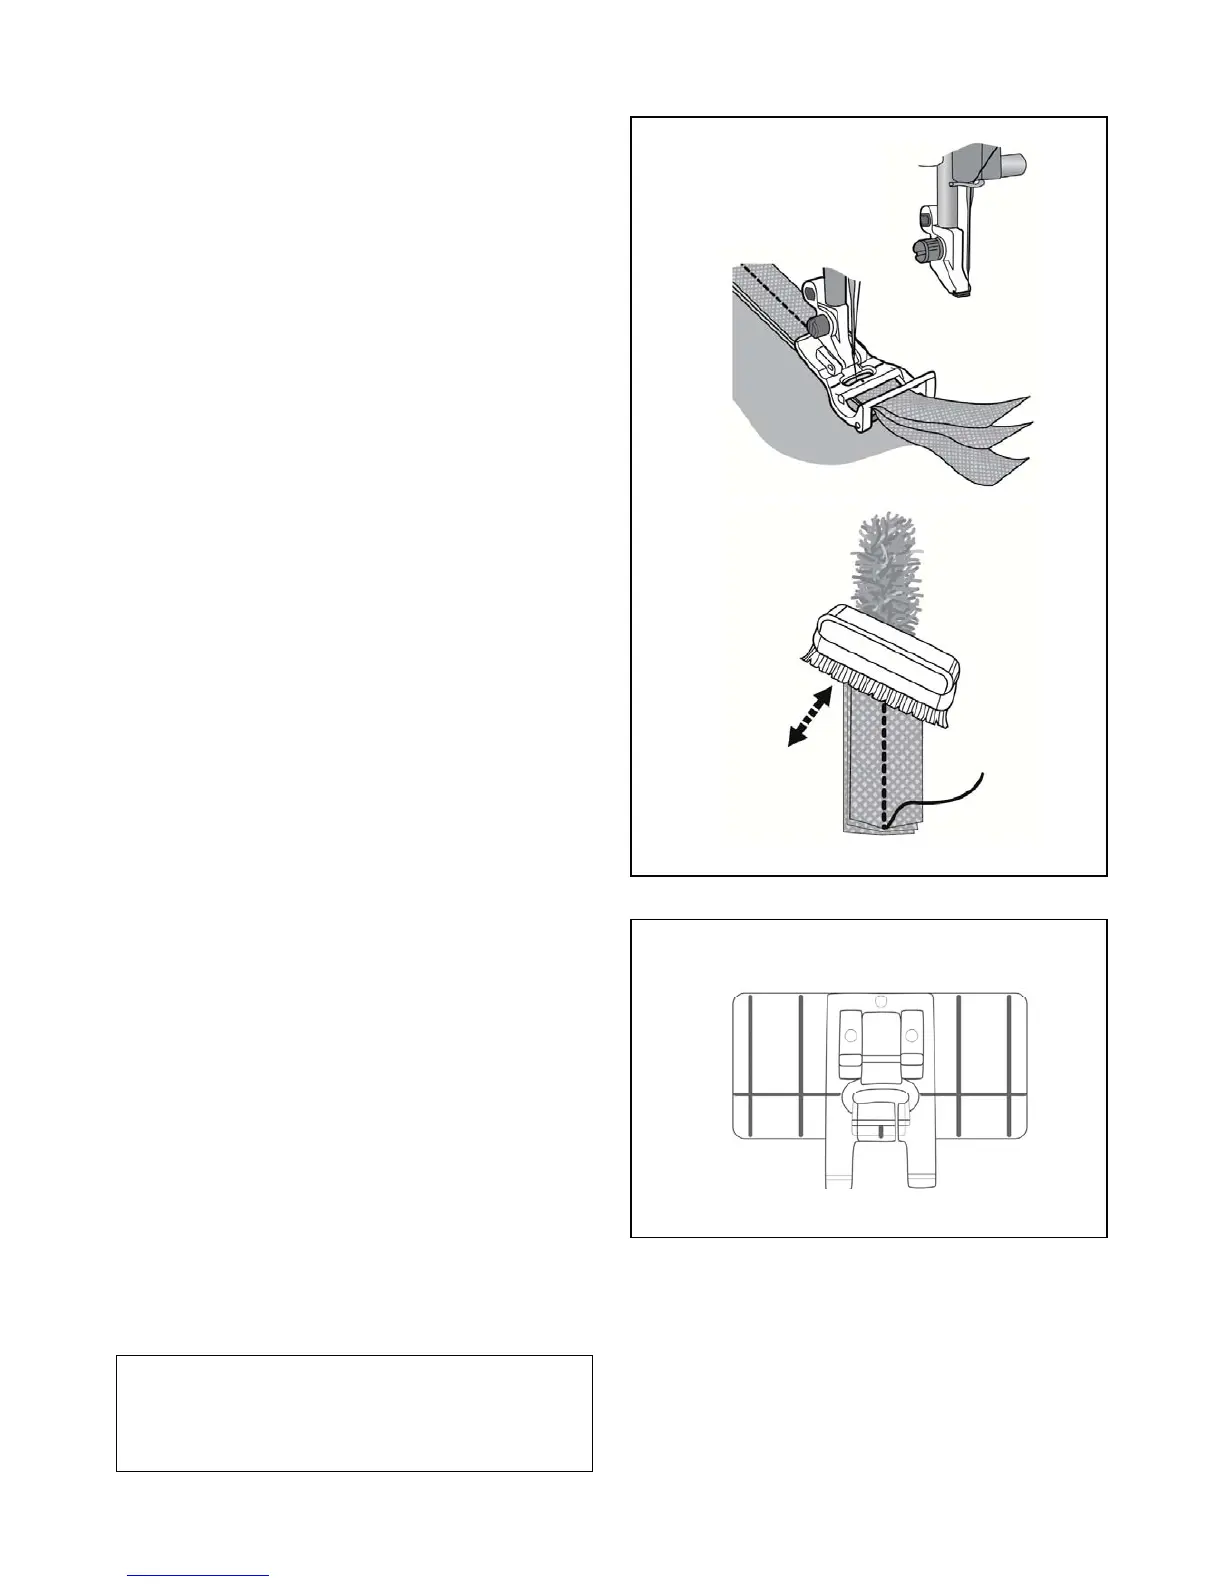
CHENILLE STITCHING FOOT &
WHITE PRESSER FOOT SHANK
2SWLRQDO3XUFKDVH
7KH&KHQLOOH6WLWFKLQJ)RRWLVXVHGWRHPEHOOLVKSURMHFWVZLWK
chenille effects.
1. Thread the top of the machine and bobbin with all-purpose
sewing thread.
3UHSDUHDPLQLPXPRIWKUHHOD\HUVRIFKHQLOOHVWULSV´
PPIRUEHVWHIIHFW3ODFHWKHVWULSVLQWRWKHSUHVVHU
IRRW<RX FDQDOVRXVHQDUURZHUVWULSV VXFKDV´
PPZLGH
3. Replace the standard shank with the white presser foot
shank that was supplied with your machine.
6OLSDQGVQDSRQWKH&KHQLOOH6WLWFKLQJ)RRWDWWKHIURQWRI
the shank.
5. Place the foundation fabric that will be embellished under
the presser foot and strips.
6HOHFWD6WUDLJKW6WLWFK
6HZDWD VORZVSHHG7KH&KHQLOOH 6WLWFK)RRWZLOOJXLGH
the strips over the foundation fabric where you want to
have the chenille effect. For additional stability, use Tear
$ZD\6WDELOL]HUXQGHUQHDWKWKHIRXQGDWLRQIDEULF
$GGVWULSVLQURZVDVGHVLUHGWR¿QLVKWKHSURMHFW
9. Machine wash on cold cycle, dry warm to help fray the
edges of the chenille strips. For a more pronounced look,
XVHDEUXVKWRUDLVHWKHIDEULF¿EHUV
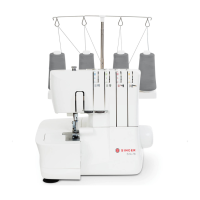
PARALLEL SEWING FOOT
2SWLRQDO3XUFKDVH
7KH3DUDOOHO6HZLQJ)RRWLVXVHGIRUVHZLQJURZVRIVWLWFKLQJ
in parallel rows.
6QDSRQWKH3DUDOOHO6HZLQJ)RRW
6HZWKH¿UVWURZRIVWLWFKHV
$OLJQWKH¿UVWURZRIVWLWFKLQJHLWKHUEHWZHHQRURQWKHUHG
guideline markings on the foot, depending on the desired
GLVWDQFHIURPWKH¿UVWURZRIVWLWFKLQJ6HZWKHQH[WURZRI
stitches, using the red guidelines as a reference.
$OLJQWKHWZRURZVVHZQIROORZLQJWKHUHGJXLGHOLQH
markings on the foot, depending on the desired distance
EHWZHHQURZVRQVWLWFKLQJ 6HZ WKHQH[WURZRI VWLWFKHV
using the red guideline markings as a reference.
5. Continue for as many rows as desired.
1RWH7KH¿UVWYHUWLFDOJXLGHOLQHVWRHLWKHUWKHOHIWRU
ULJKWLVò´IURPWKHFHQWHUQHHGOHSRVLWLRQ7KHVHFRQG
JXLGHOLQHLVDSSUR[LPDWHO\ó´IURPWKH¿UVWJXLGHOLQH
RQHLWKHUVLGH7KHUHLVDPDUNLQJDWWKHFHQWHUIURQWRI
WKHIRRWWKDWFDQDOVREHXVHGDUHIHUHQFH