86
FLOWER STITCH ATTACHMENT
2SWLRQDO3XUFKDVH
7KLVDWWDFKPHQWSURYLGHVDYDULHW\RIÀRZHUSDWWHUQV
1. Before securing the attachment, raise the needle to its
highest position by turning the hand wheel toward you.
'URSWKHIHHGGRJVXVLQJWKHOHYHUORFDWHGRQWKHEDFNRI
the machine after you remove the extension table.
3. Remove the current presser foot and shank.
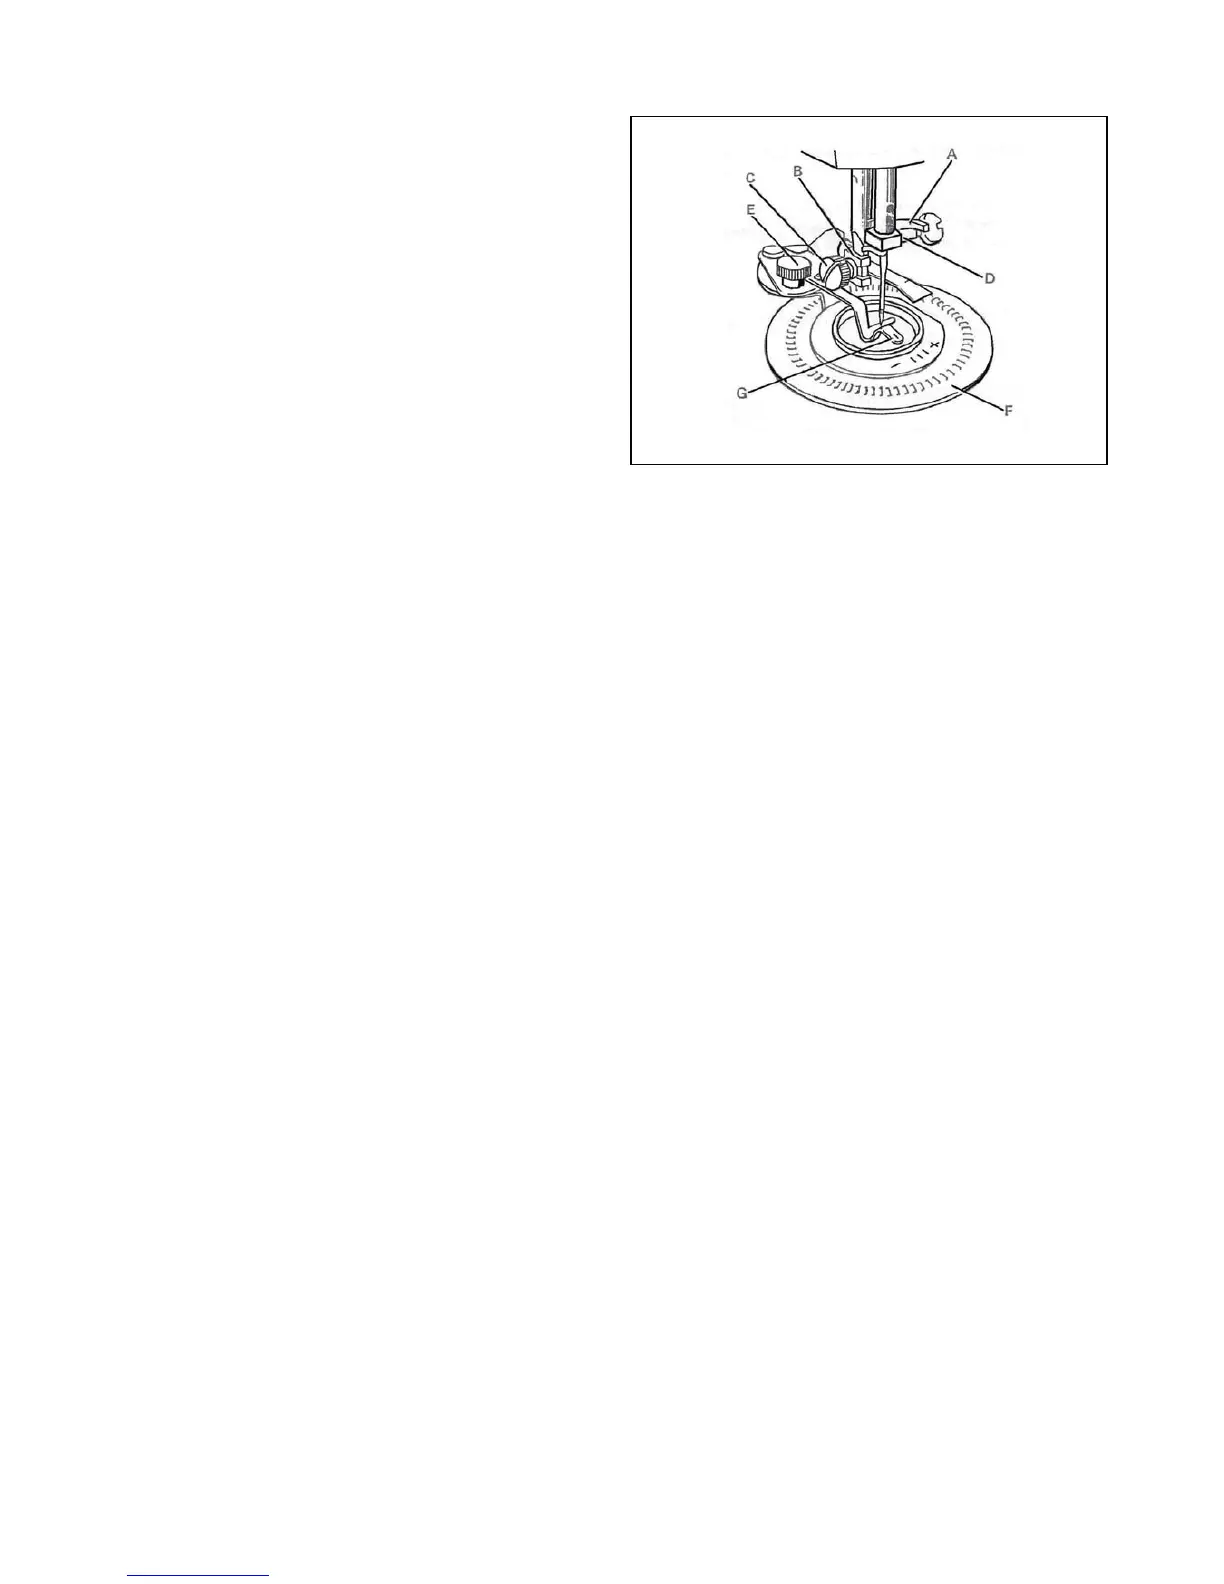
7RDWWDFKWKH)ORZHU6WLWFK$WWDFKPHQWUDLVHOHYHU$VR
WKDWLWVLWVDERYHWKHQHHGOHVFUHZ'DQGWKHQZUDSWKH
IRUN%DURXQGWKHSUHVVHUEDU7LJKWHQWKXPEVFUHZ&
6HOHFWWKH]LJ]DJVWLWFKRUEOLQGKHPVWLWFK6HWWKHXSSHU
thread tension to 1-2 and the stitch width to the desired
width.
6. To place fabric under the attachment, position the center
RIWKH LQWHQGHG SDWWHUQ WR FHQWHU RI GLVF ) /RRVHQ WKH
VFUHZ(0RYHWKHGLVF)LQWKHGLUHFWLRQRURU
DQG VHWWKH VHWWLQJPDUN*DWWKH GHVLUHGSRVLWLRQ
7LJKWHQWKHVFUHZ(
+ROGWKHHQGRIWKHQHHGOHWKUHDGZLWK\RXUOHIWKDQG7XUQ
the hand wheel toward you slowly until the needle moves
down and up again to the highest position, then stop the
hand wheel. Pull the needle thread slowly so that the
bobbin thread can pull through fabric to topside of fabric.
8. While holding the needle and bobbin threads, sew a few
stitches to lock threads. Cut threads near the seam end
and sew.
$WWKHHQGRIDVHDPUDLVHQHHGOHWRLWVKLJKHVWSRVLWLRQ
and lift the presser foot lifter. Remove fabric from machine.
&XWWKUHDGVOHDYLQJDERXWFPLQRIWKUHDG7LHRII
thread ends at back of fabric.