CHAPTER 2
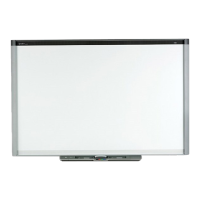
MOUNTING YOUR INTERACTIVE FLATPANEL
10 smarttech.com/kb/170642
l Use a standard VESA mounting plate (not included) to mount the interactive flat panel on a
wall.
Model Mounting plate
SPNL-6065 400 mm × 400 mm
l Use M8 screws to fasten the wall bracket.
Model
Screw length
1
Fasten force
SPNL-6065 20 mm + x mm < M8 < 50 mm + xmm 97.36–177.01 in-lb.
(11–20 N·m)
CAUTION
Do not over-tighten the
screws.
NOTE
SMART recommends M8 × 30 mm mounting screws for standard installations where the
total wall mount bracket and washer thickness is less than 7 mm.
l Because the receptacles might not be easily accessible after the installers mount the
interactive flat panel, consider connecting cables for power, computers and other devices
while the interactive flat panel is still in its packaging (see
Connecting power and devices
on
page13).
l Before turning on the interactive flat panel for the first time, clean the camera windows and
reflective tape following the instructions in
Cleaning the camera windows and reflective tape
on page27.
Choosing a location
Do the following when choosing a location for the interactive flat panel:
l Do not install the interactive flat panel in a location where a door or gate could hit it.
l Do not install the interactive flat panel in an area where it will be subjected to strong vibrations
or dust.
l Choose a location that’s far from bright light sources, such as windows and strong overhead
lighting. IR lighting can cause issues with the performance of the cameras and can lead to
unintentional or missed touches.
1
Where x is the total thickness of the wall bracket and washer.