12
EEWB334A
4-11
3
2
4 5
6
4-12
1
B CA
8
9
7
BA
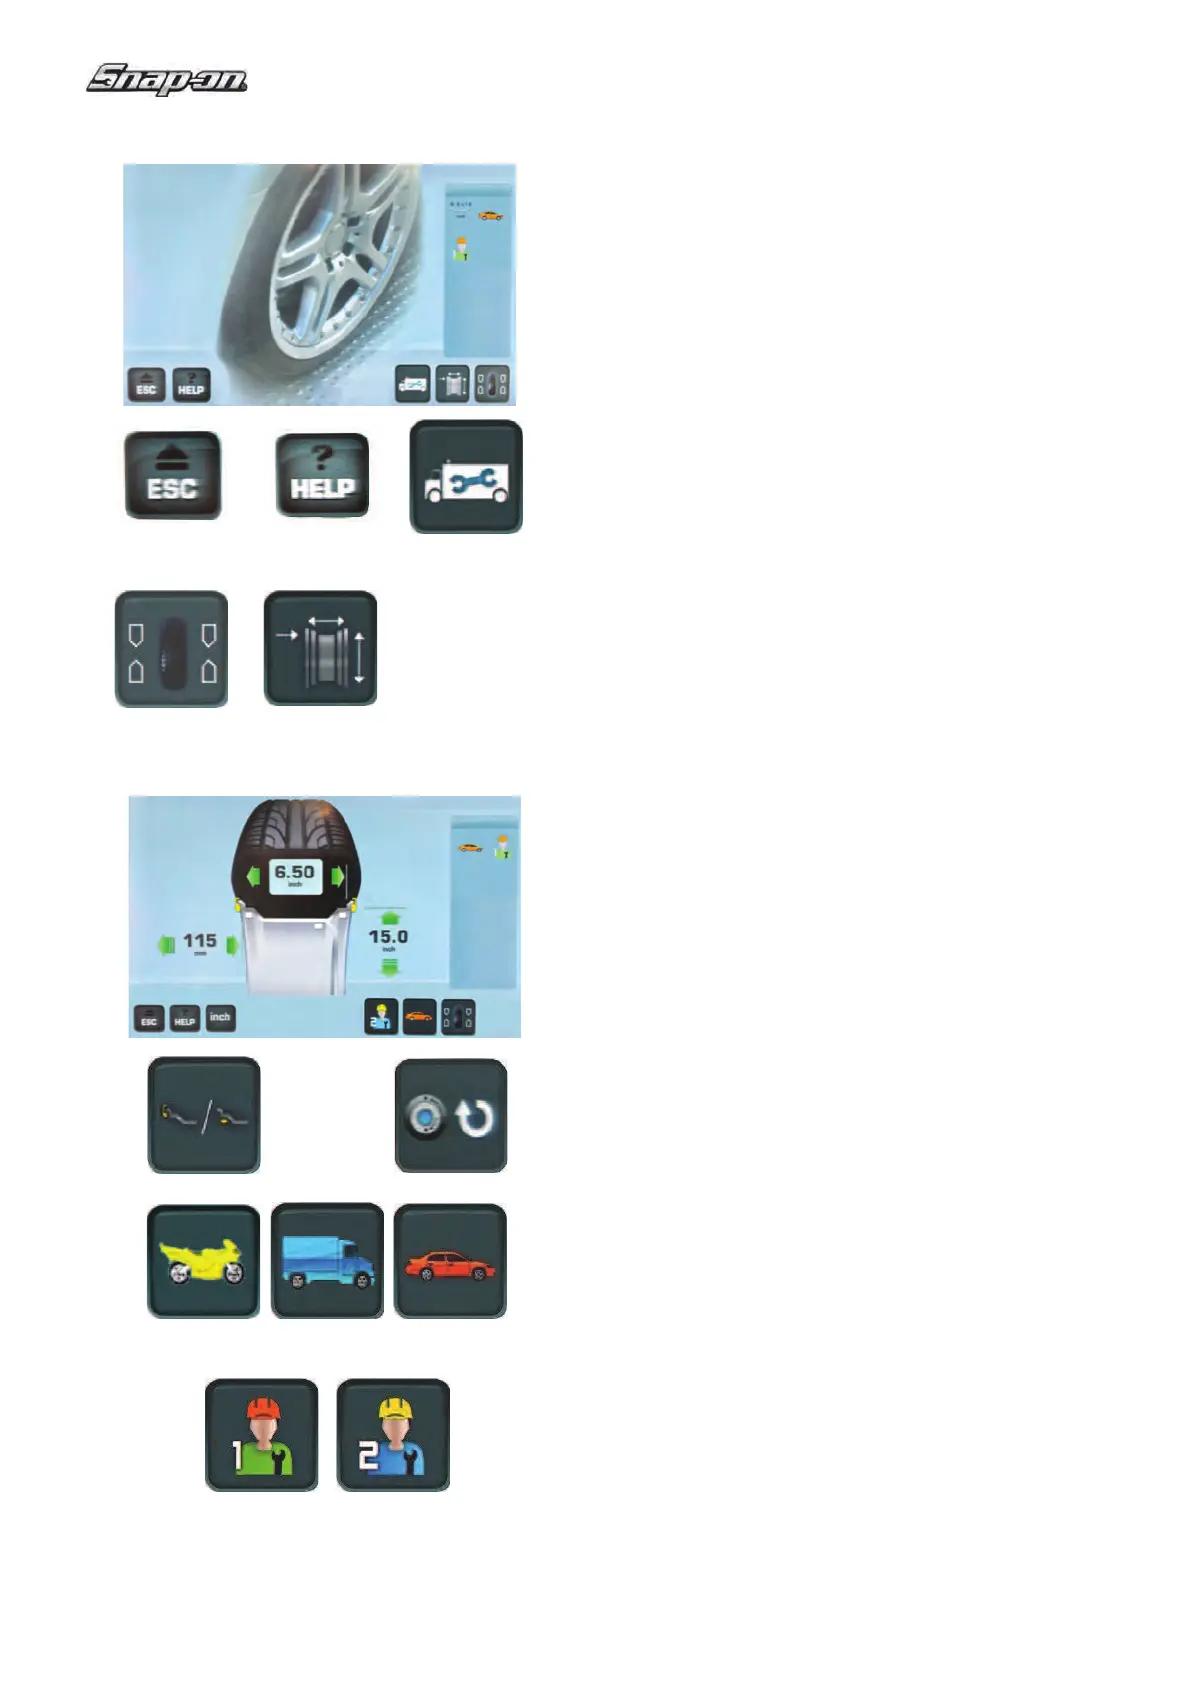
4.1.2.1 Menu Buttons
Types of menu ! elds
The Menu Keys are in the Commands Field.
Therefore,
depending on the position in the program,
the many Operating Screen Pages will in each case
show the Command keys needed for the functions
available.
To issue commands and select items:
- Touch the desired icons or keys on the screen.
Below are the meanings of the icons and keys selec-
table on the screen.
INTRO SCREEN “Main menu”
Fig. 4-11
1 ESC key
- Switches back to the previous screen.
- Exits C codes.
- Clears HELP texts and ERROR messages.
2 HELP key
- Selects HELP texts for the current function.
3 SETTINGS key
- Accesses the Settings screen (triple session).
4 BALANCING key
– Accesses the Balancing screen.
5 RIM DATA ENTRY key
- Accesses the “RIM DATA ENTRY” screen.
Note:
From this screen page, simply removing the measuring
arm causes an automatic switch to the “RIM DATA
ENTRY” screen page.
RIM DATA ENTRY “Rim data entry”
Fig. 4-12
6 EASY ALU TOGGLE key
- Changes the ALU mode suggested by the machine.
7 RESTART OPT/MIN key
- Allows restarting an optimisation/minimisation cycle
after the interruption.
8 VEHICLE key
- Allows the following selections:
MOTORCYCLE (A) VAN (B) CAR (C).
9 OPERATOR key
- Allows the following selections:
USER 1 (A) USER 2 (B)
 Loading...