32
CALIBRATION
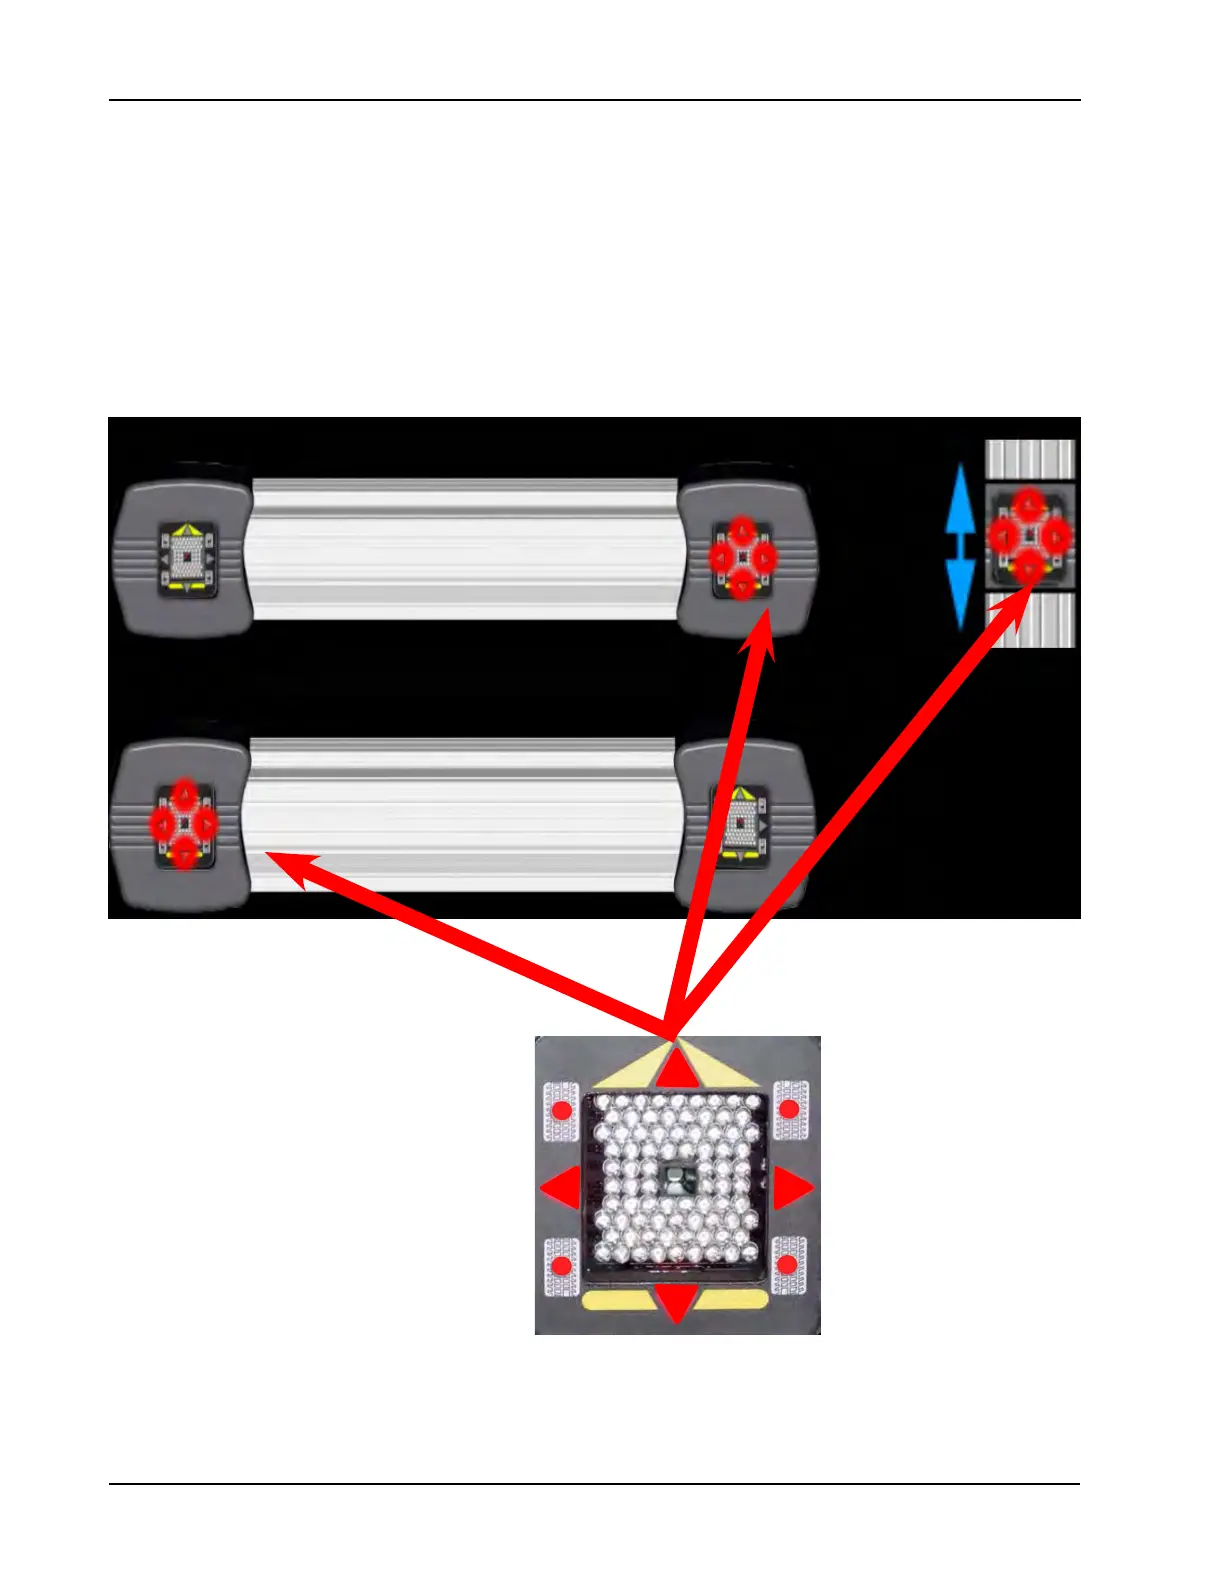
After gaining access to the camera identication, look closely at the illustration of the two camera beams. The
upper camera beam illustrates the right (passengers side) directional arrows illuminated and the lower camera
beam illustrates the left (drivers side) directional arrows illuminated. If a 3 Camera system was chosen in the
previous screen the user will also need to identify the calibration camera or if a remote camera is present it
will also need to be identied. Use the pointing device, click on the illustrated camera beam that matches the
camera beam that is being serviced. After selecting the correct illustration the illuminated directional arrows
should swap from one camera to the other. Again using the pointing device click on the camera beam that
matches the beam being worked on. After all cameras have been selected the user is prompted to restart the
alignment software.
NOTE: IF THE INCORRECT CAMERA INDENTIFICATION IS SELECTED THE CAMERA’ IMAGES WILL
BE SWAPPED FROM LEFT TO RIGHT AND ALL IMAGES WILL APPEAR IN THE CAMERA