41
-After having sharpened the chain, the height of the
depth limiter must be checked by means of a chain
gauge. For the order number see accessories.
- Correct even the smallest projections with a special flat
file (G).
- Round off the front of the depth limiter (H).
- Clean the inside, in particular the brake band area (K/7),
with a brush.
NOTE: Do not clean the brake mechanism, in particular
the spring (K/8), because it could jump out of its guide.
NOTE: Do not remove the foam material (K/9).
- Remount the protective plate and the guide plate.
- After mounting carry out a functional check of the chain
brake (see page 38).
NOTE:
The chain brake is a very important safety device and
like any other component subject to normal wear
and tear.
It is recommended to have it checked and maintained
regularly for your own safety by a SOLO service
center.
1/5
HFG
K
9
8
7
Clean the chain brake band
CAUTION: In any case actuate the
chain brake (blocking) and put on protective
gloves. Do not actuate the chain brake when cleaning.
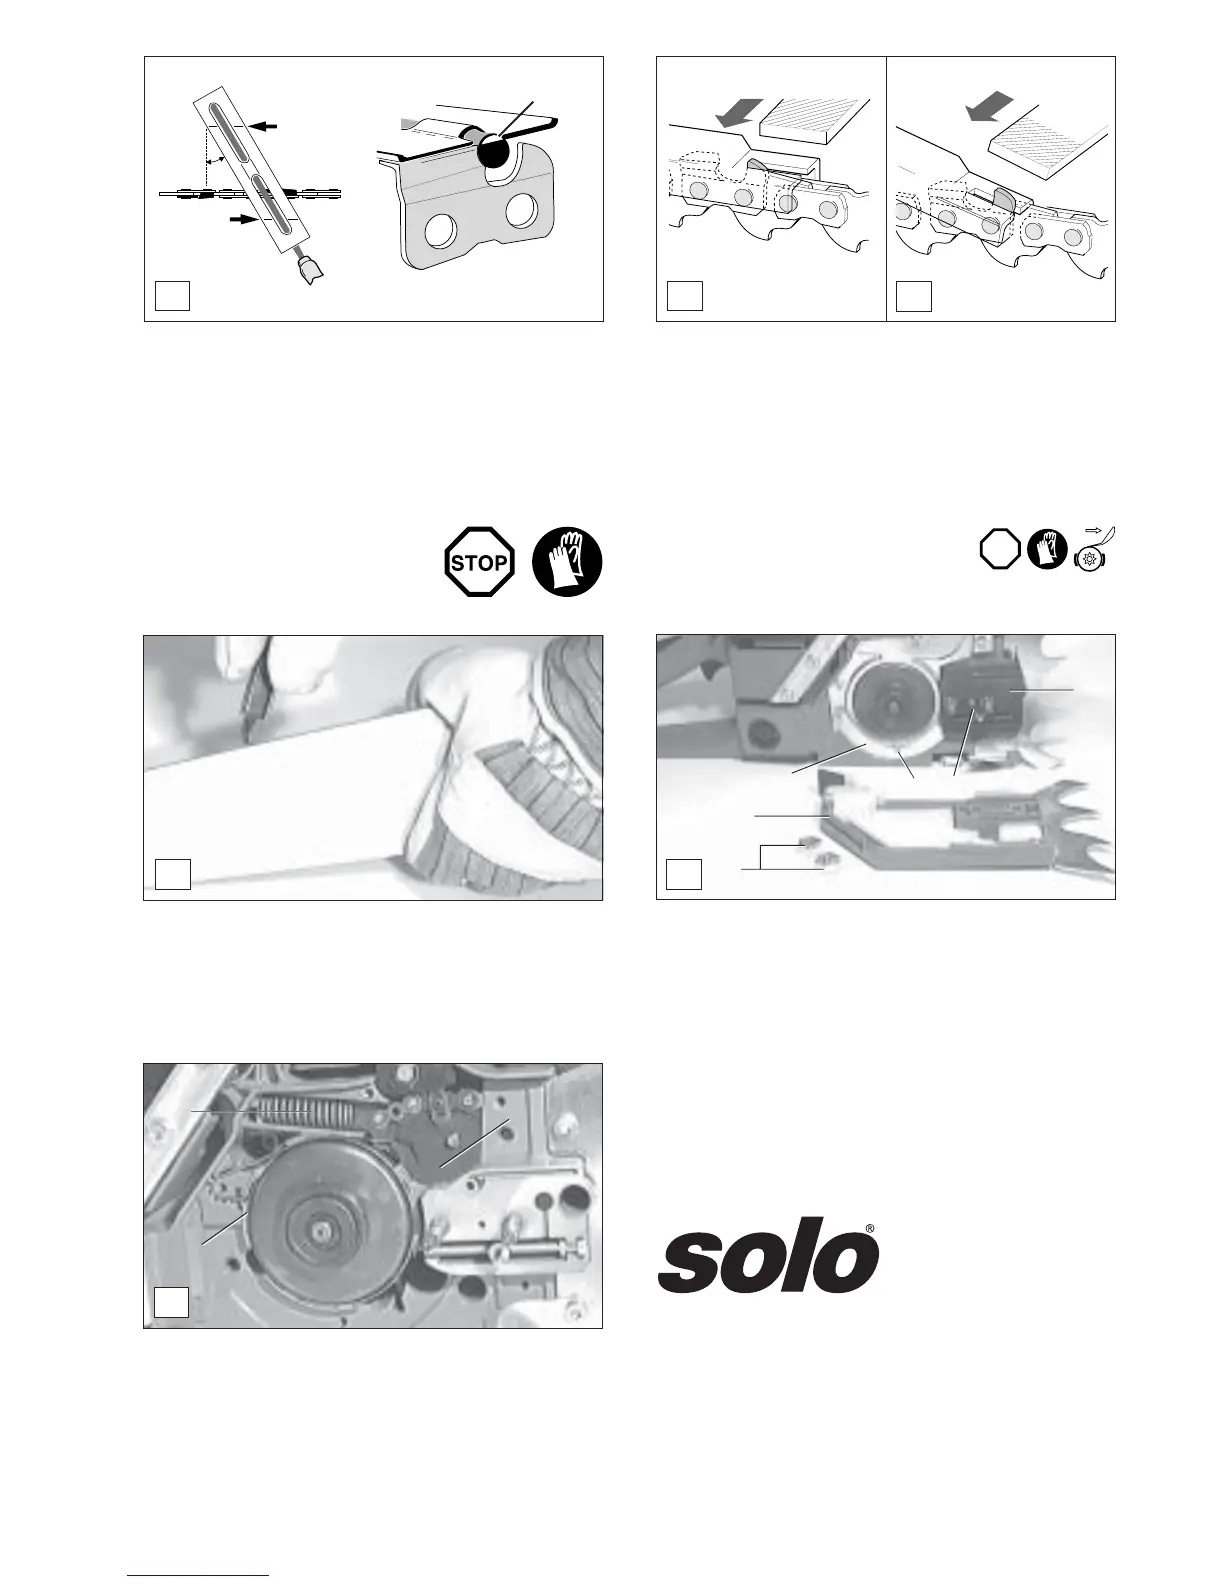
- The file holder makes it easier to guide the file, carries
markings for a correct sharpening angle of 25
o
(3/8")
and 35
o
(.404") and limits the cut depth (4/5 of the file
diameter). For the order number see accessories.
-When filing the markings must be parallel to the chain.
Cleaning the guide bar
CAUTION:
Protective gloves must be put on!
The bearing surfaces of the guide bar must be regularly
cleaned and checked for damage.
- Loosen the fastening nuts (J/1).
- Pull off the sprocket guard (J/2).
- Loosen the screw (J/3) and remove the guide plate (J/4).
- Loosen the four screws (J/5) and carefully remove the
pro-tective plate (J/6).
NOTE: Ensure the pressure spring (K/8) cannot
jump out. Secure the pressure spring in position
before cleaning.
J
2
4
6
5
3
1
I
STOP
service
service
25° (3/8")
35° (.404")