The surround amplifier does
not output sound.
The surround amplifier turns
off
or
its protection
is
active.
Sound transmission
is
not
established.
Sound transmission
is
established.
Flashes green.
Turns off.
Turns red.
Turns green.
To
enjoy
sound
by
using
headphones
You canenjoy the
system's
soundby connecting
the headphones
to
the PHONES
jack
on the
surround amplifier.
For
details
of
the surround amplifier, see
"Surround amplifier operation" (page 99).
POWER /
ON
LINE Status
indicator
-
• The volume
of
the unit may become minimum if you
turn
off
the surround amplifier while the headphones
are connected to the surround amplifier,
or
radio
reception
is
poor. In this case, "HP NO LINK" and
"VOLUME MIN" appear alternately
in
the front
panel display. Check radio reception, and set the
volume again.
• When you connect the headphones to the surround
amplifier, sound
is
not output from the system's
speakers.
To
check
the
transmission
status
You can check the status
of
sound transmission
between the unit and surround amplifier by
observing the
POWER
/
ON
LINE indicator
of
the surround amplifier.
3 Set the SURROUND SELECTOR switch
of the surround amplifier to
SURROUND.
4 Set the S-AIR ID switch
of
the surround
amplifier to
A.
5 Press POWER on the surround
amplifier.
The
POWER
/
ON
LINE indicator turns
green.
If
it
doesn't,
check the transmission
status as follows.
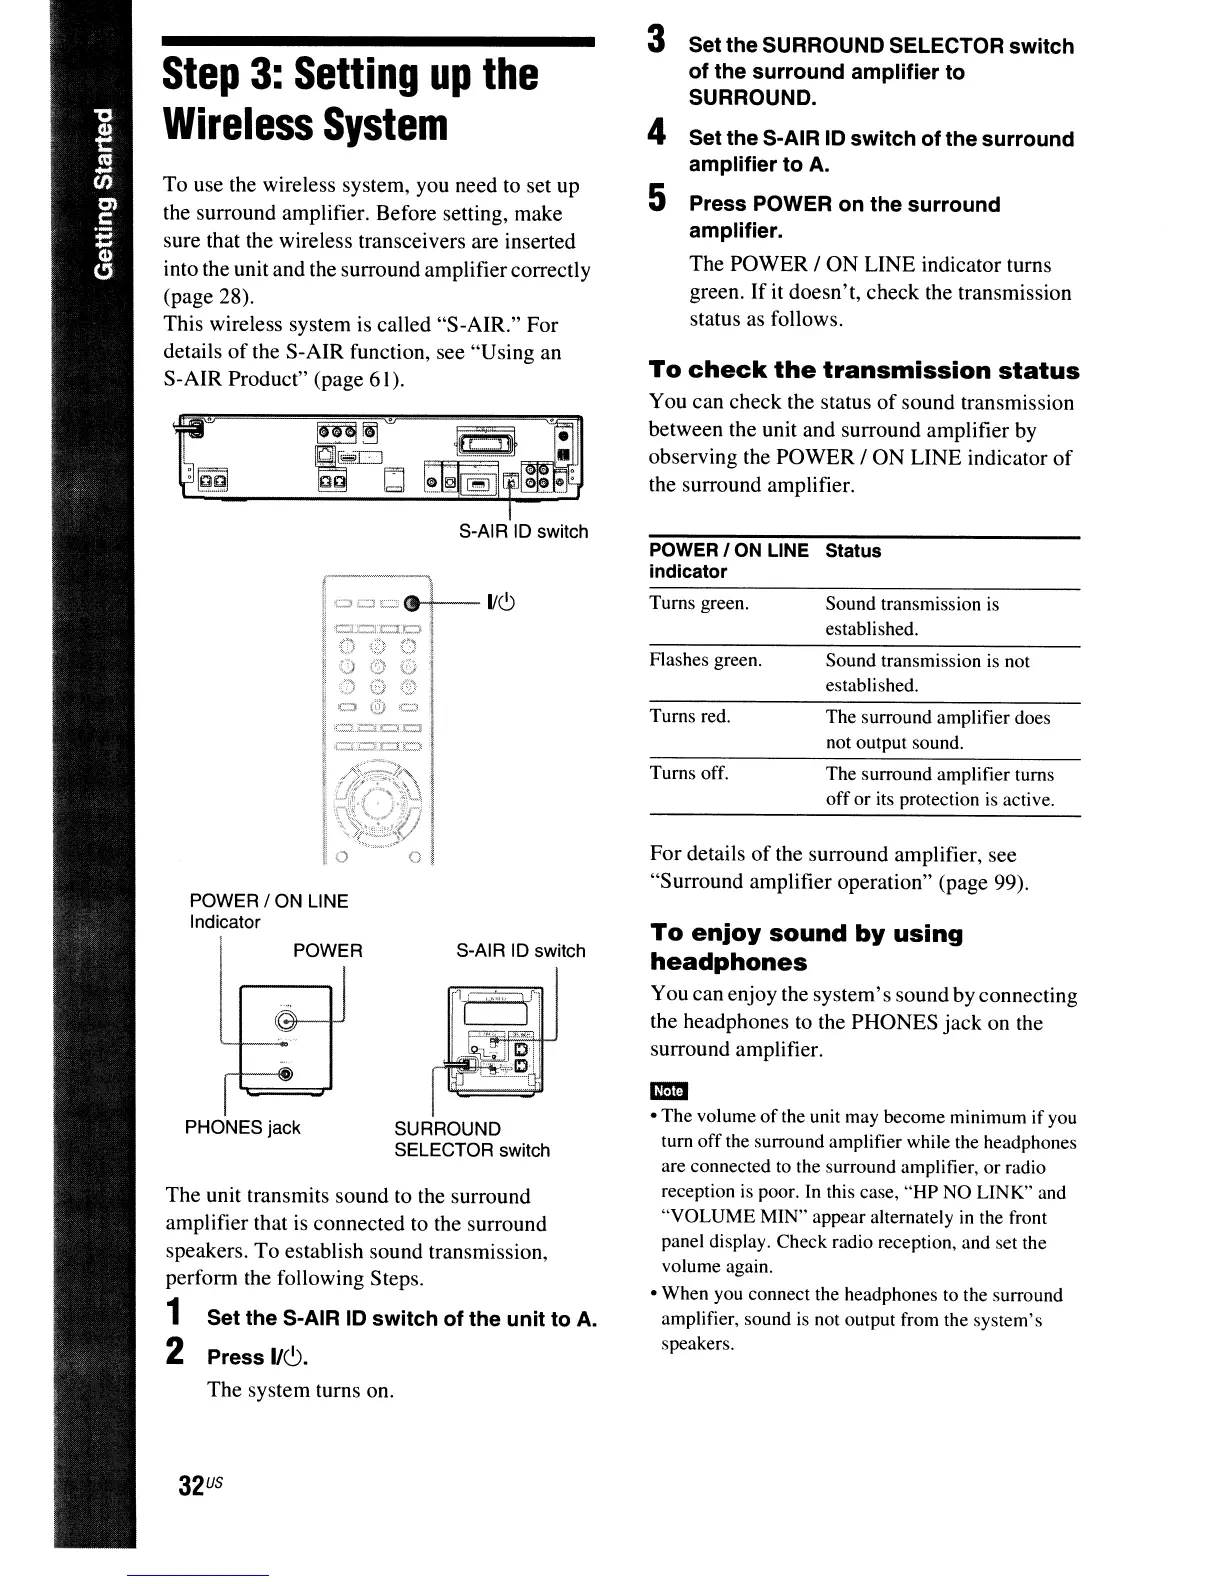
S-AIR ID switch
SURROUND
SELECTOR switch
POWER
POWER / ON LINE
Indicator
PHONES jack
I
CJor=c.-f--l/c9
i
t::1.=;:r::J:.c)
~~IiZ}g
()
v)
0)
C::l
(if
a
iC.....~;.~.t::::.j.,t:::l
o 0
S-AIR ID switch
32
US
The
unit transmits sound to the surround
amplifier that is connected to the surround
speakers.
To
establish sound transmission,
perform the following Steps.
1 Set the S-AIR ID switch of the unit to
A.
2 Press
I/C).
The
system turns on.
To
use the wireless system, you need to set up
the surround amplifier. Before setting, make
sure that the wireless transceivers are inserted
into the unit and the surround amplifier correctly
(page 28).
This wireless system is called "S-AIR."
For
details
of
the S-AIR function, see
"Using
an
S-AIR Product" (page
61).
Step
3:
Setting
up
the
Wireless
System