Chapter 5 Editing Using the Built-in Hard Disk 5-3
Chapter 5 Editing Using the Built-in Hard Disk
5-2-3 Switch Settings
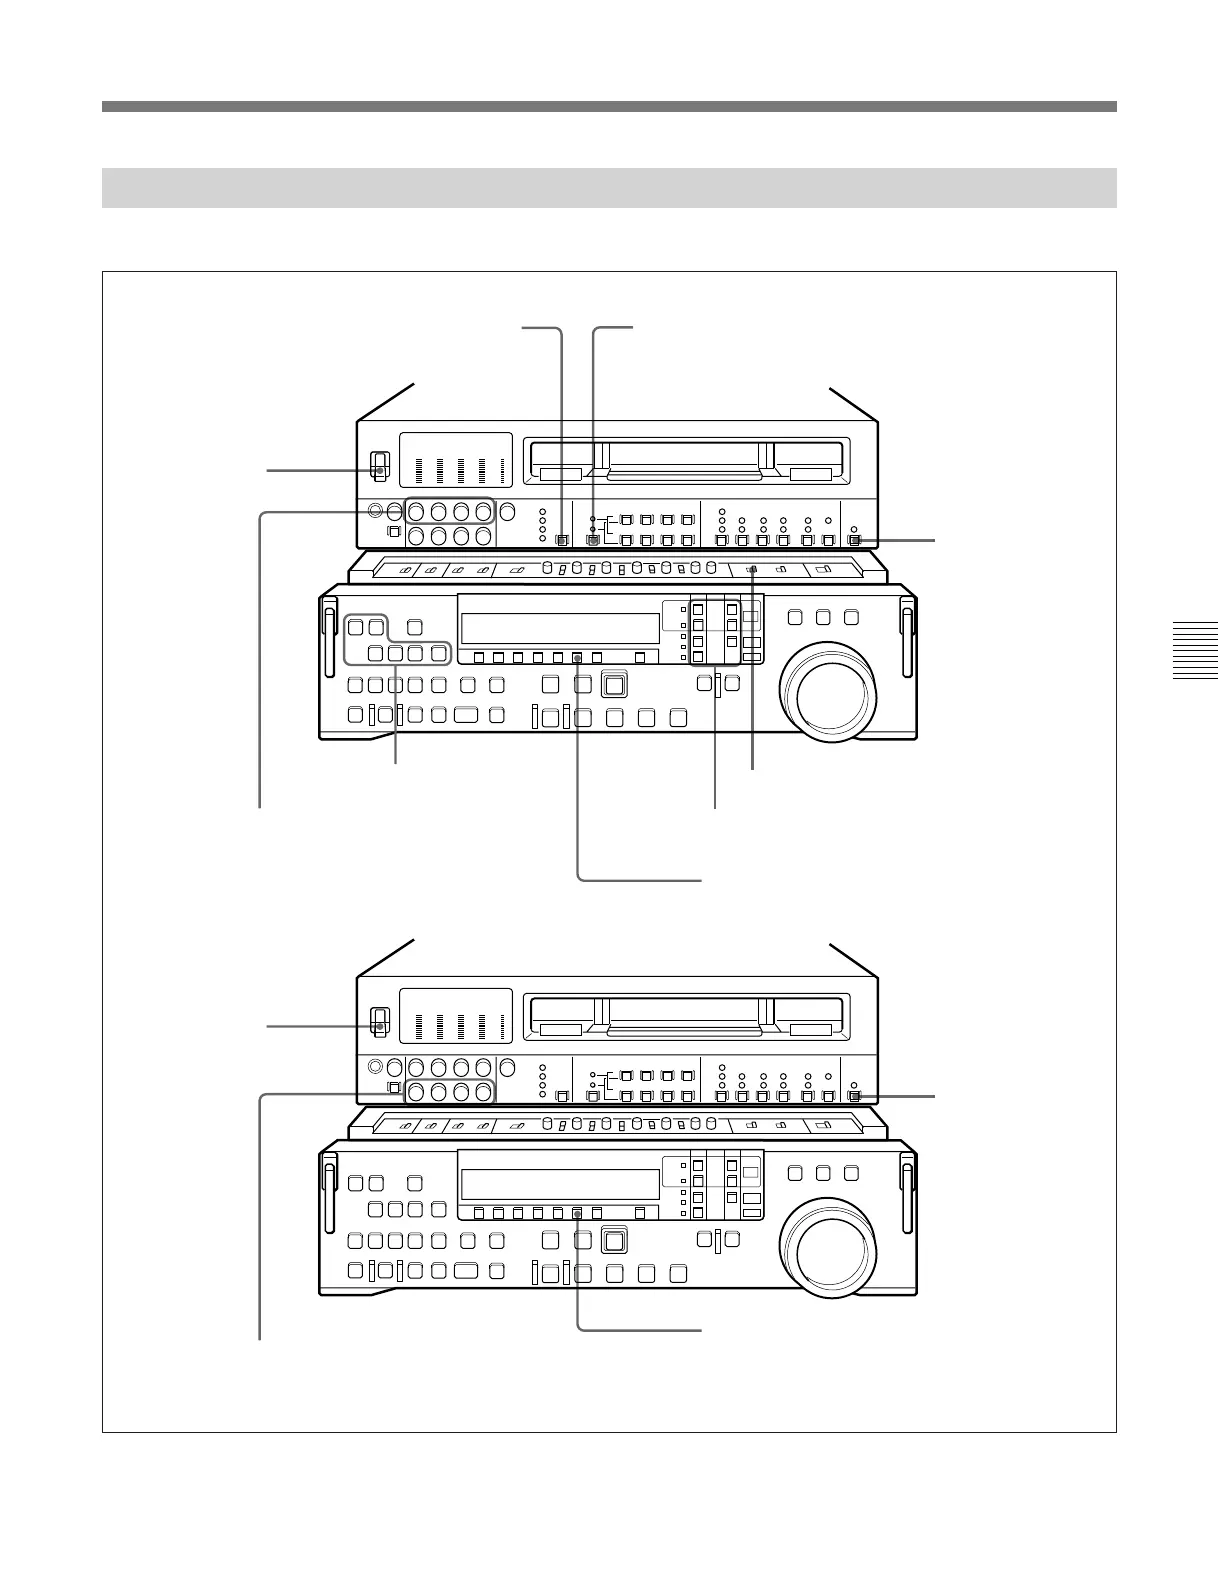
Before beginning editing, set the switches as follows.
POWER switch: ON
VIDEO INPUT SELECT switch (see page 2-3): select
the input video signal
Audio selection function selector switch (see page 2-3):
select the input audio signals
REMOTE/LOCAL
switch (see page 2-7):
9P indicator off
REC controls (see page 2-3):
adjust the audio recording
levels (see page 4-2)
Recorder (MASTER,
PROGRAM)
REC INHIBIT switch (see page 2-21): OFF
Device specification buttons (see page 2-12): select the device
on which operations are to be carried out (see page 5-4)
Editing mode setting section
(page 2-8): selecting the
editing mode (page 5-4)
CTL/TC/UB button (see page 2-9): TC or CTL
POWER switch: ON
REMOTE/LOCAL
switch (see page 2-7):
9P indicator lit
Player (when EXT =
DNW-A100/A100P)
PB controls (see page 2-5): adjust the
audio playback levels
CTL/TC/UB button (see page 2-9): TC or CTL



 To Next Page