Chapter 6 Editing Without Using the Built-in Hard Disk (Two-VTR Editing)
6-6 Chapter 6 Editing Without Using the Built-in Hard Disk (Two-VTR Editing)
6-1 Automatic Editing
6-1-6 Preview
When you have set the edit points, the PREVIEW/
REVIEW button flashes, indicating that you can carry
out a preview.
To carry out a preview, use the following procedure.
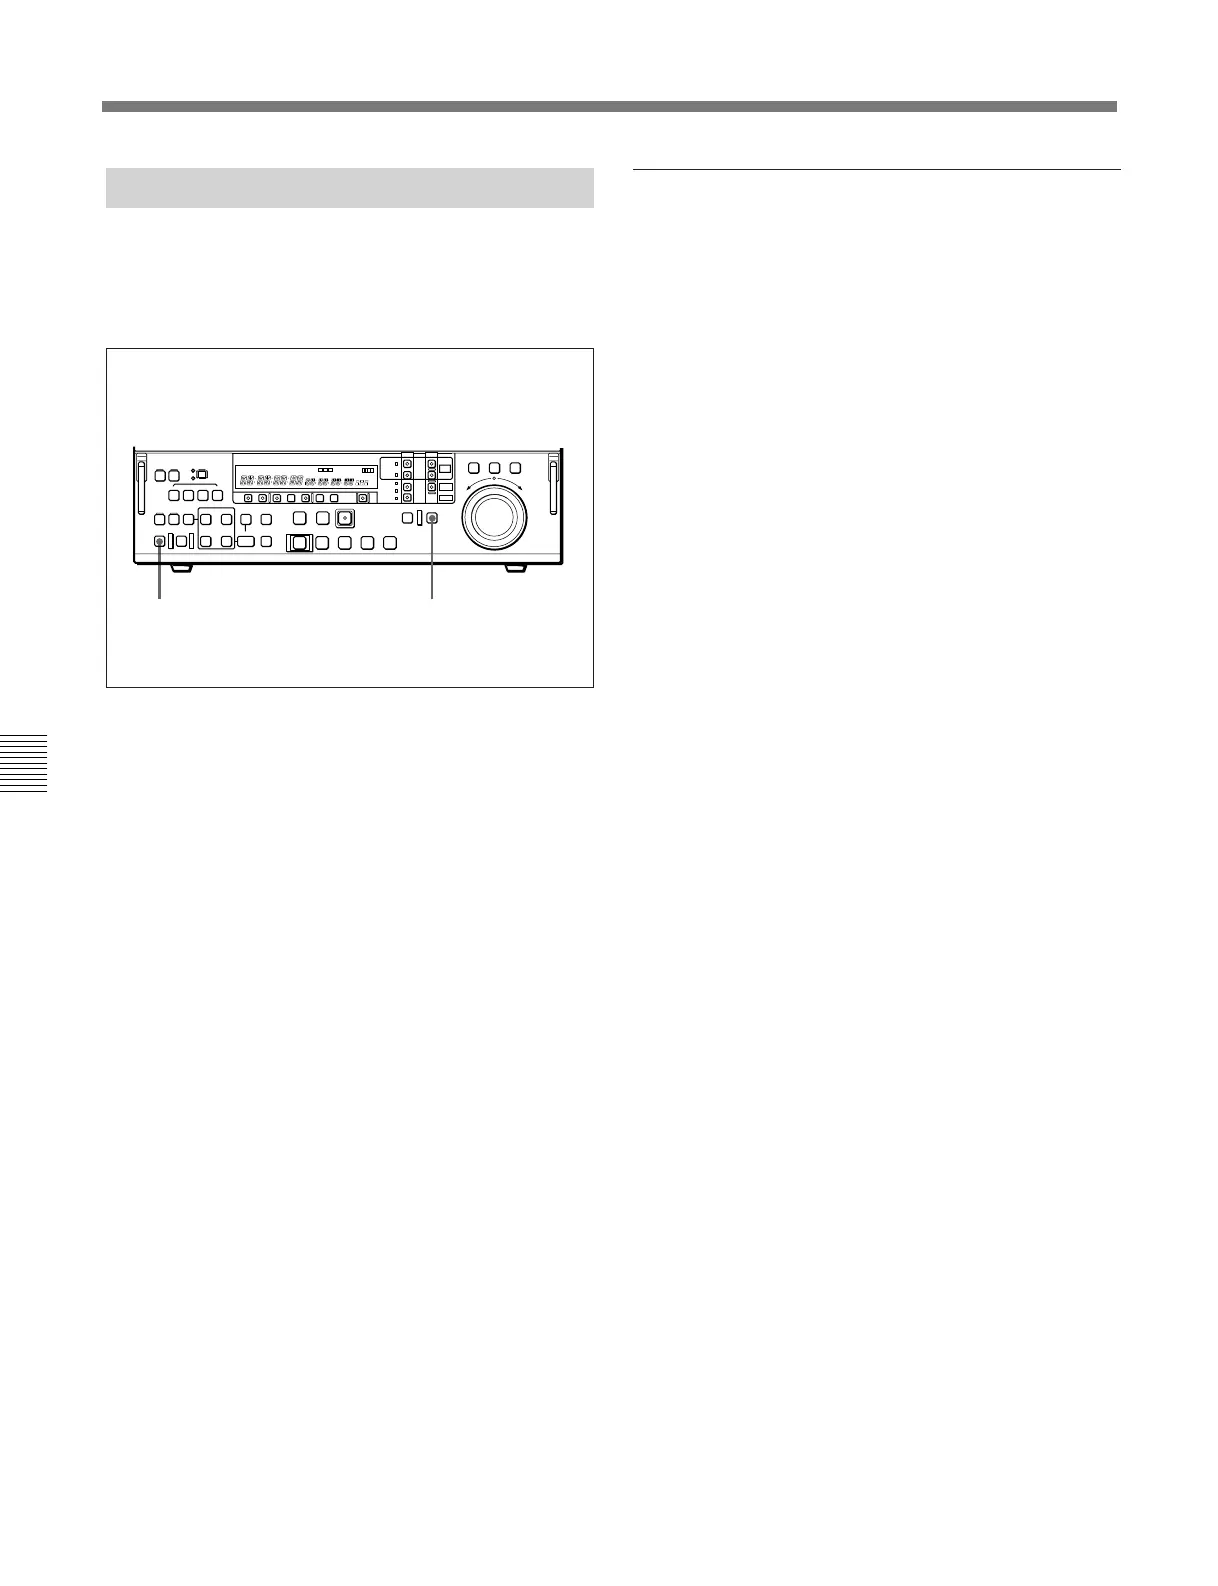
1 Press the RECORDER button, turning it on.
2 Press the PREVIEW/REVIEW button.
The PREVIEW/REVIEW button changes from
flashing to continuously lit, and the preview is
carried out.
At the end of the preview, the PREVIEW/
REVIEW button goes off.
To stop the preview
Press the STOP button.
The tape stops at the position where you pressed
the button.
To return the tape to the preroll point
Press the PREROLL button.
To return the tape to the IN point or OUT point
Press the PREROLL button and the IN button or OUT
button simultaneously.
After the preview, make adjustments to the edit points,
then repeat the preview as necessary.
For details of how to modify or delete edit points, see
Section 6-1-4, “Modifying and Deleting Edit Points” (page
6-4).
2 1
Monitor output
During a preview, you can monitor the playback video
on a monitor connected to the recorder. The type of
video depends on the current settings.
For details, see the table “Monitor output video during
previews and editing” in Section 5-2-9 “Preview”, referring
to the case when the player is EXT and the recorder is
TAPE.