Chapter 6 Editing Without Using the Built-in Hard Disk (Two-VTR Editing)
Chapter 6 Editing Without Using the Built-in Hard Disk (Two-VTR Editing) 6-5
Deleting an edit point
To delete an edit point, use the following procedure.
You can use the same procedure whether or not the
DELETE button is flashing.
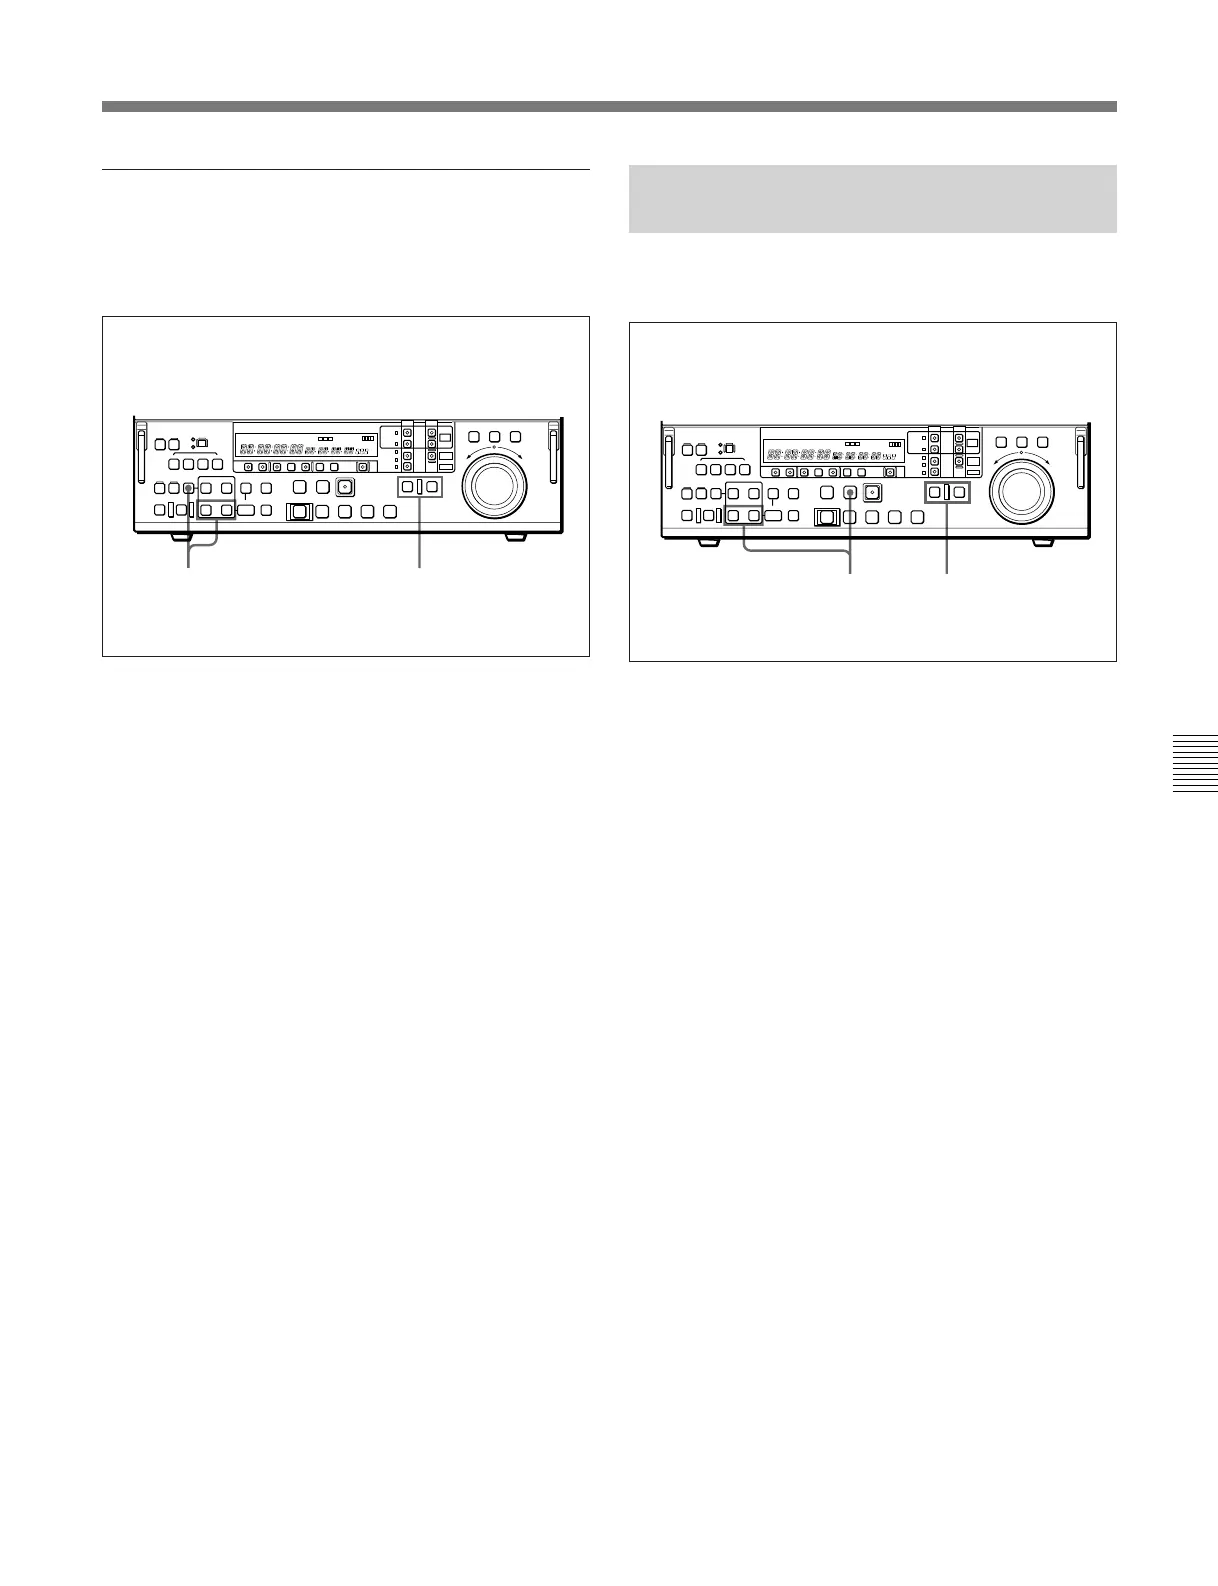
1 Press the RECORDER button or PLAYER button
to select the VTR on which you wish to delete the
edit point.
The button you have pressed lights.
2 Hold down the DELETE button and press the IN
button or OUT button according to the edit point
you wish to delete.
The IN point or OUT point is deleted according to
which button you pressed, and the DELETE button
goes off.
To restore a deleted edit point
To restore an edit point immediately after deleting it,
hold down the IN button or OUT button according to
the edit point you wish to restore, and press the
RECALL button.
12
6-1-5 Cue-up to Edit Points and
Preroll
To preroll to an edit IN point or cue up to any edit
point, use the following procedure.
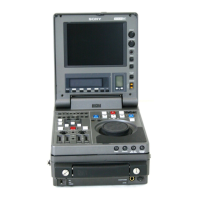
1 Press the RECORDER button or PLAYER button
to select the VTR on which you wish to operate.
The button you have pressed lights.
2 •To cue up to an edit point
Hold down the IN button or OUT button
according to the edit point to which you wish to
cue up, and press the PREROLL button.
This cues up to the edit point you have selected.
•To preroll
Press the PREROLL button.
The tape is wound back to a position 5 seconds
before the edit IN point, and stops.
To change the preroll time
The factory default setting for the preroll time is 5
seconds, but you can use basic menu item 001 to
change this to any value from 0 to 30 seconds. If you
change the preroll time, make sure that the setting is
not longer than the recording length before the edit IN
point.
Note that for automatic editing, the preroll time setting
on the recorder takes precedence.
For more information about the basic menu, see Section 7-2,
“Basic Menu” (page 7-1).
12