Chapter 4 Recording and Playback
Chapter 4 Recording and Playback 4-1
4-1 Recording
Chapter 4 Recording and Playback
This section describes recording on the VTR and hard
disk built into the unit.
4-1-1 Preparations for Recording
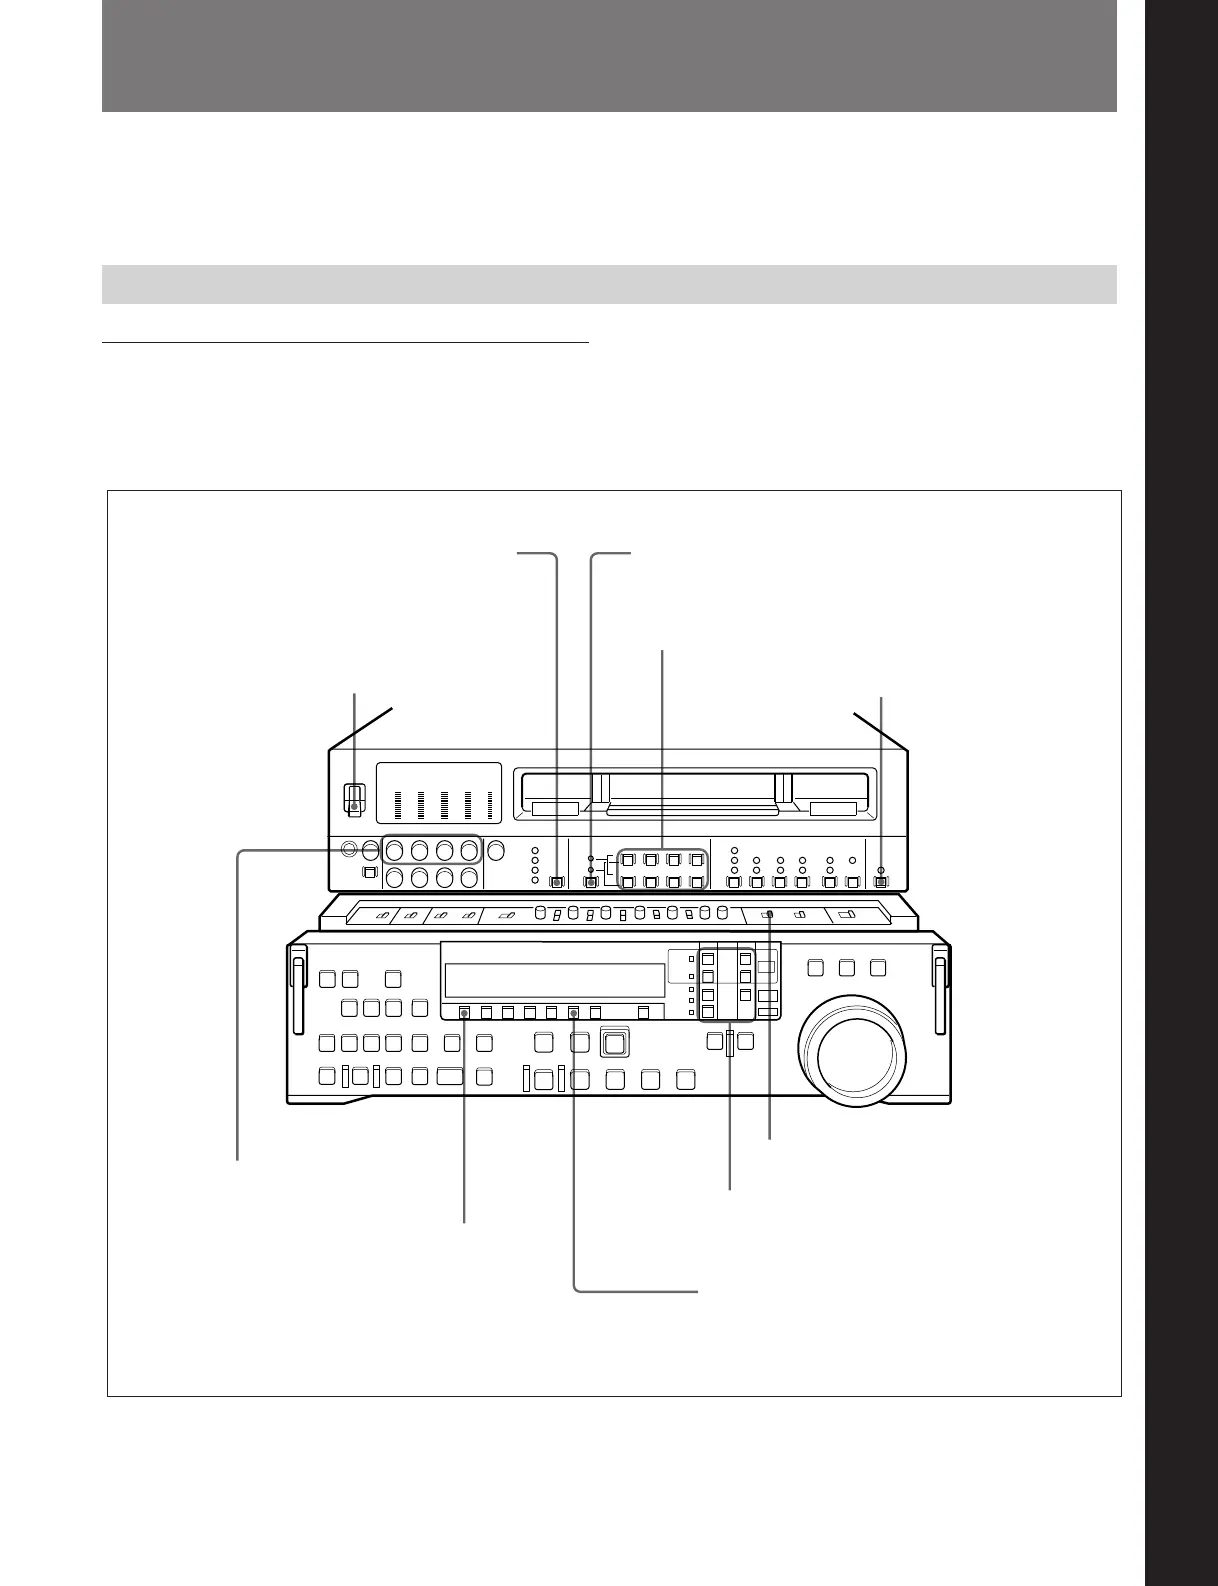
Switch settings
Before beginning recording, make any necessary
switch settings.
For details of the settings of each of the switches, refer to
the pages indicated in parenthesis.
POWER switch: ON
Audio selection function selector switch (see page 2-3):
select the input audio signal
REMOTE/LOCAL switch (see page 2-7):
9P indicator off
REC controls (see page 2-3):
adjust the audio recording
levels (see page 4-2)
PB.EE button (see page 2-9): lit
CTL/TC/UB button (see page 2-9): select
the time data to be displayed
REC INHIBIT switch (see page 2-21): OFF
Device specification buttons (see page 2-12):
select the device on which operations are to
be carried out (see page 4-2)
VIDEO INPUT SELECT switch
(see page 2-3): select the input
video signal
AUDIO INPUT/MONITOR SELECT buttons (Before Version 2.00)
AUDIO INPUT/MIXING/MONITOR SELECT buttons (Version 2.00
or later) (see page 2-4): select the audio channel(s) to be monitored