Do you have a question about the Sony HCD-XB4 and is the answer not in the manual?
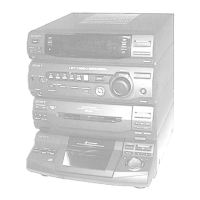
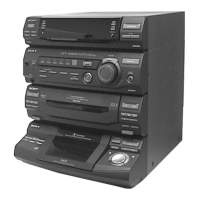
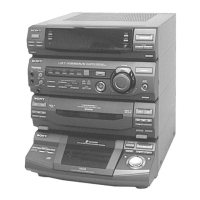
Identifies different regional models of the HCD-D590/XB4.
Details technical specifications like audio power, inputs, and outputs.
Technical data for the CD player component.
Technical data for the tape player component.
Technical data for the FM/AM tuner.
Unit's power, dimensions, mass, and accessories.
Warning about hazardous radiation exposure from controls or procedures.
Procedure for testing AC leakage from exposed metal parts to earth.
Precautions against electrostatic discharge and handling flexible boards.
Guidelines for safe laser diode emission checks.
Lists model numbers and their corresponding part numbers.
Basic instructions for initial setup and connection.
Detailed steps for connecting speakers, antennas, and power.
Instructions for protecting the CD mechanism during transport.
Steps to set the unit's clock for timer functions.
Guide on how to preset radio stations for FM and AM bands.
Instructions for connecting turntables and other audio devices.
Specific steps for connecting a turntable and selecting the PHONO input.
Instructions for connecting optional surround speakers.
Guidance on connecting outdoor FM and AM antennas.
Steps for connecting a VCR and selecting the VIDEO input.
How to play CDs, including loading, selecting, and controlling playback.
Standard procedure for playing CDs, including multi-disc playback.
Instructions for CD Synchro Recording from CD to tape.
Detailed steps for automatic recording from a CD to tape.
How to listen to radio stations, including preset tuning.
Steps to preset radio stations for easy access.
Manual recording process from radio to tape.
How to play tapes on Deck A or Deck B, including tape type detection.
Continued instructions for playing tapes, including cassette insertion and direction selection.
Instructions for high-speed dubbing from tape to tape.
Steps for copying tapes at high speed.
How to check remaining time and other information on the CD player display.
How to use Repeat Play for single tracks, CDs, or all discs.
Detailed guide on setting and cancelling Repeat Play modes.
How to use Shuffle Play for random track playback.
Detailed guide on setting and cancelling Shuffle Play.
How to create custom playback sequences for CDs.
How to set up Non-Stop Play for continuous CD playback.
Detailed steps for enabling and disabling Non-Stop Play.
Manual recording from various sources to tape.
Recording specific CD tracks to tape in a desired order.
How to program and edit CD tracks for recording.
Continues instructions for programming CD tracks for recording.
Feature to automatically determine suitable tape length for CD recording.
Feature to automatically determine suitable tape length for CD recording.
How to use the Loop function to repeat parts of a CD.
How to use the Loop function to repeat parts of a CD.
Detailed steps for using the Loop effect.
How to use the Flash function for CD sound effects.
Detailed steps for using the Flash effect.
Options for reinforcing bass, creating powerful sound, and using headphones.
Options for reinforcing bass, creating powerful sound, and using headphones.
How to apply an automatic graphic equalizer effect.
Detailed steps for using the Wave equalizer function.
How to activate the GROOVE function for enhanced bass and sound.
How to use the DBFB function to reinforce bass.
How to use the SUPER WOOFER function for bass reinforcement.
Instructions for connecting and using headphones.
Menu for selecting sound characteristics based on music genre.
How to manually adjust the graphic equalizer levels.
How to manually adjust the graphic equalizer levels.
How to enable and use the surround sound effect.
How to create and store custom sound profiles.
How to create and store custom sound profiles.
How to use the Karaoke function with an optional microphone.
How to use the Karaoke function with an optional microphone.
How to set the sleep timer to turn off the unit automatically.
How to set the sleep timer to turn off the unit automatically.
How to set the wake-up timer to turn on the unit.
How to set the wake-up timer to turn on the unit.
How to set the unit to record radio programs automatically.
Procedure to verify timer settings.
Steps to cancel programmed timer operations.
Procedure for disassembling the unit's outer case.
Details on removing the front panel assembly.
Steps for accessing and removing the main board.
Procedure for disassembling the main section of the unit.
Steps for removing the CD mechanism deck.
Procedure for disassembling the tape mechanism deck.
Steps for removing the cassette lid assembly.
Procedure for disassembling the CD lid assembly.
Steps for removing the panel sub-assemblies.
Procedure for accessing the base unit.
Details on the disc table assembly and its adjustment.
Procedure for disassembling the BD board.
Steps for removing the optical pick-up and sled motor.
Procedure for disassembling the audio board.
Steps for removing the capstan motor.
Procedure for clearing all stored data and resetting the unit.
Mode to move pickup to a vibration-resistant position for shipping.
Procedure for resetting the unit while retaining preset data.
Mode to freely run the CD sled motor for cleaning or adjustment.
Option to change input terminal name between VIDEO and MD.
Option to change AM tuning channel step.
Mode to check all LEDs, indicators, and buttons.
Mode for checking CD and tape deck operation repeatedly.
Steps for initiating and operating CD aging mode.
Sequence of operations performed during CD aging mode.
Steps for initiating and operating tape deck aging mode.
Sequence of operations performed during tape deck aging mode.
Precautions for mechanism adjustments, including cleaning and tools.
Table detailing torque meter readings for various modes.
Table detailing tension meter readings for tape playback.
Steps for electrical adjustments on the deck section.
Procedure for adjusting head azimuth for optimal playback.
Procedure for adjusting tape speed on Deck A.
Procedure for adjusting playback levels for both decks.
Procedure for adjusting record bias current on Deck B.
Procedure for adjusting record level on Deck B.
Steps for adjusting the AM tuner section.
Procedure for adjusting the tuned level for AM reception.
Notes on FM section adjustment.
Procedure for adjusting the tuned level for FM reception.
General notes regarding CD section operation and checks.
Procedure for checking the S-curve waveform.
Procedure for checking and adjusting focus bias.
Description of RF signal waveform.
Procedure for checking the RF signal level.
Procedure for checking E-F Balance during a 1-track jump.
Diagram showing the location of various circuit boards.
Waveform examples for the BD section.
Waveforms related to the tuner section.
Waveforms related to the panel section.
Waveforms related to the main section.
Block diagram illustrating the tuner section's signal flow.
Block diagram of the CD section, including optical pick-up and motors.
Schematic diagram of the main section, showing component interconnections.
Schematic diagram for the BD section of the unit.
Printed wiring board layout for the BD section (Side A and Side B).
Schematic diagram for the CD motor control section.
Printed wiring board layouts for CD motor and sensor boards.
Schematic diagram for the tuner section.
Printed wiring board layout for the tuner section.
Printed wiring board layouts for the deck section components.
Schematic diagram for the deck section.
Schematic diagram for the main section (Part 2).
Printed wiring board layout for the main section.
Schematic diagrams for various panel sections.
Printed wiring board layouts for panel sections.
Block diagrams for ICs in the main section.
Printed wiring board layouts for the power section.
Schematic diagram for the power section.
Block diagrams for ICs in the BD section.
IC block diagrams for the tuner section.
Pin function description for IC301 on the main board.
Continued pin function description for IC301.
Continued pin function description for IC301.
Pin function description for IC601 on the panel board.
Exploded view of the case and rear panel assembly.
Exploded view of the front panel section (Part 1).
Exploded view of the front panel section (Part 2).
Exploded view of the chassis section, showing main components.
Exploded view of the tape mechanism deck (Part 1).
Exploded view of the tape mechanism deck (Part 2).
Exploded view of the tape mechanism deck (Part 3).
Exploded view of the CD mechanism deck.
Exploded view of the base unit section.
List of electrical parts for the audio board.
Continued list of electrical parts for the audio board.
List of electrical parts for the BD board.
List of electrical parts for BD LED, CD Motor, CD-A SW, CD-B1 SW boards.
List of electrical parts for CD-B2 SW, Door SW, Headphone-Mic, Leaf Switch boards.
List of electrical parts for Leaf Switch, LED, and Main boards.
List of electrical parts for the Main board.
Continued list of electrical parts for the Main board.
Continued list of electrical parts for the Main board.
List of electrical parts for Main and Panel boards.
List of electrical parts for Panel and Power Amp boards.
List of electrical parts for the Power Amp board.
Continued list of electrical parts for the Power Amp board.
List of electrical parts for the Panel board.
List of electrical parts for TCB and Trans boards.
Continued list of electrical parts for TCB and Trans boards.
| Speaker Type | 2-Way Bass Reflex |
|---|---|
| FM Tuner | Yes |
| AM Tuner | Yes |
| Remote Control | Yes |
| Type | Mini Hi-Fi System |
| CD Player | Yes |
| Cassette Deck | Yes |