— 23 —
KP-43T85T / 53SV85T / 61SV85T
*: In the factory preset, “GRN CENT” appears on the screen fi rst. To
change the color to red or blue, press the 3 key.
13. Cover the red and blue picture lenses with lens caps to allow only
green to show, or use the method shown in the note below to turn
the CRTs off individually.
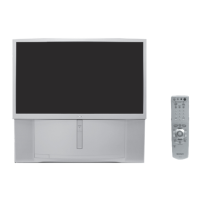
Adjustment type
Display Adjustment item G R B
H/V* H/V* H/V*
CENT CENTER -/- O/O O/O
SKEW SKEW O/O O/O O/O
SIZE SIZE -/- O/O O/O
LIN LINEARITY -/- O/- O/-
KEY KEY STONE -/- -/O -/O
PIN PIN CUSHION -/O -/O -/O
* H = Horizontal V = Vertical O = Yes - = No
Note: If lens caps are unavailable, you can cut off the unnecessary color
beams in the service mode by individually changing the data from “1”
to “0” in category VPNT, item 28 RON (red), item 29 GON (green), or
item 30 BON (blue).
2-11. GREEN REGISTRATION ADJUSTMENT
GREEN CENTER, GREEN SIZE
The sizing and centering that was performed in the previous section
(section 2-10) should have correctly sized and centered the green CRT.
The sizing and centering (coarse adjustment mode) of the red and blue
CRTs in following sections are performed so that the red and blue
patterns overlay the green pattern as close as possible prior to the fi ne
mode adjustments. The fi ne-mode adjustments are made for all 3 colors
so that the cross-hatch lines are straight vertically and horizontally, and
the linearity and convergence is correct.
GREEN SKEW
1. Display a cross-hatch pattern from an external generator.
2. Confi rm that category “PJE” is selected (refer to step 9 in the
previous section, section 2-10).
3. Make sure that only the external pattern is displayed. If the internal
cross-hatch is displayed, press the 6 button on the remote until only
the external pattern is displayed.
4. Select GRN SKEW with the 1 and 4 buttons on the remote
commander.
5. Using the joystick buttons on the remoter commander, adjust the
crosshatch lines so that they go straight vertically and horizontally,
not slanting.
GRN
SKEW
000 000
6. Press “MUTING” then “ENTER” to write the new adjustment data
into memory.
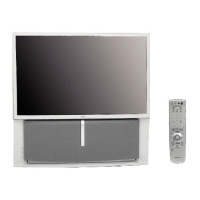
GREEN PINCUSHION
1. Select GRN PIN with the 1 and 4 buttons on the remote commander.
2. Adjust the top and bottom crosshatch lines so that they are straight.
GRN
PIN
XXXX 000
Note: These are required when either severe misadjustment or data loss
has occurred.
3. Press “MUTING” then “ENTER” to write the new adjustment data
into memory.
GREEN FINE ADJUSTMENT
Press “MUTING” then “ENTER” often during the fi ne adjustment mode to
save the adjustment data.
1. Press the 6 button until the external pattern disappears and the TV’s
internal cross-hatch pattern appears.
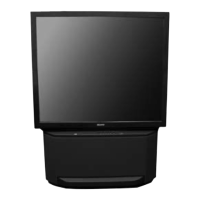
2. Press the 9 button on the remote commander to shift to the fi ne
adjustment mode. The green cursor will appear in the center of the
screen.
3. Use the 1 and 4 buttons on the joystick on the remote commander
to move the cursor (see below) to each area of the screen that
you want to adjust, and adjust with the joystick arrow buttons on
the remote.
Cursor movement by the 1 and 4 keys:
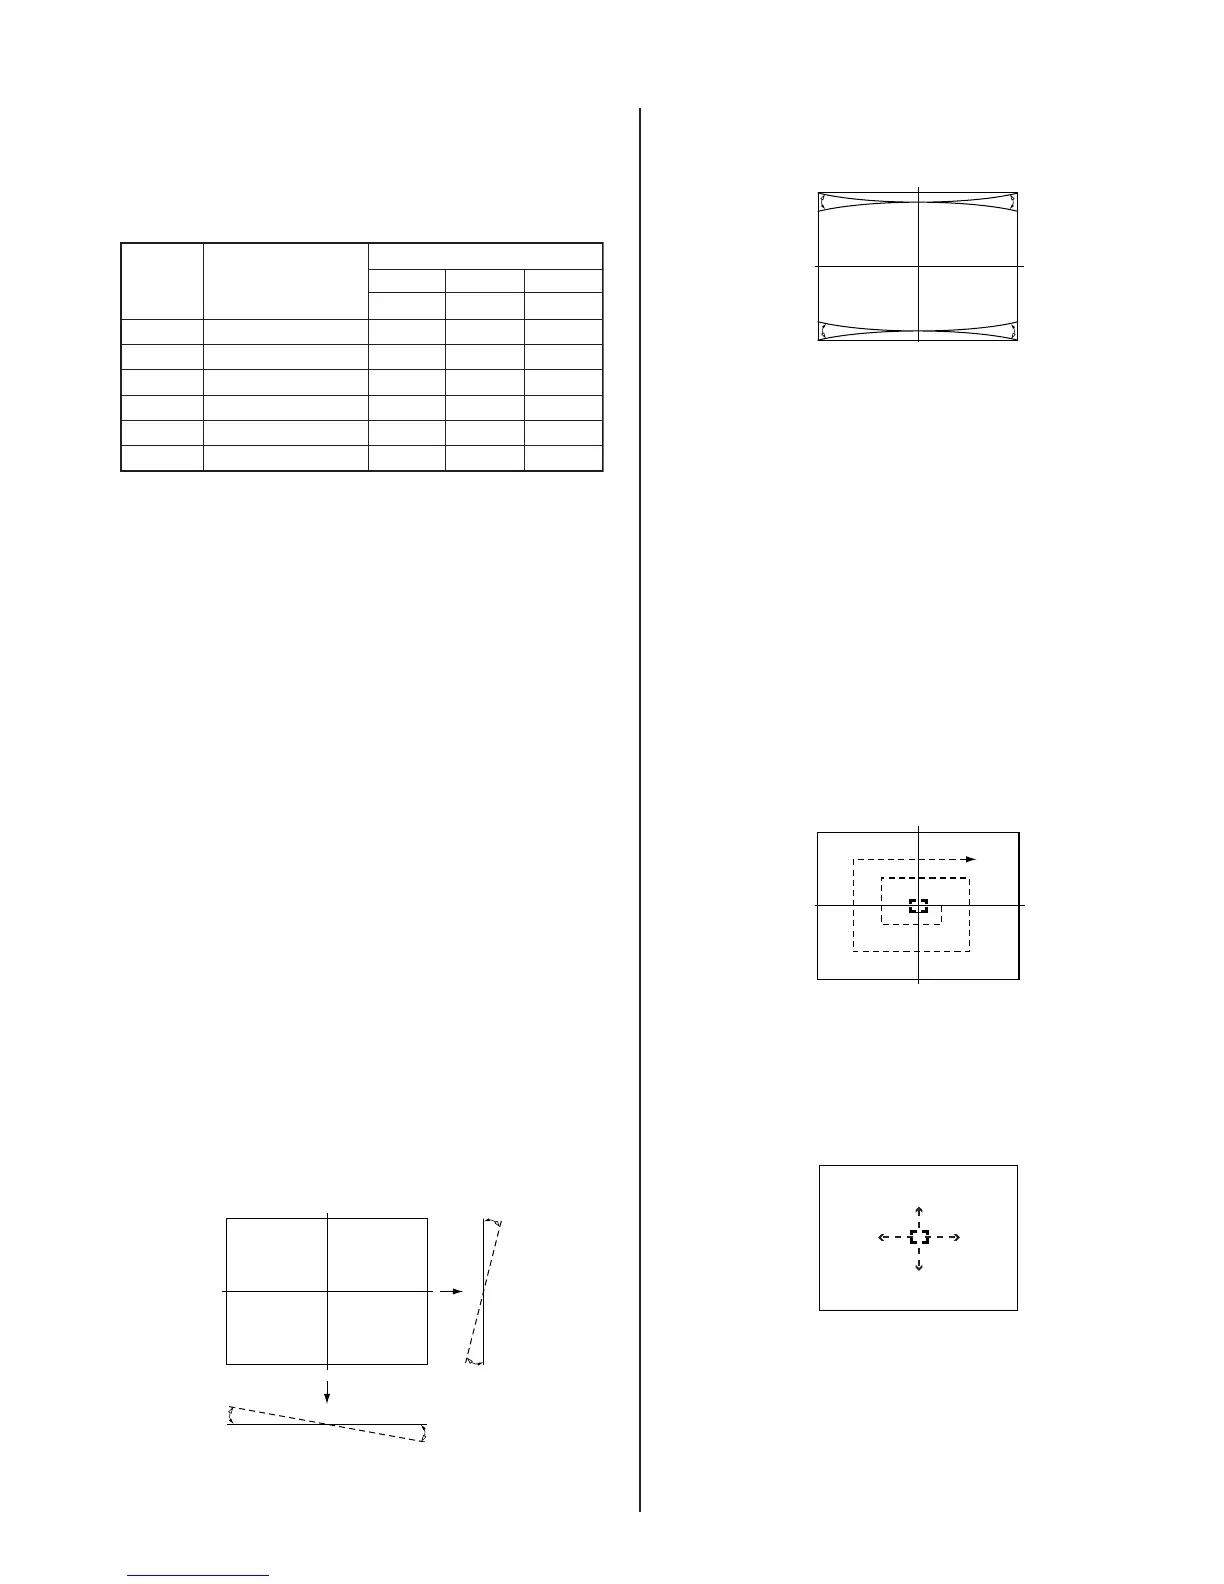
Alternative method of moving the cursor.
Press the joystick center button once which will cause the cursor to
change from green to white. When the cursor is white you can move it up
or down, left or right, by using the joystick arrow buttons.
4. Press the joystick center button once; the cursor will return to
green (or red or blue, depending on the previously selected color).
When the cursor is green, you can adjust the geometry of the area
surrounding the cursor by using the joystick arrow buttons.
 Loading...