38
Moving recorded folder/
album/track
— Move function
You can use this function to change the order of
the tracks. When you move tracks, the tracks are
automatically renumbered.
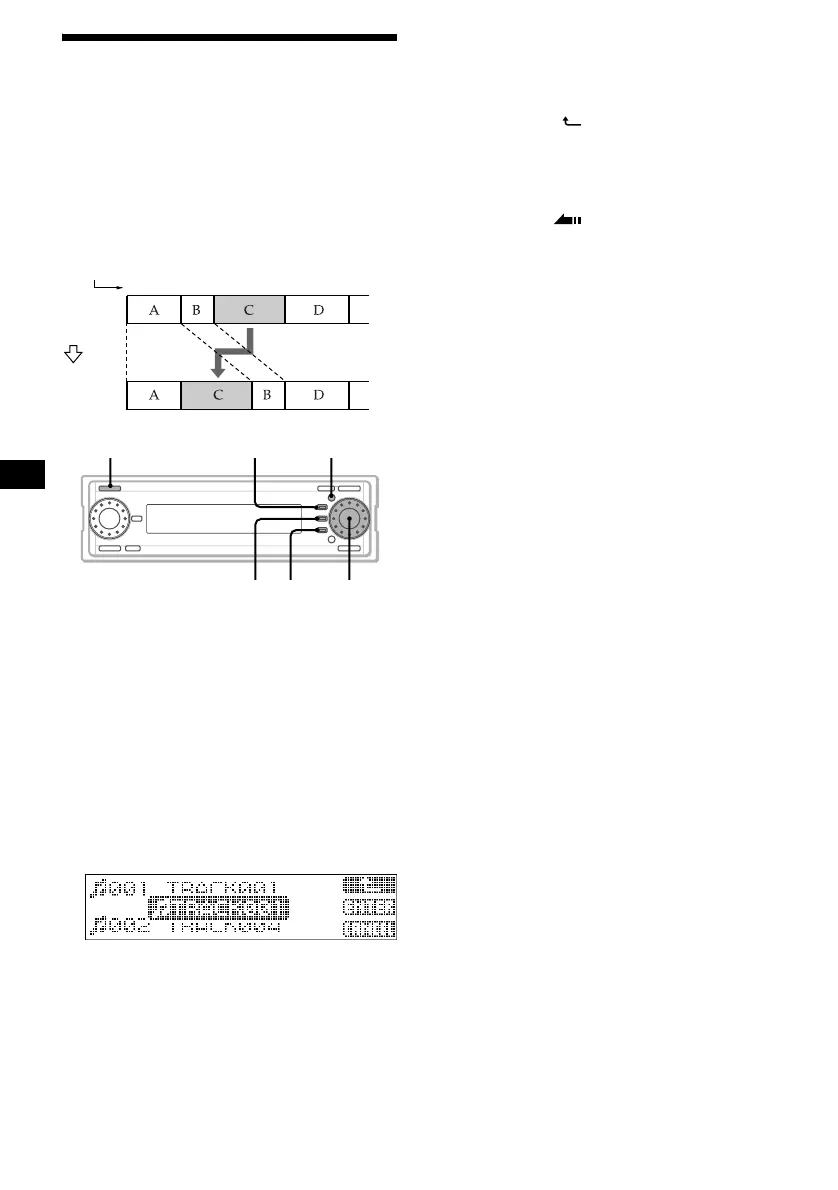
Example: Moving track C to position 2.
1 Press (SOURCE) repeatedly to select
“HDD.”
2 Press the R dial repeatedly to display
the desired name list.
Each time you press the R dial, the list display
changes as follows:
Album name list t Track name list t
Normal playback display t Album name list
3 Rotate the R dial to select the item you
want to move, then press (MENU).
4 Rotate the R dial to select “Move,”
then press the R dial.
5 Select the position to insert.
1Press the R dial to select the
desired list (Folder/album/track).
To go back one step to the previous level,
press (F1) ().
2Rotate the R dial to select the
position to insert.
3Press (F2) (ENTER).
6 Press (F3) ().
The normal display appears.
To cancel moving
Press (MENU).
Tip
If you press (F3) (CANCEL) in step 5, the list display
appears.
Notes
• You cannot select tracks from different albums at the
same time.
• You cannot move a track and album in the Play List
folder to another folder.
You also cannot move an album or track from
another folder to the Play List folder.
• During moving, playback automatically stops.
• A folder can contain a maximum of 200 albums.
• An album can contain a maximum of 400 tracks.
1
1
2
2
43
4
3
Track
number
Before
moving
After
moving
Move track C to the
second position.
MENU
F2 F3
F1SOURCE
R dial
 Loading...