1-10
44
Recording TV programmes using the ShowView
®
system (SLV-D950B only)
Recording TV programmes using the
ShowView
®
system
(SLV-D950B only)
The ShowView system is the feature that
simplifies programming the VCR to make
timer recordings. Just enter the ShowView
number listed in the TV programme guide.
The date, times, and programme position of
that programme are set automatically. You
can preset a total of six programmes,
including settings made with other timer
methods.
Before you start...
•Check that the DVD-VCR clock is set to
the correct time.
•Turn on the DVD-VCR and your TV.
•Set your TV to the video channel so that
the signal from the player appears on the
TV screen.
•Set TV
/ DVD·VIDEO to DVD·VIDEO,
then press SELECT VIDEO to control the
VCR (page 9).
•When using a decoder, turn it on.
•Insert a tape with its safety tab in place.
Make sure the tape is longer than the total
recording time.
1
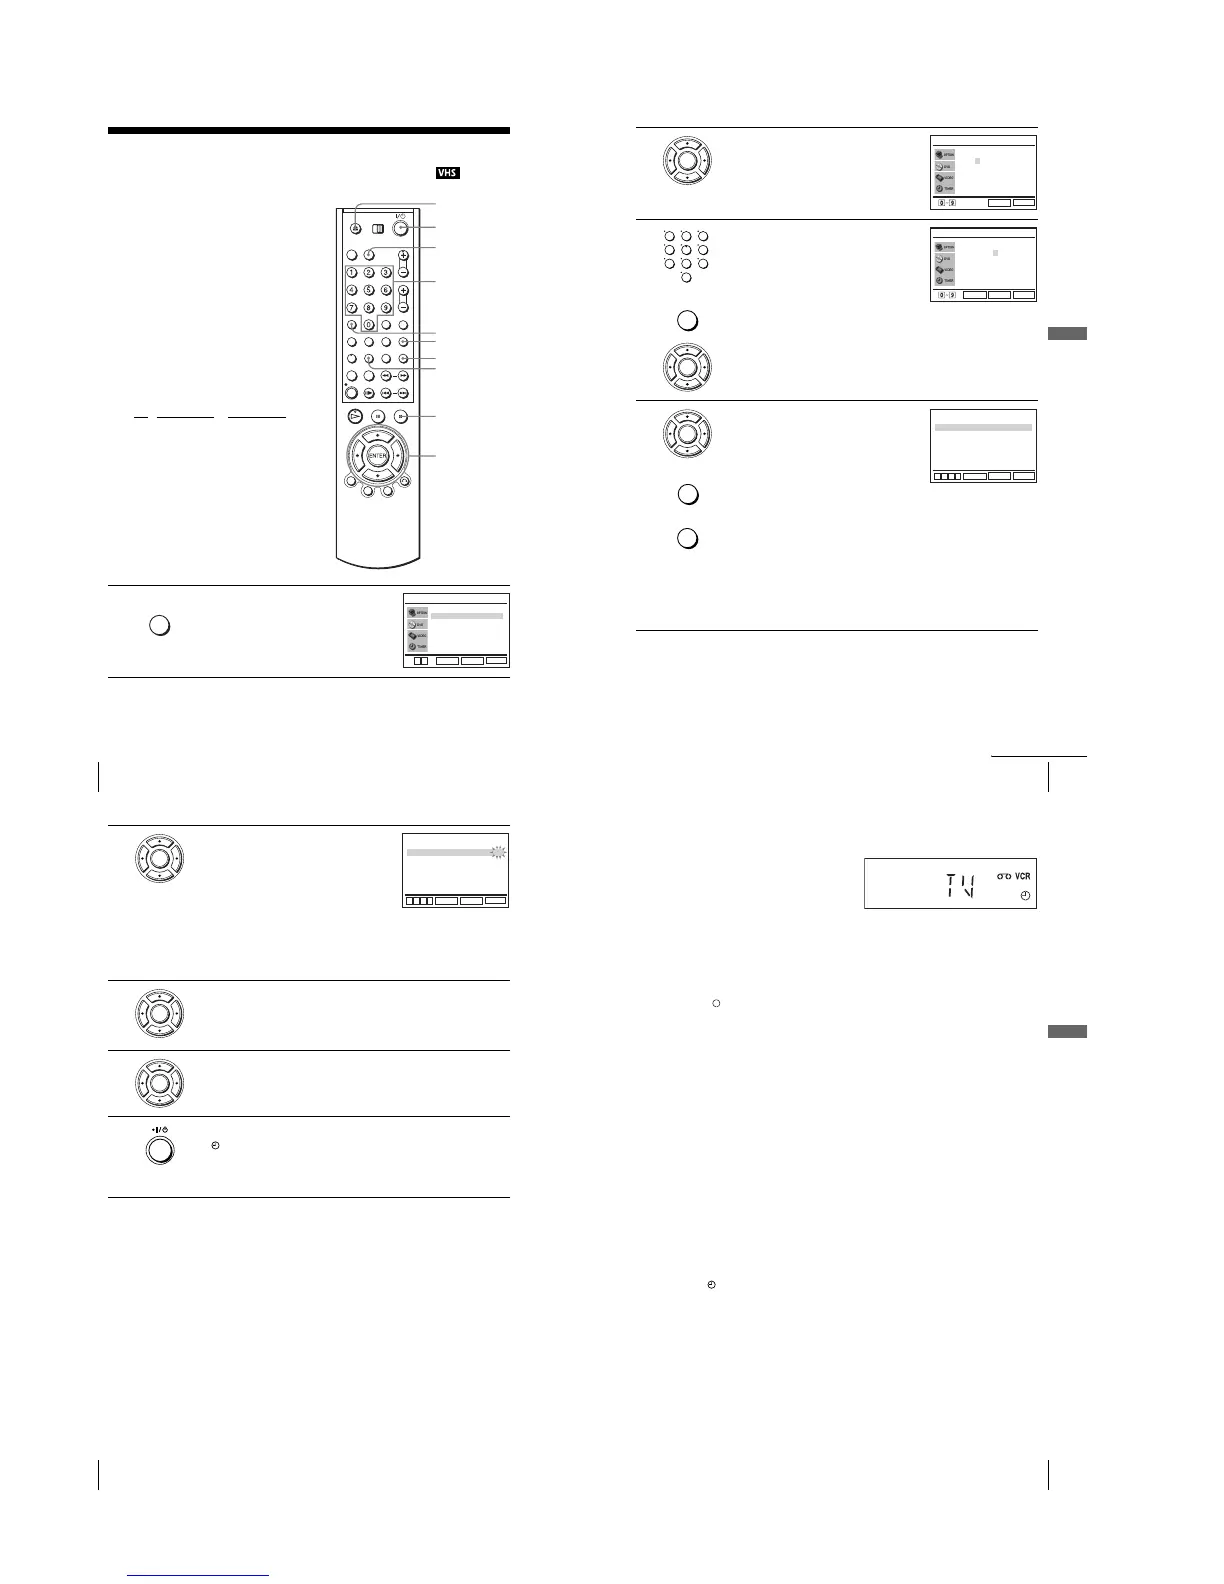
Press TIMER.
The “OPTIONS PROG.” menu appears.
TV/VIDEO
INPUT SELECT
V/v/B/b
ENTER
?/1
x
Number
buttons
TIMER
SELECT VIDEO
Z
CLEAR
SUBTITLE
TIMER
Normal
ShowView
RETURN
OPTIONS PROG.
SET UP
ENTER
V
v
45
Recording TV programmes using the ShowView
®
system (SLV-D950B only)
Basic Operations
2
Press V/v to select “ShowView”, then press
ENTER.
The “ShowView” menu appears.
3
Press the number buttons to enter the
ShowView number.
If you make a mistake, press CLEAR and re-
enter the correct number.
Yo u can also press B to delete the last entered
number.
4
Press ENTER.
The date, start and stop times, programme
position, tape speed and VPS (Video
Programme System)/PDC (Programme
Delivery Control) setting appear on the TV
screen.
• If “– –” appears in the “PR” (programme)
column (this may happen for local broadcasts), you have to set the
appropriate programme position manually.
Press V/v to select the desired programme position.
•To record from a decoder or other source connected to one or more of the
LINE inputs, press INPUT SELECT to display the connected line in the
“PR” position.
Yo u will only have to do this operation once for the referred channel. The
VCR will then store your setting.
If the information is incorrect, press CLEAR to cancel the setting.
ENTER
RETURN
SET UP
Code – –– –– – – ––
Code
ShowView
B
: 0–9
Corriger :
123
456
789
0
CLEAR
ENTER
RETURN
SET UP
ENTER
Code 1 23 4– – – ––
ShowView
B
: 0–9
:
Code
Corriger
INPUT
SELECT
ENTER
CLEAR
35
––
––
––
––
––
SP
––
––
––
––
––
Non
––
––
––
––
––
19
––
––
––
––
––
19 : 00
––:––
––:––
––:––
––:––
––:––
20 : 00
––:––
––:––
––:––
––:––
––:––
PR JOUR DEBT FIN
SPEED
V/P
RETURN
CLEAR
ENTER
v
V
b
B
SA
––
––
––
––
––
continued
46
Recording TV programmes using the ShowView
®
system (SLV-D950B only)
To stop recording
To stop the DVD-VCR while recording, press SELECT VIDEO and then press x.
Daily/weekly recording
In step 5 above, press v to select the recording pattern. Each time you press v, the
indication changes as shown below. Press V to change the indication in reverse order.
today t JOUR (Monday to Sunday) t S-SA (every Saturday) ..... t
S-DI (every Sunday) t 1 month later t (dates count down) t today
Timer recording with VPS/PDC signals
Some broadcast systems transmit VPS or PDC signals with their TV programmes.
These signals ensure that your timer recordings are made regardless of broadcast
delays, early starts, or broadcast interruptions.
To use t he VPS/PDC function, set “V/P” to “Oui” in step 5 above. You can also use
the VPS/PDC function for a source connected to one or more of the LINE inputs.
5
If you want to change the date, tape speed and
the VPS/PDC setting:
1
Press B/b to select the item you want to
change.
2
Press V/v to reset it.
•To record the same programme every day or
the same day every week, see “Daily/weekly
recording” on page 46.
•To use the VPS/PDC function, set “V/P” to “Oui”. For details about the
VPS/PDC function, see “Timer recording with VPS/PDC signals” on
page 46.
6
Press ENTER to confirm the setting.
7
Press ENTER to confirm all settings.
8
Press ?/1 to turn off the DVD-VCR.
The indicator appears in the display window and the VCR stands by for
recording.
To record from a decoder or other source, leave the connected equipment
switched on.
ENTER
35
––
––
––
––
––
SP
––
––
––
––
––
Non
––
––
––
––
––
19
––
––
––
––
––
19 : 00
––:––
––:––
––:––
––:––
––:––
20 : 00
––:––
––:––
––:––
––:––
––:––
V/P
RETURN
CLEAR
ENTER
v
V
b
B
SA
––
––
––
––
––
PR JOUR DEBT FIN
SPEED
ENTER
ENTER
47
Recording TV programmes using the ShowView
®
system (SLV-D950B only)
Basic Operations
To watch another TV programme after setting the timer
Tips
•To set the channel, you can also use the V/v or number buttons.
•If the indicator appears, this means that the VCR is currently recording this programme.
•You can also do the following tasks while the VCR is recording:
–Reset the counter (page 39).
–Display tape information on the TV screen (page 41).
To use the Auto Tape Speed function
In step 5 above, press v to select “Auto”. When you are recording a programme in
the SP mode and the remaining tape length becomes shorter than the recording time,
the recording tape speed is automatically changed to the LP mode. Note that some
noise will appear on the picture when the tape speed is changed. To operate this
function correctly, the “Sélect. Cassette” setting in the “REGLAGE DE LA
FONCTION VIDEO” menu must be accurate (see page 105).
Tips
•To set the line input video source, you can also use the INPUT SELECT button.
•You can set the extended time for the ShowView setting by 10, 20, 30, 40, 50, or 60 minutes.
Set “Etendre ShowView” in the “REGLAGES UTILISATEUR” menu to the desired
extended time on page 110.
•To check, change, or cancel the programme setting, see “Checking/changing/cancelling timer
settings” on page 56.
Notes
•If the VPS/PDC signal is too weak or the broadcasting station failed to transmit VPS/PDC
signals, the VCR will start recording at the set time without using the VPS/PDC function.
•The indicator flashes in the display window when you press ?/1 with no tape inserted.
1
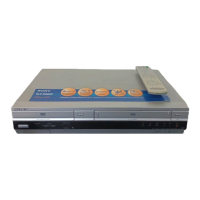
Press TV/VIDEO to display “TV” in the display window.
2
If your TV is connected to the VCR using A/V connections, set the TV to the
TV’s aerial input; if not, skip this step.
3
Select another channel on the TV.



 To Next Page