2-12
1 SPRING TENTION LEVER
STOPPER
MARK[B]
"A"
2 LEVER TENTION ASS`Y
3 BAND BRAKE ASS`Y
2-4-11 Lever Pinch Drive,
Lever Tension Drive Removal
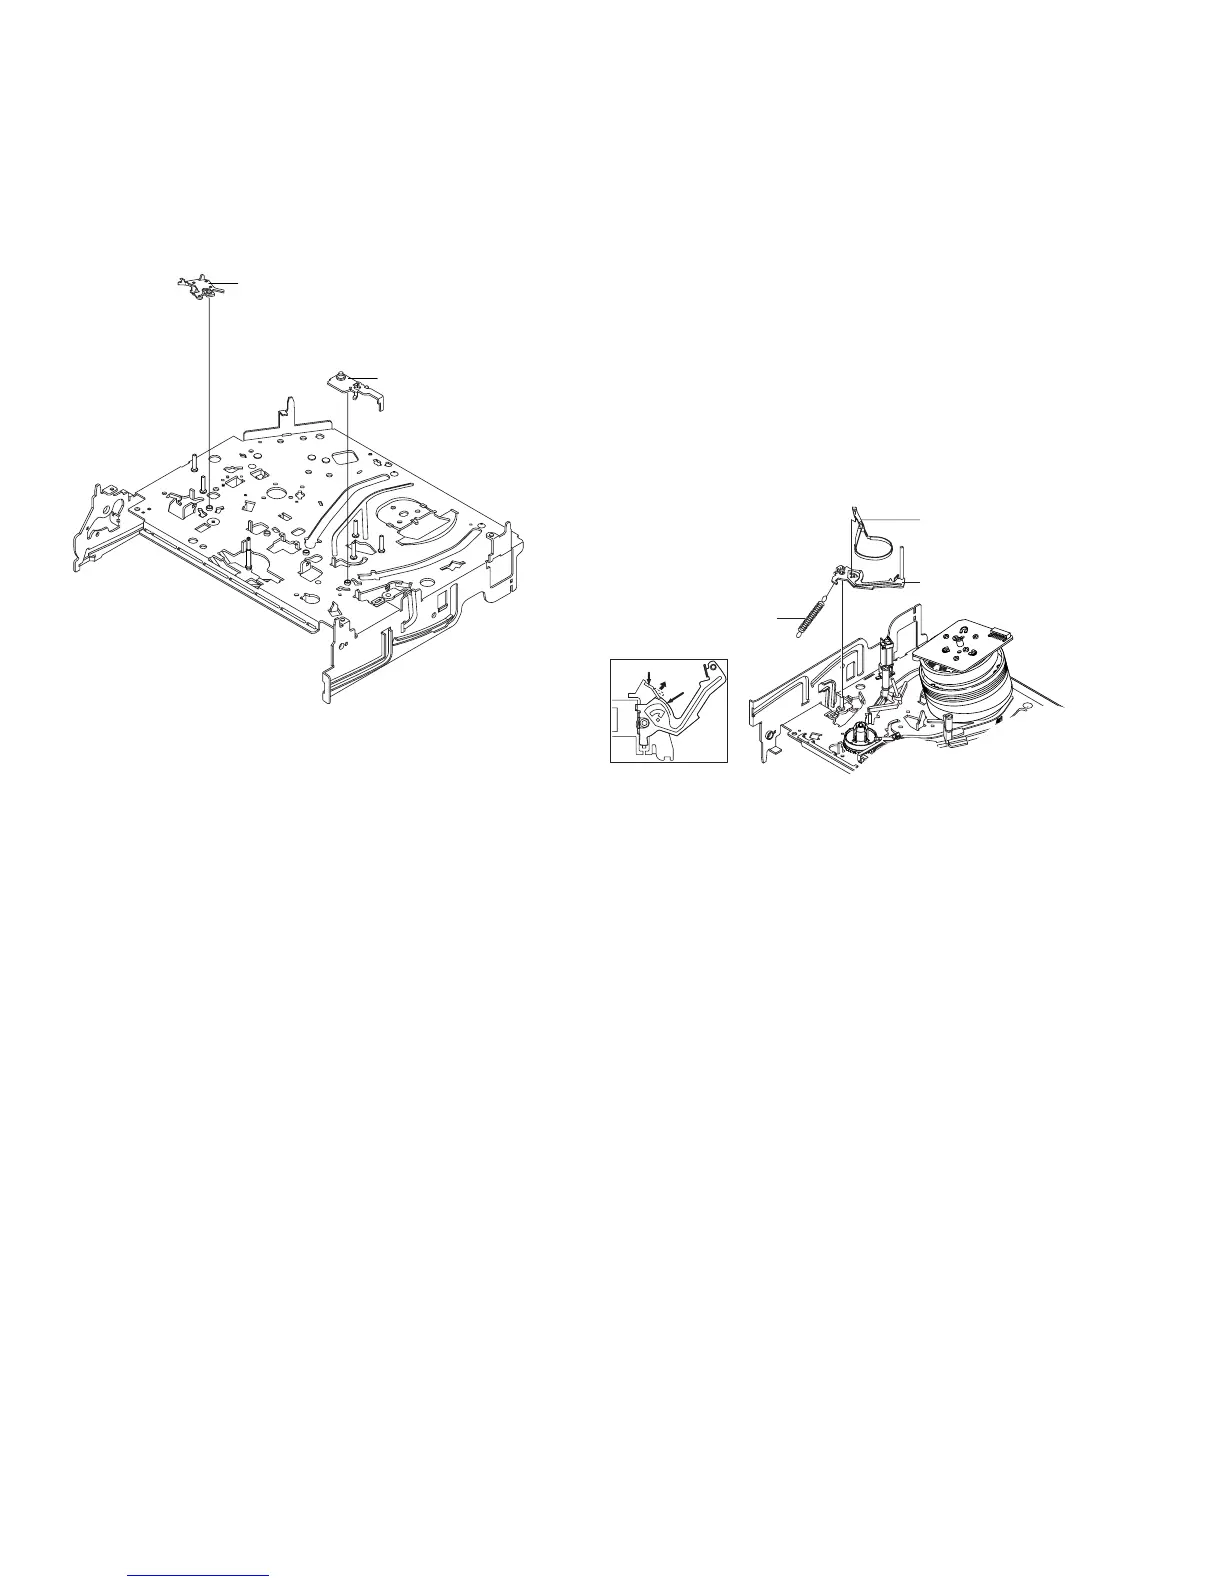
1) Remove the Lever Pinch Drive 1, Lever Tension Drive 2.
Fig. 2-23 Lever Pinch Drive,
Lever Tension Drive Removal
2-4-12 Lever Tension Ass’y,
Band Brake Ass’y Removal
1) Remove the Lever Brake S Ass’y (Refer to Fig 2-25).
2) Remove the Spring Tension Lever 1.
3) Rotate stopper of Main Base in the direction of arrow “A”.
4) Lift the Lever Tension Ass’y 2 & Band brake
Ass’y 3.
Note:
1) When replacing the Lever Tension Ass’y 2, be sure to apply Grease
on the post,
2) Take care not to touch stain on the felt side, and not to be folder
and broken Band brake Ass’y
3) After Lever Tension Ass’y seated, Rotate stopper of Main Base to
the Mark[B].
Fig. 2-24 Lever Tension Ass’y,
Band Brake Ass’y Removal
1 LEVER PINCH DRIVE
2 LEVER TENSION DRIVE
 Loading...