16
Installation and Connection
Installing the Camera
Installing the Camera on a Desk
Place the camera on a flat surface.
If you have to place the camera on an inclined surface,
make sure that the inclination is less than ±15 degrees to
guarantee pan/tilt performance, and take measures to
prevent it from falling.
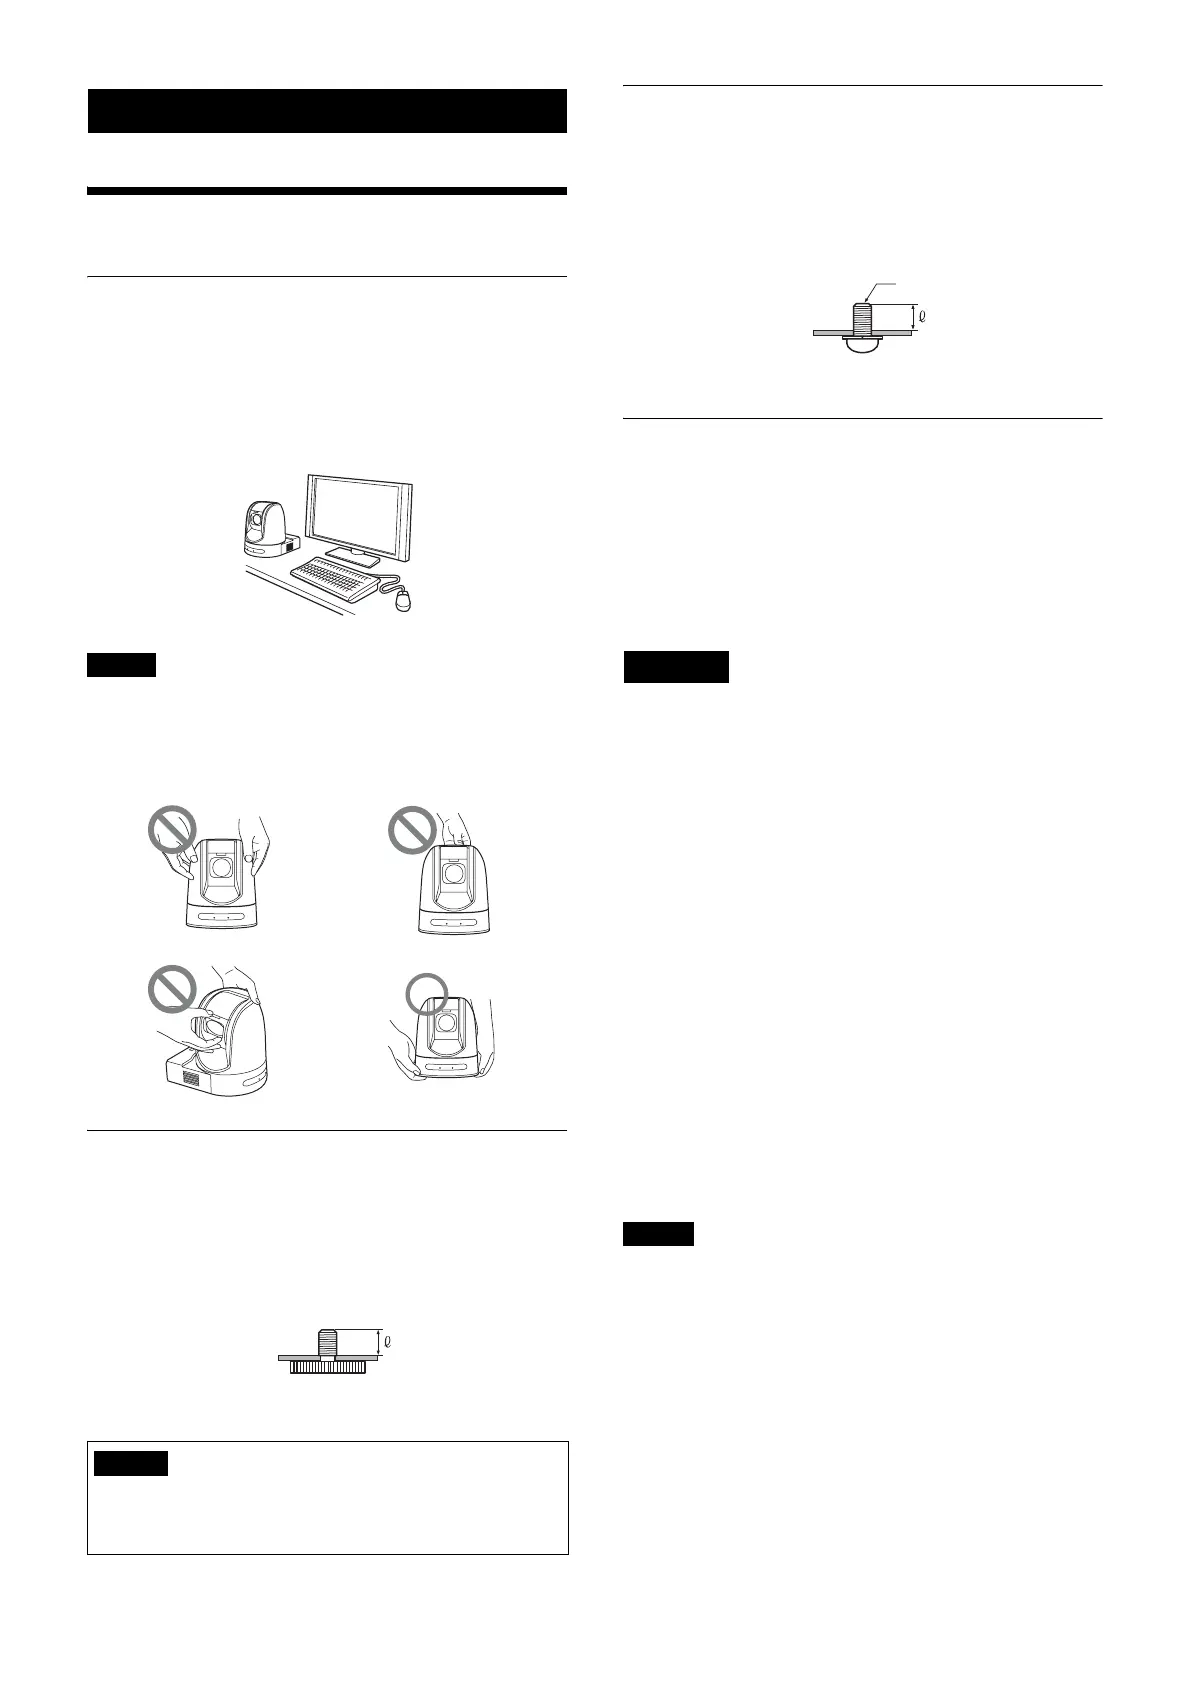
• Do not grasp the camera head when carrying the
camera.
• Do not turn the camera head by hand. Doing so may
result in a camera malfunction.
Attaching the Camera to a Tripod
Attach a tripod to the screw hole used for attaching a
tripod on the bottom of the camera.
The tripod must be set up on a flat surface and its screws
tightened firmly by hand.
Use a tripod with screws of the following specifications.
Installing the Camera Using the M3
Fixing Screw Holes
Attach the camera using 4 M3 fixing screw holes located
on the bottom of the camera.
Attach the camera to a fitting with a flat surface using M3 screws
with the following specifications.
Installing the unit on the ceiling
Using the ceiling bracket, wire rope, and screws supplied,
you can attach the camera to the ceiling.
When you install the unit, always install it on a level
ceiling. If you have to install it on a sloping or uneven
ceiling, make sure that the place where you install it is
within ±15 degrees of the horizontal.
• Entrust installation to an experienced contractor or
installer when installing the unit on ceilings or other
high locations.
• When installing the unit in a high location, be sure that
the location and installation components (excluding the
supplied accessories) are strong enough to support the
unit and the mounting bracket, and install the unit
securely. If the components are not strong enough, the
unit may fall and cause serious injury.
• Always install the supplied wire rope to prevent the unit
from falling.
• If you install the unit in a high location, check
periodically, at least once a year, to ensure that the
connection has not loosened. If conditions warrant,
make this periodic check more frequently.
Before installation
Determine the shooting direction of the camera, and then
make the holes for the ceiling bracket (B) and the
connecting cables on the ceiling.
• The connecting cables cannot be passed through ceiling
bracket (B). A hole for the wiring is required in the
ceiling at the back of the unit where it is attached to the
ceiling.
• The recommended tightening torque for each screw are
described in below.
M3: 0.6 N·m (6.1 kgf·cm)
M2.6: 0.4 N·m (4.1 kgf·cm)
Notes
Installation of the camera using the tripod screws and
screw holes should not be done for installation on a
ceiling or a shelf, etc., in a high position.
4 = 4.5 - 7 mm
4 =
3
/
16
-
9
/
32
inches
Caution
CAUTION
Notes
M3 screw
4 = 3 – 8 mm
4 =
1
/
8
–
11
/
32
inches


 To Next Page