18
3
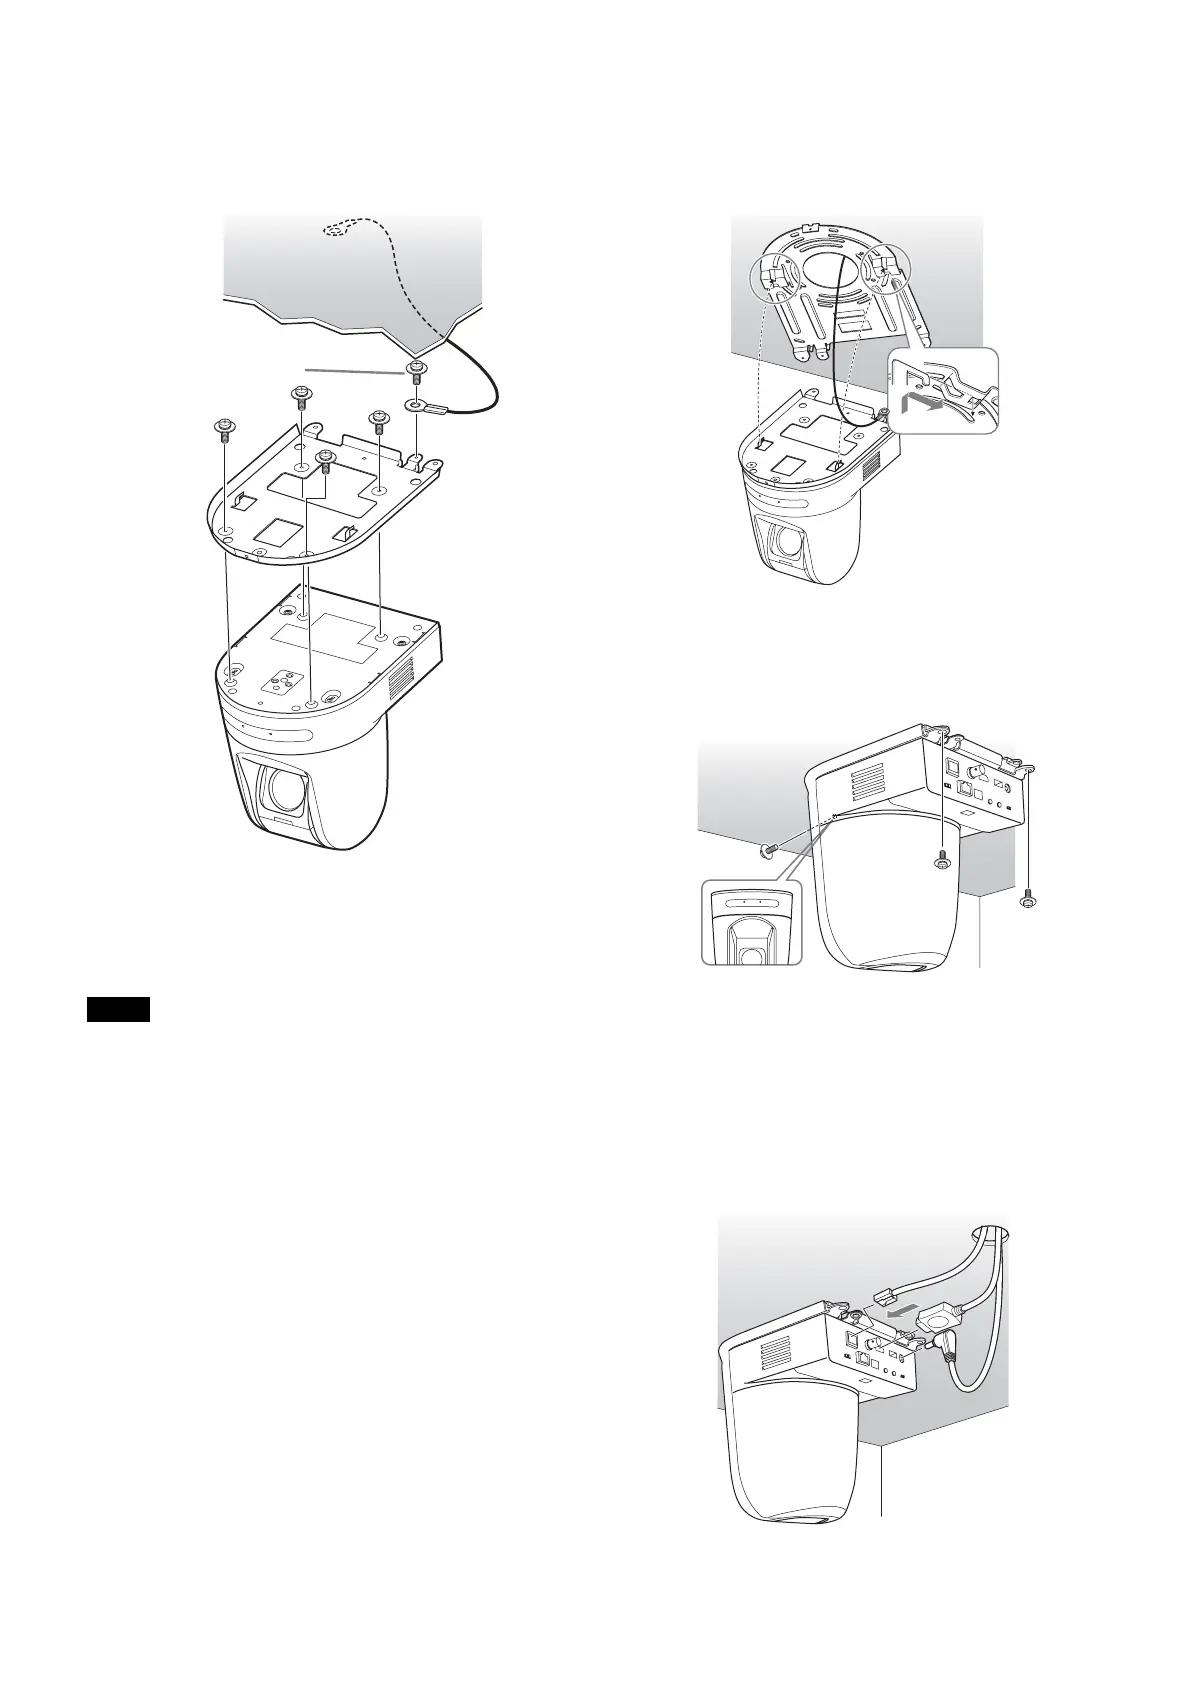
Attach the ceiling bracket (A) to the bottom of the
camera using the 4 screws (M 3
× 8) supplied.
Align the bracket holes with the screw holes on the
camera, and attach the bracket to the camera.
Tighten the screws a bit at a time in the numbered order
shown in the illustration. After all of the screws are
inserted and temporarily tightened properly, securely
tighten each one in turn.
For assembly, use only the screws supplied with the unit.
Using other screws may damage the unit.
4
Insert the protrusions raised on the ceiling bracket (A)
into the spaces prepared in the ceiling bracket (B),
and temporarily attach them by pushing the ceiling
bracket (A) to the rear.
5
While pushing up on the front part of the camera,
attach it using the 3 screws (M 3
× 8) supplied,
starting with the screw at position 1.
Lightly tighten screws temporarily in the order
indicated in the figure. Afterwards, screw each of
them firmly.
6-1
Connect the cables to the connectors on the rear of
the camera.
Note
Attach
the wire rope.
M 3
× 8
(supplied)
1
2
3
Ceiling
Ceiling
bracket (A)
4
Ceiling
Ceiling
bracket
(B)
Ceiling
bracket (A)
Ceiling
1
M 3 × 8
(supplied)
Ceiling


 To Next Page