Do you have a question about the Sony UP-25MD and is the answer not in the manual?
Provides essential guidance for operating the color video printer.
Section for recording model and serial numbers for product reference.
Crucial warnings to prevent fire, electric shock, and ensure proper operation.
Information for users in the USA and Canada regarding FCC rules and CSA standards.
Essential safety guidelines for operating the device in medical environments according to standards.
Specific EMC precautions required for medical environments and RF communication equipment.
Declaration of electromagnetic emissions compliance and guidance for environment use.
Details on immunity tests (ESD, transient, surge) and recommended environments for compliance.
Guidance on RF immunity and recommended separation distances for portable/mobile equipment.
Recommended separation distances for RF communications equipment.
Instructions and warnings for connecting the power supply, especially for medical use.
Details on high picture quality, resolution, menu settings, and HDTV support.
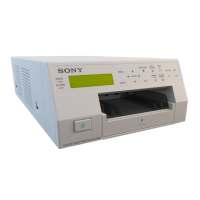
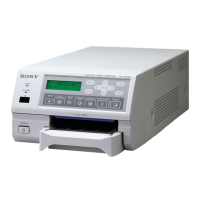
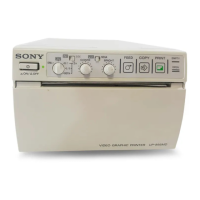
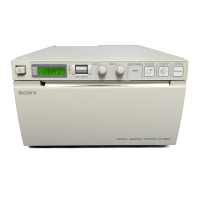
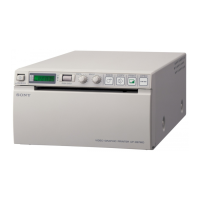
Identification and function of all buttons, indicators, and the display on the printer's front panel.
Details of rear panel connectors for video, remote control, and computer communication.
Explanation of the various sections and indicators shown on the printer's built-in display.
List of included accessories and instructions for verifying package contents.
Guidelines for connecting video equipment and HDTV signals for printing.
Steps for connecting remote control units or a computer for printer operation.
Step-by-step guide for correctly loading the ink ribbon into the printer.
Instructions for loading paper into the paper feed tray for printing.
Proper steps for loading paper, including handling protective sheets and tray insertion.
Guidance on attaching the stopper to prevent printouts from falling.
Choosing the correct input signal (VIDEO, S VIDEO, COMP) for printing.
Ensuring connections, consumables, input signal, and memory settings are correct.
Steps to capture a specific image from the source onto the printer's memory.
Troubleshooting blurred captures by adjusting memory mode settings.
Adjusting print speed, handling black lines, and improving print quality.
Procedures for stopping prints and resolving issues like pale printouts or black lines.
How to select and apply pre-configured user settings for printing.
Methods for specifying the number of identical copies to print.
Directly setting the number of copies using the dedicated PRINT QTY button.
Adjusting the number of copies through the PRINTER SETUP menu.
Queuing additional print jobs while the printer is busy with the current operation.
Options for different print layouts, including full-size, reduced images, and captions.
Explanation of memory modes (Frame, Field) for capturing images.
Steps to select between Frame and Field modes for image capture.
Selecting the specific memory page for storing captured images.
Choosing how many reduced images (1, 2, or 4) to capture per page.
Setting whether to show the captured memory image or the source image on the monitor.
Procedure for capturing multiple images and applying white borders.
Enabling or disabling white borders for reduced image printouts.
Troubleshooting blurred images by adjusting the memory mode.
Explanation of non-text caption entry operations and menu items.
Step-by-step guide for entering captions using the printer's interface.
Moving the cursor and selecting characters for caption input.
Switching between capital and lowercase letters for caption text.
Procedures for correcting or replacing entered characters in a caption.
Adding spaces or new characters into an existing caption.
Setting the printer to print with or without captions.
Setting the function of the STOP/CLEAR button for image deletion.
Clearing all captured images from all memory pages simultaneously.
Removing images from a single selected memory page.
Removing a specific reduced image from a memory page.
Hiding on-screen indicators like Q1, A, S, etc., from the video monitor.
Turning monitor display elements ON or OFF via the DISPLAY button or menu.
List of functions configurable through various menus like COLOR ADJUST, LAYOUT SETUP, etc.
Visual representation of the printer's menu hierarchy for accessing settings.
Fundamental steps for opening, displaying, and moving through printer menus.
How to highlight and select specific settings within a menu.
Adjusting values for selected menu items using directional buttons.
Increasing or decreasing setting values using the directional buttons.
Restoring printer settings to their original factory values.
Adjusting Hue, Color Intensity, Gain, and Offset for input signals.
Matching monitor color to printout color using THRU/EE signals.
Fine-tuning color intensity, contrast, and sharpness for printouts.
Modifying Red, Green, and Blue color components for printout intensity.
Setting DARK/LIGHT for contrast and sharpness levels for printouts.
Setting printout tone to SOFT, NORMAL, or HARD for image areas.
Adjusting printout area to eliminate black frames or lines caused by signal mismatch.
Using WINDOW SETUP items to remove black lines from printouts.
Adjusting the printout area to fit the paper using the RESIZE TO FIT function.
Configuring the RESIZE TO FIT setting for printout scaling.
Steps to adjust color balance using the COLOR BALANCE menu.
Generating test prints to evaluate color balance across nine images.
Choosing the image with the optimal color balance from test prints.
Fine-tuning color balance values when initial results are not optimal.
Using HSV adjustment to selectively modify specific colors (Red, Yellow, Green, etc.).
Displaying the HSV adjustment menu from the PRINTER SETUP.
Choosing a specific color (e.g., Red, Yellow) to adjust using the COLOR SEL option.
Choosing parameters like INTENSITY, SATURATION, VALUE, or HUE for color adjustment.
Explanation of how INTENSITY, SATURATION, VALUE, and HUE parameters affect color.
Revising parameter values for optimal color adjustment results.
Restoring HSV adjustment parameters to their factory default values.
Choosing the correct input signal type (V/SV/COMP) for HDTV sources.
Configuring the printer to automatically detect or manually set SD/HD signal types.
Choosing the format (e.g., 1080i, 720p) for HDTV input signals.
Determining whether to output unconverted HDTV or downconverted SDTV signals.
Choosing how HDTV signals are converted to SDTV (Letterbox, Crop, Squeeze).
Mapping specific printer operations to the remote control unit's switches.
Modifying the contrast of the printer's LCD screen for better readability.
Setting the behavior of the tray light and operational/error sound tones.
Configuring the baud rate for computer communication via RS-232C.
Showing ink ribbon type and remaining print count on the monitor.
Storing custom printer configurations as user sets for quick recall.
Saving current settings as a user set and optionally naming it.
Loading, copying, or modifying existing user set configurations.
Returning all printer settings to their factory default configurations.
Important safety notices regarding cleaning messages, installation environment, and transportation.
Procedure for cleaning the thermal head and internal rollers using a cleaning cartridge.
Details on available color printing and laminate printing packs (UPC-21S/21L/24SA/24LA).
Tips for preserving printouts and notes on ink ribbon/paper usage.
Details on power requirements, operating conditions, and dimensions.
Specifications for video input/output connectors, remote control, and computer interface.
List of included and optional accessories for the printer.
Details on using the REMOTE 2 connector for automatic printing capabilities.
Information on electrical safety and suitability for use in specific medical environments.
Common problems and initial checks for suspected damage or malfunctions.
Resolving issues like blank paper ejection, ALARM indicator, or print marks/stripes.
List of error messages, their causes, and remedies for printer malfunctions.
Diagnosing and resolving issues related to paper mismatches, switch levers, and mechanical troubles.
Understanding warning messages like HIT ANY KEY, INPUT MISMATCH, or NO INPUT.
Interpreting messages like PLEASE WAIT, ADJUSTING TEMP, or CLEAN HEAD.
Addressing warnings related to ribbon removal or entering transport mode.
Steps to clear jams by ejecting the tray and removing partially jammed paper.
Procedure for opening the base plate to clear deeply lodged paper jams.