| Specim IQ User Manual | 33
2.
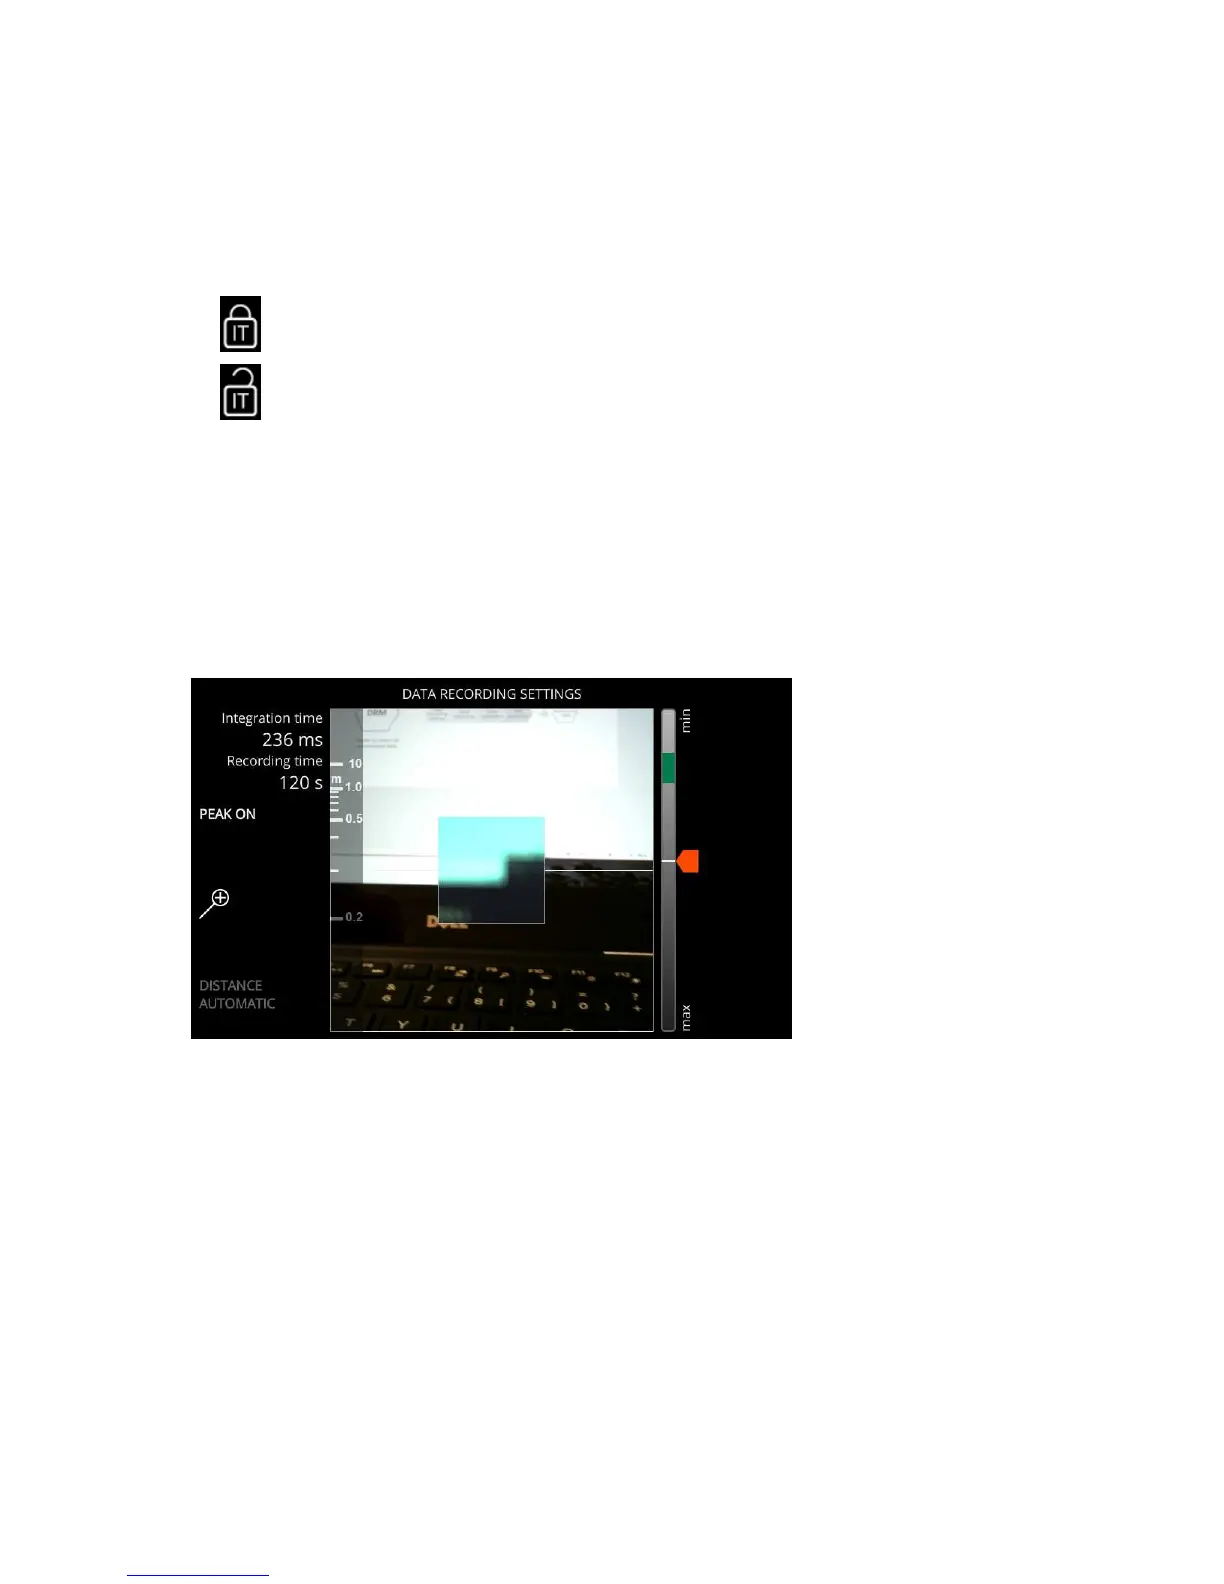
Set the integration time.
The camera calculates an estimate of a suitable integration time, and marks it with a green area on the integration
time slider range. The current integration time and the estimated recording time are shown in the upper left-hand
corner of the viewfinder.
If necessary, you can also lock the integration time by pressing the Custom 1 button. The Custom 1 button
symbol indicates if the integration time has been locked or not, as follows:
•
— Integration time is locked.
•
— Integration time is not locked.
You can adjust the integration time by:
• Sliding the integration time slider upward or downward, on the touch screen.
• Using the UP and DOWN buttons.
3.
Optional: Align the focus camera and viewfinder camera views.
The focus camera and the viewfinder camera objectives are on different places on the camera. The DISTANCE
AUTOMATIC mode attempts to align these views with each other, but occasionally it fails to do so. In these
cases, the focus camera and viewfinder camera views may not be perfectly aligned, as depicted in the figure
below:
To align the views:
Figure 47: Focus Camera and Viewfinder Camera Views
a) Enable DISTANCE MANUAL by pressing the Custom 4 button.
b) Use the UP and DOWN buttons or the touch screen to align the viewfinder camera view with the focus camera
view.
Selecting the White Reference Area
This section describes how to select the white reference area when recording data on Specim IQ.
Selecting the white reference area is part of the data recording procedure on every data recording mode.
Proceed as follows:
Select the white reference area from the touch screen.
The screen below is opened: