Power-Style™ QED-2 Switchboards Section 4—Installation
16 © 1988–2018 Schneider Electric All Rights Reserved 80043-055-13
ENGLISH
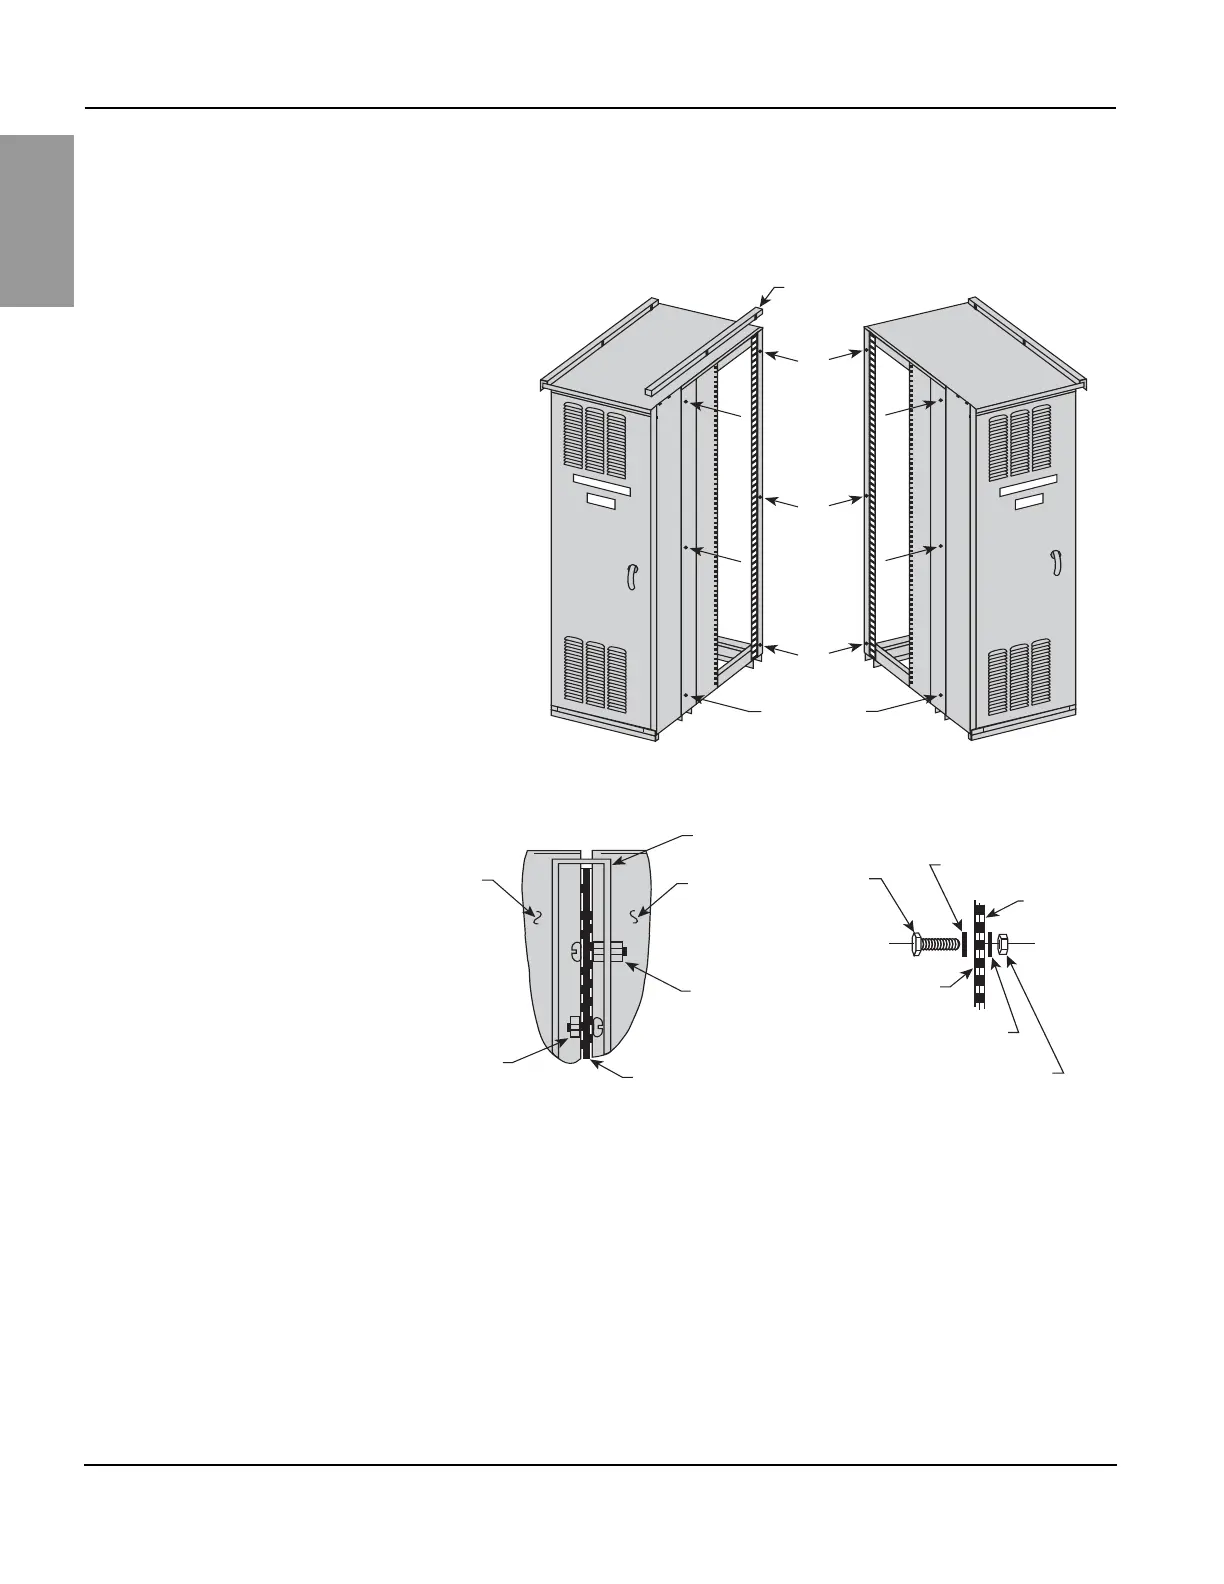
Joining Shipping Sections—Outdoor Switchboards
1. Remove the center top cap (Figure 6) from the left-hand section, and retain all
hardware for reuse.
2. When possible, open or remove the front and rear doors and panels, providing
access to bolt adjacent shipping sections together.
3. Remove three 0.5-in. (13 mm) diameter knockouts from the front vertical corner
channel and three from the rear vertical corner channel (a total of six per frame
side) as indicated by the arrows in Figure 6.
4. Position each adjacent section, carefully leveling it and aligning it with the
previous section. If lifting straps are provided, completely remove them from
the sides being bolted together so the sections can be joined flush. The only
gasket required between sections is provided on the roof flange.
Figure 6 – Joining Adjacent Sections—Outdoor Switchboards
Center top cap
See Detail A
Knockouts
(typically 6 places)
See Detail B
Left-hand
section top
plate
Center top cap
Right-hand
section top
plate
Typical:
1/4-20 x 1-1/4 in. slotted
pan head screw, 1/4 in. flat
washer, and 1/4-20 hex nut
Installed
gasketing
Typical:
1/4-20 x 5/8 in.
slotted pan head
screw, 1/4 in. flat
washer, and
1/4-20 hex nut
3/8-16 x1 in.
cap screw
3/8 in. external
tooth lock washer
3/8-16 hex nut
3/8 in. helical
lock washer
Left-hand
section
Right-hand
section
Detail A
Detail B