January, 2016 120-53
Model F120 UV/IR Flame Detector
Install the Front Housing
!
IMPORTANT: The front and rear housing threads and O-ring are shipped prelubricated.
This lubrication is required. It insures the ease of assembly and future disassembly.
It also increases the water resistance of the unit. Should the lubrication become
inadvertently contaminated (dirt, etc.) or removed, the lubrication replacement proce-
dure in the Maintenance section of this manual must be followed.
14. Engage the threads of the front and rear housings.
It is often helpful to rotate the front cover backwards (counterclockwise) one to two
turns. This will assist in locating the threads prior to tightening the front housing into
the rear housing. While rotating the front housing counterclockwise and applying
slight rearward pressure, a slight “click” can be heard. The “click” is a useful
indication that the front and rear housings are aligned and can be tightened together.
15. Tighten the front and rear housings BY HAND. Turn the front housing into the rear
housing by turning it clockwise. If necessary, the rear housing can be held in correct
orientation by placing a 1 1/4 inch open end wrench over the rear mounting hex
shaped conduit entrance while tightening the front housing.
!
WARNING: Do not over tighten the front and rear housings. Do not use a wrench or
other mechanical device to tighten the housings. Over tightening may damage the
threads and or prevent the unit from operating.
16. After ve (5) complete turns, the O-ring will begin to engage the rear housing.
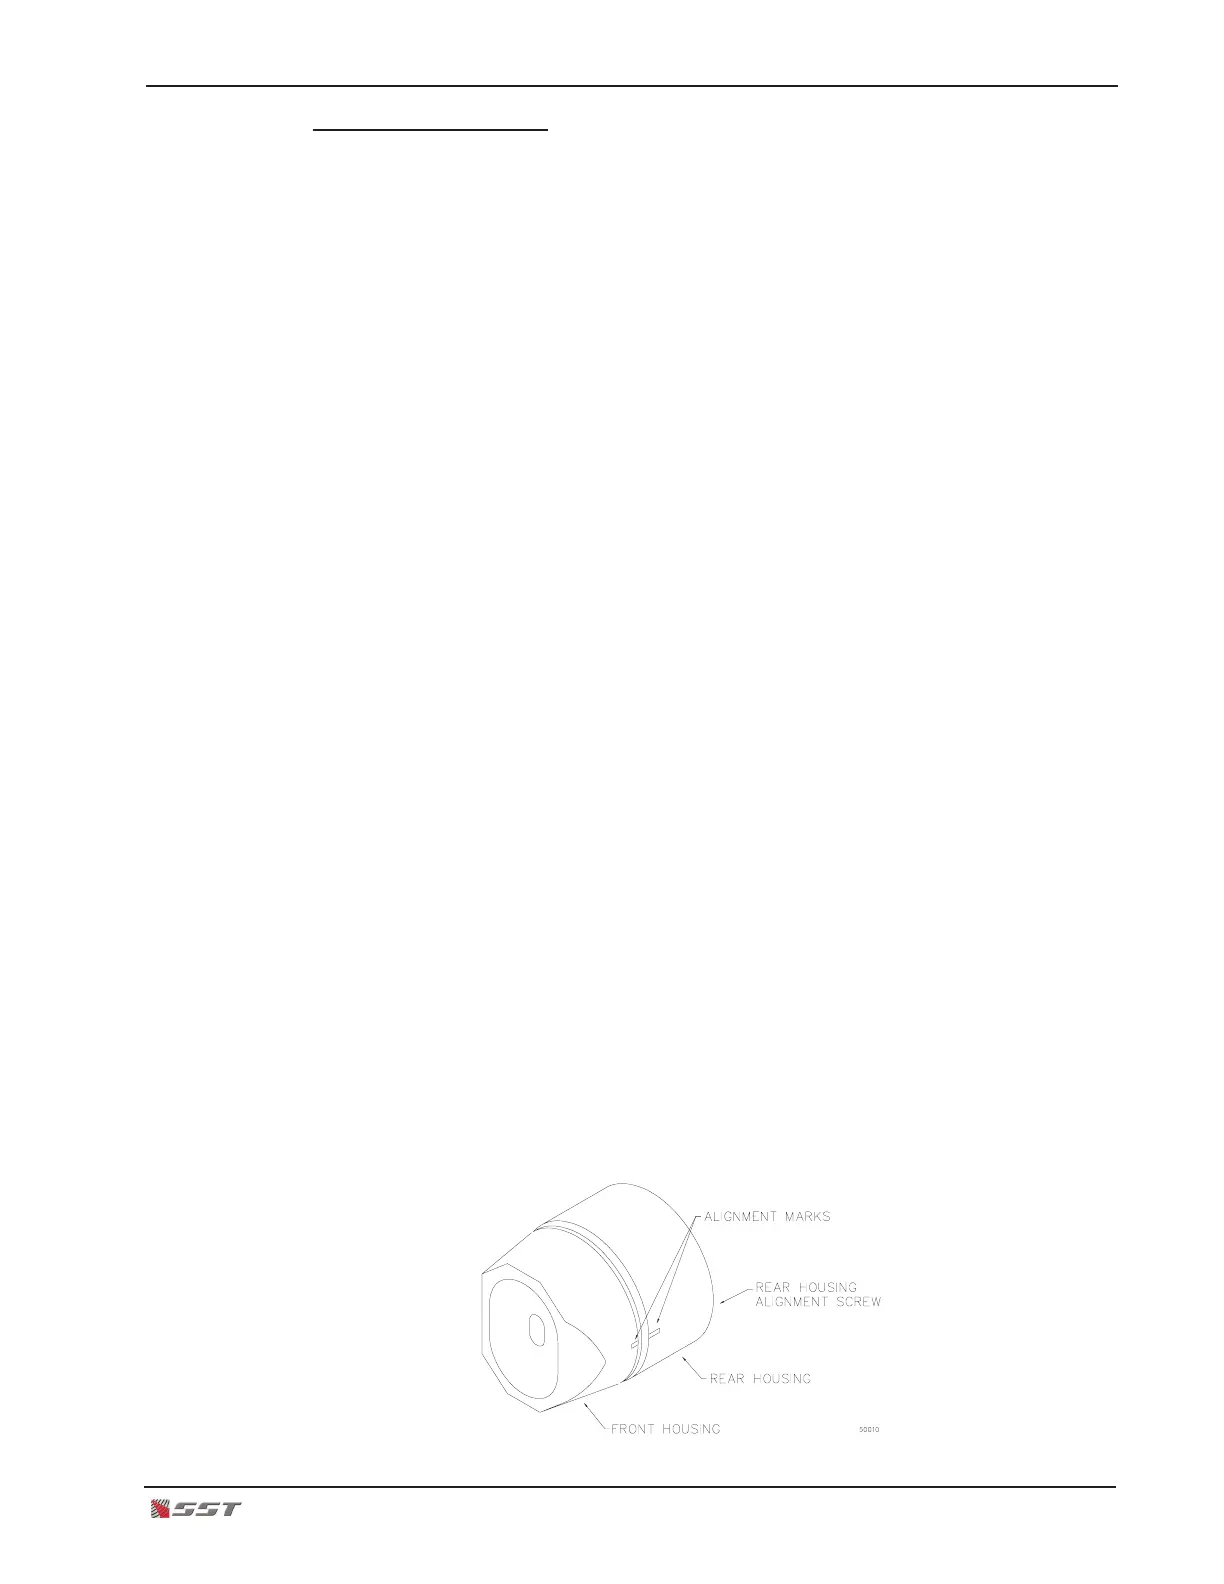
Take note of the alignment “V” groove located on the front housing and alignment
marks on both the front and rear housings.
When the O-ring disappears and the rear-most side of the alignment “V” groove has
disappeared below the leading edge of the rear housing, the front cover is adequately
engaged to insure an explosion-proof and water resistant junction. It also indicates
that the spring-loaded lamp contacts are engaging the top PC board.
17. Continue to rotate the front housing until all the alignment marks on the front and
rear housings are aligned. When both alignment marks are aligned, the rear housing
alignment screw must be fully seated to insure a water resistant seal.
!
WARNING: The alignment screw must be fully seated to insure proper operation
and ame detection protection. Neglecting to fully seat the alignment screw may
cause moisture to accumulate in the ame detector, and can cause the housing to
no longer be explosion-proof.
 Loading...