Distance Goal - The default distance goal is 5 miles (English units) or 5 kilometers (metric units). You may enter any
distance goal from 5 miles (5 kilometers) to 19.80 miles (31.86 kilometers).
2. When the desired goal value has been entered, press the START or ENTER key to accept the current value. You are prompt-
ed to enter your weight.
■
The treadmill will display a default weight of 155 pounds (70 kg). You may enter any weight from 0 to 350 pounds (0
to 135 kg).
■
You can enter your weight using the numeric keypad. Use the keys to enter your correct weight.
■
You can press the or key, as necessary, to increase or decrease the displayed weight in 1 pound (or 1 kg)
increments.
■
When your correct weight has been entered, press the key to accept the displayed value and proceed to the next
parameter.
3. The Information Window displays a prompt to enter a time goal or distance goal, as appropriate, for the first segment of
the program:
Time Goal - The default segment time goal is 4 minutes. You may enter any time goal from 1 minute to the remaining
goal time.
Distance Goal - The default distance goal is 1 mile (English units) or 1 kilometer (metric units).You may enter any seg-
ment distance goal from 0.10 miles (0.10 kilometers) to the remaining goal distance.
4. When the desired segment goal value has been entered, press the START or ENTER key to accept the displayed value and
proceed to the next parameter.
5. The Information Window displays a prompt to enter a speed for the first segment of the program.
■
You may enter any speed from 0.5 to 10.0 mph (0.8 to 16.0 kph) for 110-volt units or 0.5 to 12.0 mph (0.8 to 19.3 kph)
for 220-volt units, in increments of 0.1 units.
6. When the desired segment speed value has been entered, press the S
TART or ENTER key to accept the displayed value and
proceed to the next parameter.
7. The Information Window displays a prompt to enter an incline for the first segment of the program.
■
You may enter any incline from 0.0 to 15.0%, in increments of 0.5%.
8. When the desired segment incline value has been entered, press the S
TART or ENTER key to accept the displayed value
and proceed to the next segment.
9. The Information Window will display prompts for additional program segments. Continue to enter the desired goal (time
or distance, as appropriate), speed and incline until values for all segments of the program have been entered. The sys-
tem will continue to prompt for segment values until one of the following conditions is met:
■
The total number of segments equals 20.
■
The combined value of the segment goals is equal to the total goal.
10. When values for the final segment have been entered, you are prompted with a 3 second countdown, then the treadmill
begins the program.
11. You can adjust the incline of the treadmill during the program:
■
You can adjust treadmill incline from 0 to 15%, in 0.5% increments. Press the key to increase the treadmill
incline; press the key to decrease the treadmill incline.
12. You can adjust the speed of the treadmill during the program:
■
You can specify a desired speed from 0.5 to 10.0 mph (0.8 to 16.0 kph) for 110-volt units or 0.5 to 12.0 mph (0.8 to
19.3 kph) for 220-volt units, using the numeric keypad. Use the keys to enter your desired speed, then press
the S
TART or ENTER key to accept the entered speed.
■
You can adjust treadmill speed from 0.5 to 10.0 mph (0.8 to 16.0 kph) for 110-volt units or 0.5 to 12.0 mph (0.8 to 19.3
kph) for 220-volt units, in 0.1 mph (or 0.1 kph) increments. Press the key to increase the treadmill speed; press
the key to decrease the treadmill speed.
13. You can adjust your time goal during the program:
■
You can adjust your time goal from 5 minutes to the maximum allowed program time. Press the ADJUST key to
increase your time goal; press the A
DJUST key to decrease your time goal.
14. If desired, you can use the personal cooling fan during your workout (see “Using the Cooling Fan” for details).
To operate the treadmill during Cooldown:
1. You can adjust the incline of the treadmill during the program:
■
You can adjust treadmill incline from 0 to 15%, in 0.5% increments. Press the key to increase the treadmill
incline; press the key to decrease the treadmill incline.
2. You can adjust the speed of the treadmill during the program:
■
You can specify a desired speed from 0.5 to 10.0 mph (0.8 to 16.0 kph) for 110-volt units or 0.5 to 12.0 mph (0.8 to
19.3 kph) for 220-volt units, using the numeric keypad. Use the keys to enter your desired speed, then press
the S
TART or ENTER key to accept the entered speed.
■
You can adjust treadmill speed from 0.5 to 10.0 mph (0.8 to 16.0 kph) for 110-volt units or 0.5 to 12.0 mph (0.8 to 19.3
kph) for 220-volt units, in 0.1 mph (or 0.1 kph) increments. Press the key to increase the treadmill speed; press
the key to decrease the treadmill speed.
3. When the cooldown cycle ends, the treadmill will slow to a stop. If you wish to exit the cooldown cycle before it ends auto-
matically, press the S
TOP key. The treadmill will slow to a stop.
HEART RATE MONITORING
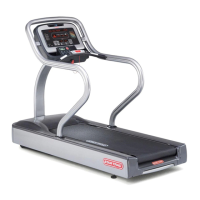
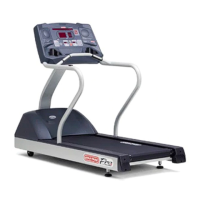
Heart rate monitoring allows you to determine if your treadmill workout is too challenging or not challenging enough. Monitoring
heart rate is easy with the STAR TRAC PRO S TREADMILL, which provides both a heart rate strap and heart rate grips that
allow you to your heart automatically. Your goal will be to keep your exercise heart rate at 60 to 90 percent of the theoretical max-
imum for your age as listed on the Target Heart Rate table and graph in chapter 6.
NOTE: The Heart Rate monitor is not a medical test, nor is it designed as a medical test. It is simply a guide to target heart rate
training. Please consult with your physician prior to engaging in any strenuous physical activity.
IMPORTANT: The manufacturer does not warrant the heart rate system performance on this product, as the heart rate system
performance varies, based on a user’s physiology, fitness level, age, method of use and other factors. Furthermore, the heart rate
system is not for medical use.
C
ONTACT
H
EART
R
ATE
M
ONITORING
You may use the heart rate contact grips to automatically check your heart rate. Just follow these steps:
1. Grasp the stainless steel heart rate contact grips; you do not have to squeeze tightly.
2. When a heart rate has been detected, the indicator illuminates, indicating a calculation is taking place. The
Information Window displays “HR DETECTED”.
3. When your heart rate has been acquired, the indicator will begin pulsating, and your heart rate in beats per minute
(BPM) will be displayed in the Heart Rate Window continuously.
4. Release the Heart Rate grips if you wish to remove your heart rate from the display.
NOTE: Contact heart rate may not give accurate BPM when exercising over 4.0 mph.
C
HEST
S
TRAP
H
EART
R
ATE
M
ONITORING
You may use the heart rate strap to automatically check your heart rate. Just follow these steps:
1. Before beginning your workout, or during a pause, moisten the back of the transmitter on the heart rate strap (not includ-
ed). Place the strap snugly around your chest with the transmitter resting directly over your sternum.
2. When a heart rate has been detected, the indicator illuminates, indicating a calculation is taking place. The
Information Window displays “HR DETECTED”.
3. When your heart rate has been acquired, the indicator will begin pulsating, and your heart rate in beats per minute
(BPM) will be displayed in the Heart Rate Window continuously.
4. Remove the heart rate strap, if you wish to remove your heart rate from the display.
NOTE: The performance of the transmitter may be affected by body types, body oils, metal in clothing, and outside electrical inter-
ference. Always be sure that the transmitter and skin are in good contact. Avoid operating other electrical equipment near your
treadmill when you use the heart rate strap.
4
STAR TRAC PRO / PRO S TREADMILL O
WNER
’
S
M
ANUAL
3522 STAR TRAC PRO / PRO S TREADMILL O
WNER
’
S
M
ANUAL