6. Reverse procedure to install.
A. Verify there is no water in air trap.
B. Verify there is no water, kinks or holes in
pressure sensor tubing.
C. Verify tubing clamp is properly installed.
7. Check for proper operation.
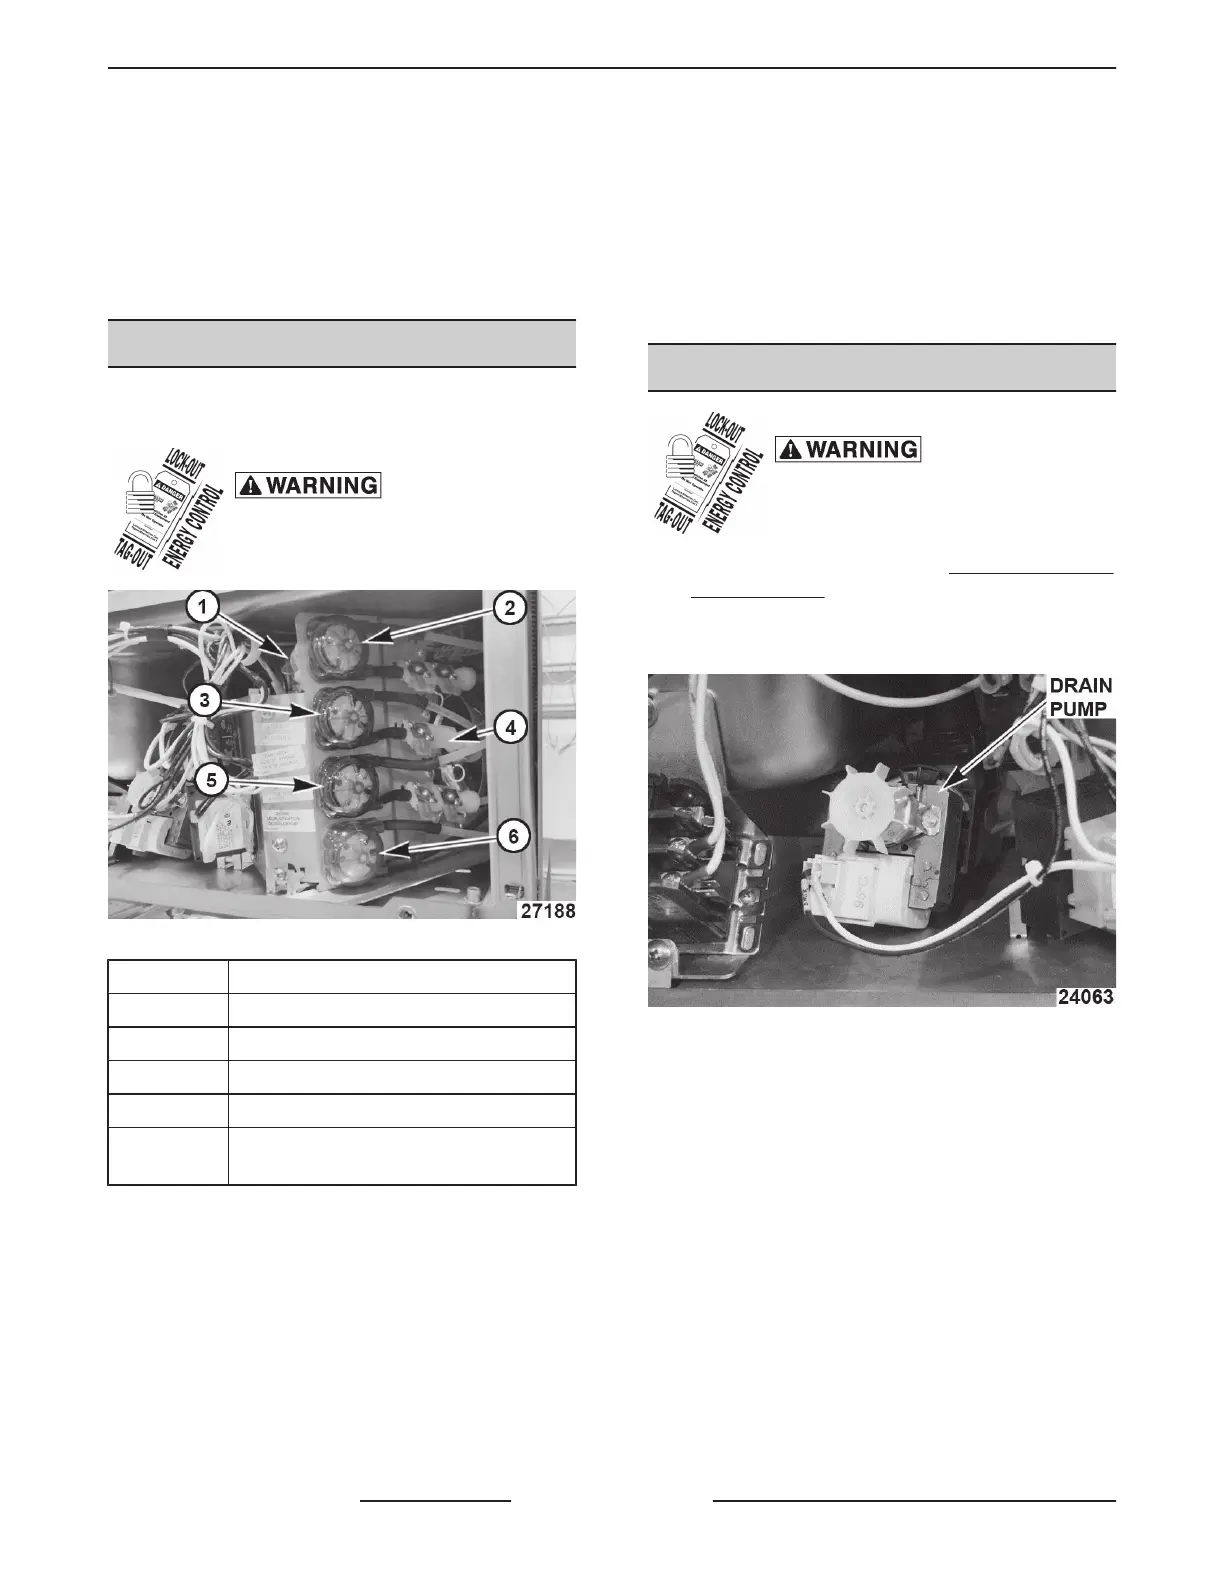
CHEMICAL PUMPS - WELCO
If chemical pump label is no longer visible, replace
label to identify pump for future servicing.
Disconnect the
electrical power to the machine and
follow lockout / tagout procedures.
Fig. 15
NUMBER DESCRIPTION
1 Chemical Pump Motor
2 Detergent Chemical Pump
3 Rinse Aid Chemical Pump
4 Chemical Sensor
5
Sanitizing Chemical Pump (SU-L & SG
only)
1. Remove front trim panel.
2. Remove clamps and tube and pull from sensor.
3. Remove snap cover.
4. Remove tube from chemical sensor [5].
5. Replace with new chemical sensor [5].
6. Replace snap cover.
7. Replace hose to tube and sensor. Secure with
clamps.
NOTE: Do NOT use zip ties.
NOTE: Do NOT over squeeze clamp. Over squeezing
causes leaks.
Replacing Chemical Pump
1. Twist pump Counter Clock Wise and slide off
shaft.
2. Reverse procedure to install.
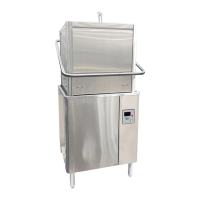
DRAIN PUMP
Disconnect the
electrical power to the machine and
follow lockout / tagout procedures.
1. Remove front trim panel and
LEFT AND RIGHT
TRIM PANELS.
2. Remove electrical connections noting their
location.
Fig. 16
3. From left side using a long flathead screwdriver,
GENTLY open tab securing drain pump.
NOTE: Tab is easily broken. Do not need to replace
broken tab.
SG, SU-L, SU-H DISHWASHERS - REMOVAL AND REPLACEMENT OF PARTS
F45577 (1215) Page 10 of 59