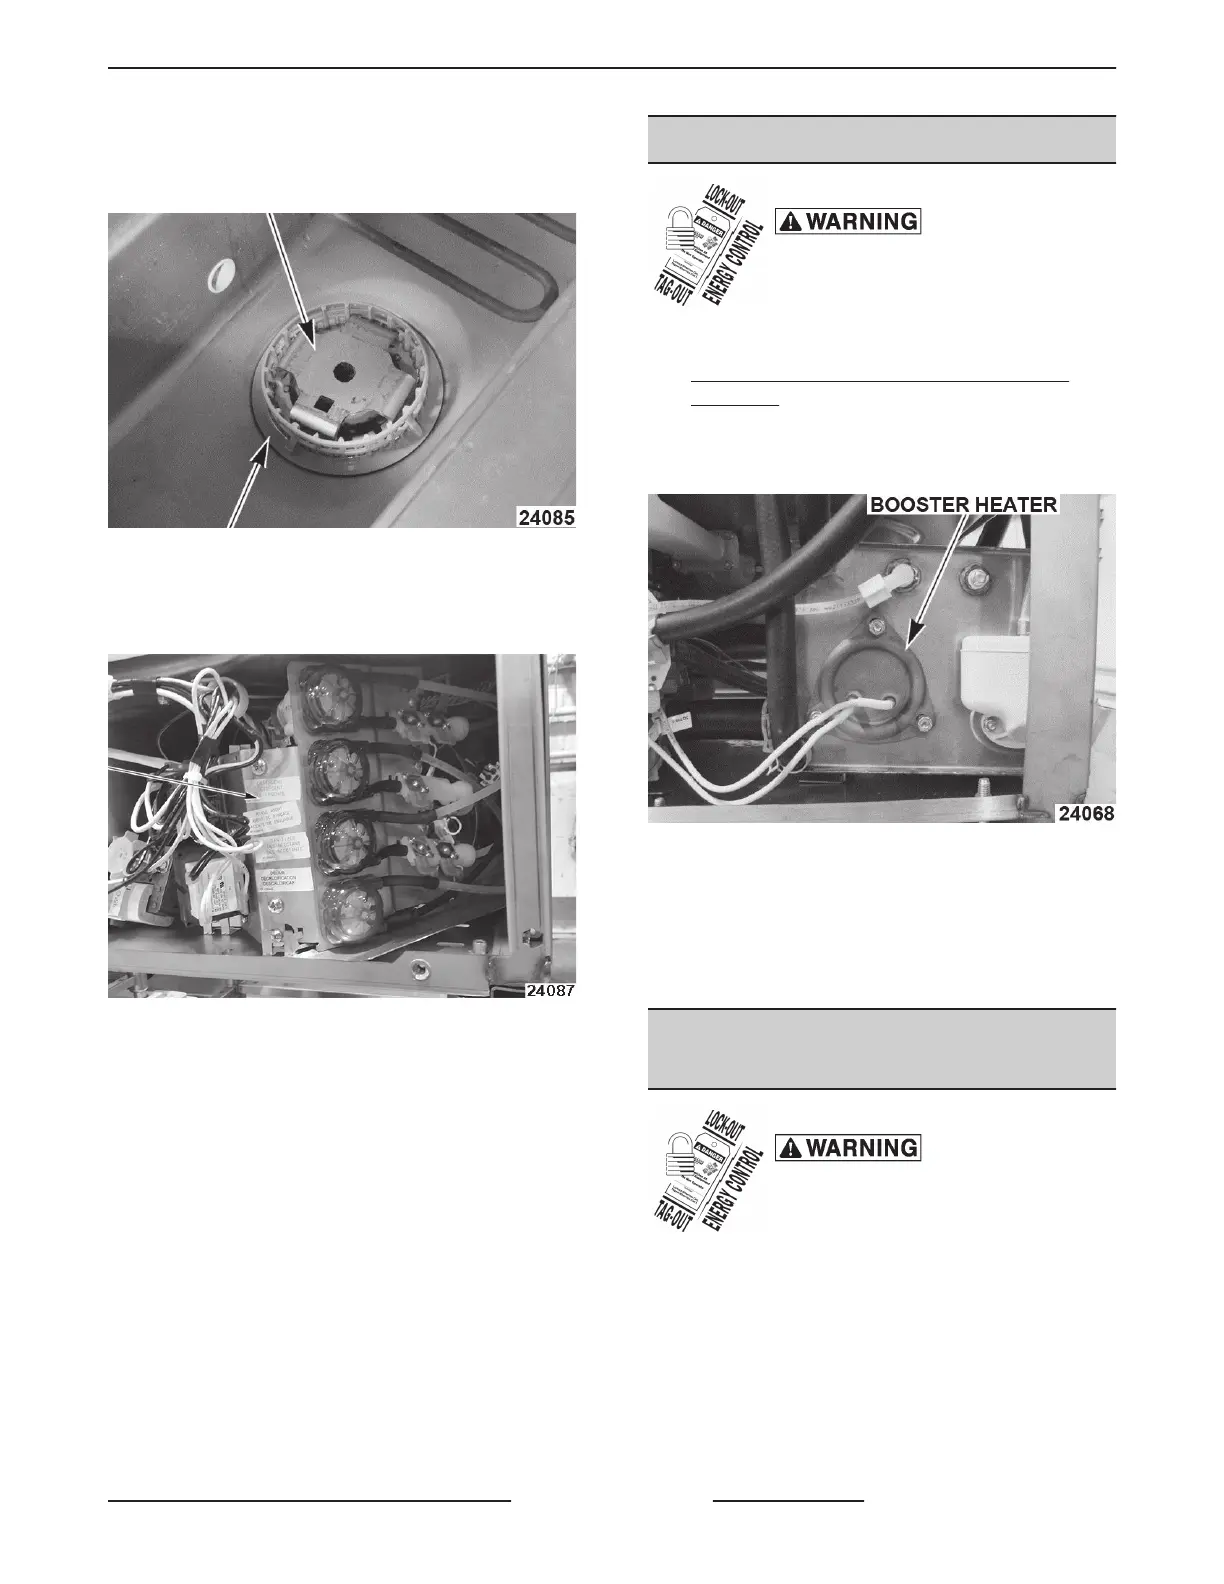
10. Using service tool, remove pump nut.
NOTE: ⅜" drive extension can be used to turn service
tool.
Fig. 33
11. If clearance is necessary to remove wash pump/
motor, move chemical pump mounting bracket
assembly.
Fig. 34
12. Remove wash pump and motor assembly.
13. Reverse procedure to install.
NOTE: Transfer motor mount with locator nut just
started on threads onto replacement wash pump/
motor assembly.
NOTE: Once wash pump and motor are positioned
under dishwasher with motor mount slid into place,
tighten pump nut inside sump one thread for stability.
Once hose and electrical connections have been
made, tighten pump nut.
14. Check for proper operation.
BOOSTER HEATER (SU-H)
Disconnect the
electrical power to the machine and
follow lockout / tagout procedures.
1. Remove front trim and right side panel.
2.
PURGE BOOSTER/HOLDING TANK FOR
SERVICE.
3. Disconnect booster heater wires from contactor.
4. Remove mounting screws.
Fig. 35
NOTE: Proper position with element wires on bottom.
5. Remove booster heater.
6. Reverse procedure to install.
7. Check for proper operation.
BOOSTER THERMISTOR & HIGH
LIMIT PROTECTION (SU-H)
Disconnect the
electrical power to the machine and
follow lockout / tagout procedures.
NOTE: Before replacing the High Limit, push reset
button on face of both high limit protectors. Verify that
this does not fix issue before proceeding.
Surface-Mount Thermistor
1. Remove front, left, and right trim panels.
2. Remove mounting nut and disconnect wires at
connector.
SG, SU-L, SU-H DISHWASHERS - REMOVAL AND REPLACEMENT OF PARTS
Page 15 of 59 F45577 (1215)