25
03.11
Strapex SMA 30
9 CORRECTIVE MAINTENANCE / ADJUSTMENTS
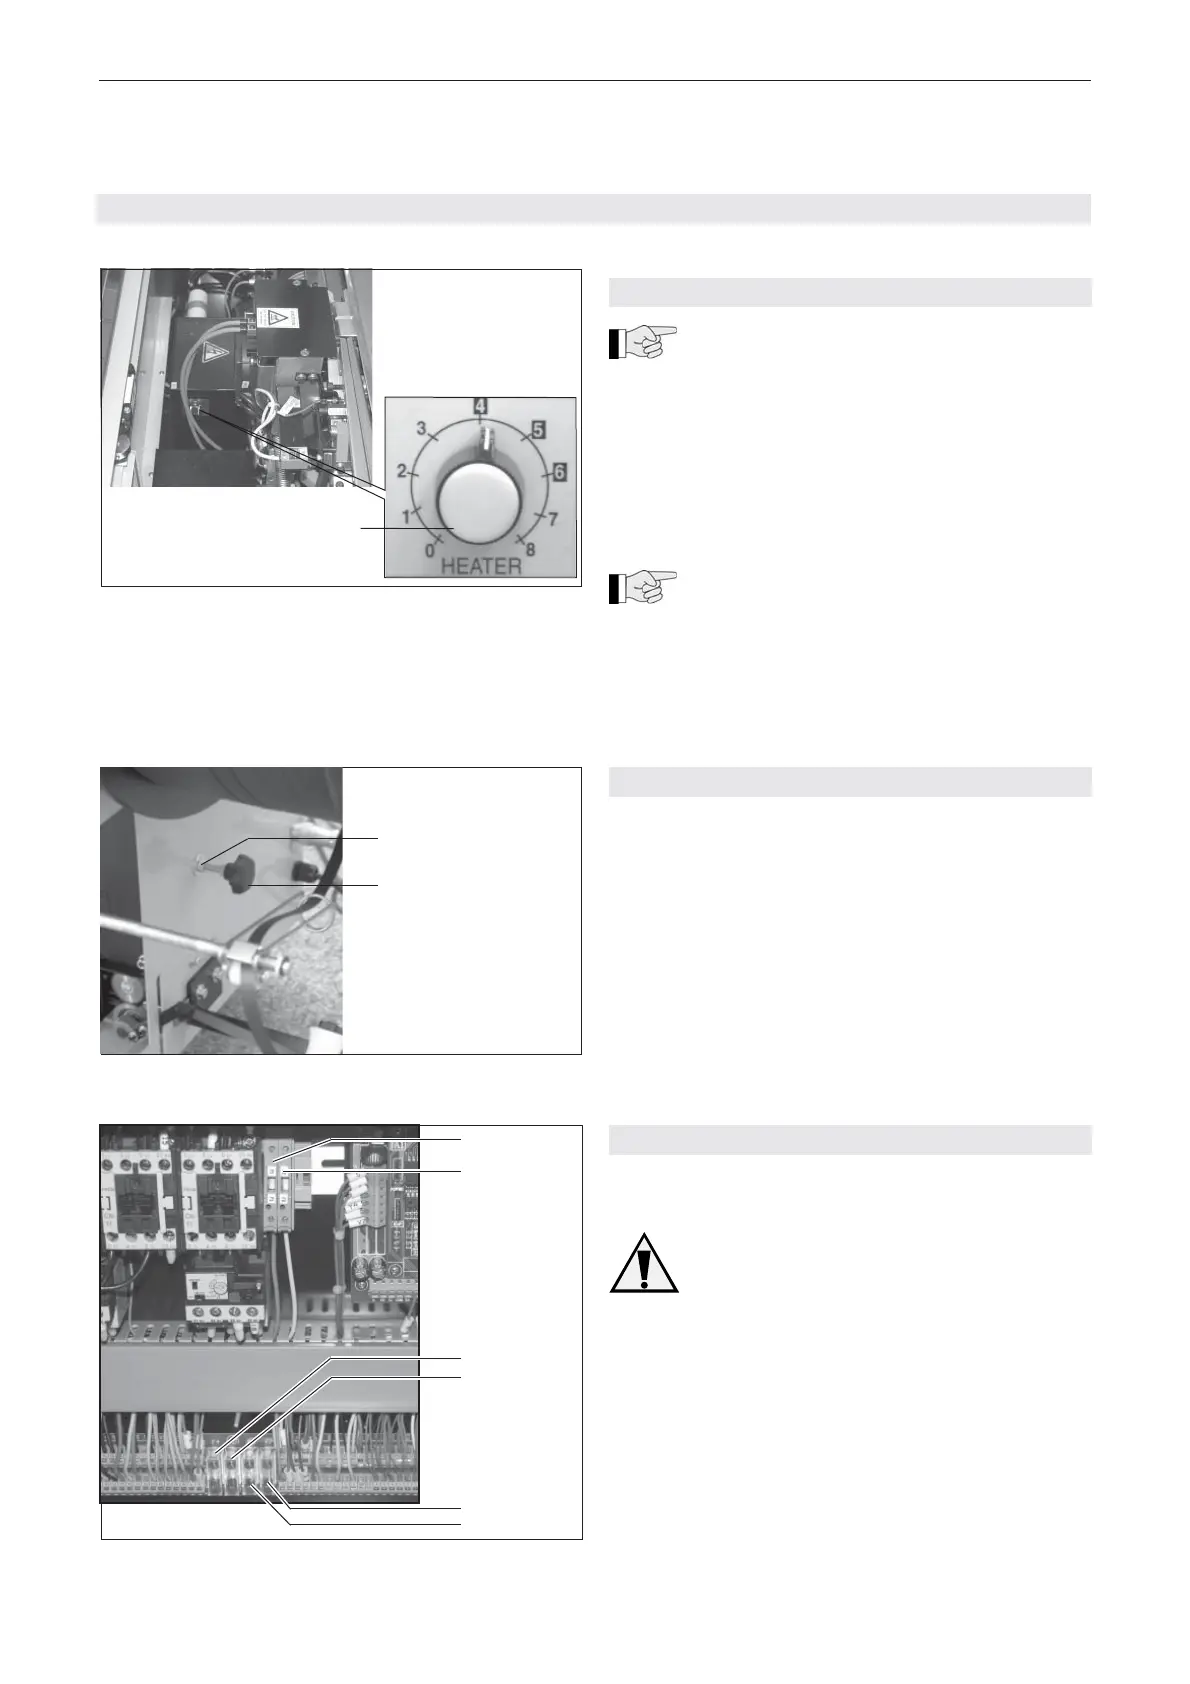
9.1 ADJUST WELDING TEMPERATURE
The welding temperature can be adjusted to
suit the strap thickness and strap quality:
– For thin straps = low temperature.
– For thick straps = high temperature.
– Open table plate (refer to chapter 8).
– Turn the ”Welding temperature” (11/1) potentiome-
ter to the required position.
thin straps approx. position 4
thick straps approx. position 6
Set potentiometer stepwise until best strap
sealing is performed.
– Close the table plate carefully, using both hands.
Mount both screws.
2
1 2 3 4
Fig. 13
1
2
3
4
6
5
Fig. 11
1
Fig. 12
1
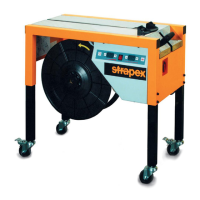
9.2 SET STRAP MAGAZINE FILLING
The quantity of strap in the magazine must be adap-
ted to the size of the package.
– Loosen counter nut (12/1) and turn knurled nut
(12/2) clockwise:
Quantity of strap is decreased.
– Loosen counter nut (12/1) and turn knurled nut
(12/2) counter-clockwise:
Quantity of strap is increased.
– Tighten counter nut (12/1).
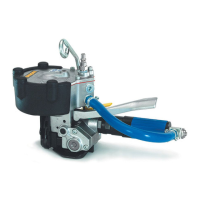
9.3 REPLACING FUSES
– Loosen eight phillips head screws and remove rear
cover.
Before opening the cover of control box,
disconnect the power plug.
– Loosen two phillips head screws and remove cover
of control box.
– Swivel down fuse cover plate (13/1 and 13/2) and
replace defective fuse:
13/1 = Fuse F1 (220 V = 15A)
13/2 = Fuse F2 (220 V = 15A)
13/3 = Fuse F4 (220 V = 2A, 110 V = 3A)
13/4 = Fuse F5 2A
13/5 = Fuse F6 4A (slow blow)
13/6 = Fuse F7 2A (slow blow)
– Re-install cover of control box and rear cover.