202
TOP COVER INTERLOCK SENSOR AND ACTUATOR
Required Tools
• 2 mm hex wrench
• 2.5 mm hex wrench
Removing Top Cover Interlock Sensor
1. Power OFF the printer. See “Powering Off” on page 169.
2. Open the front top cover.
3. Disconnect the top cover sensor cable at the quick disconnect.
4. Remove the three cable ties that secure the cable to the sensor mounting bracket.
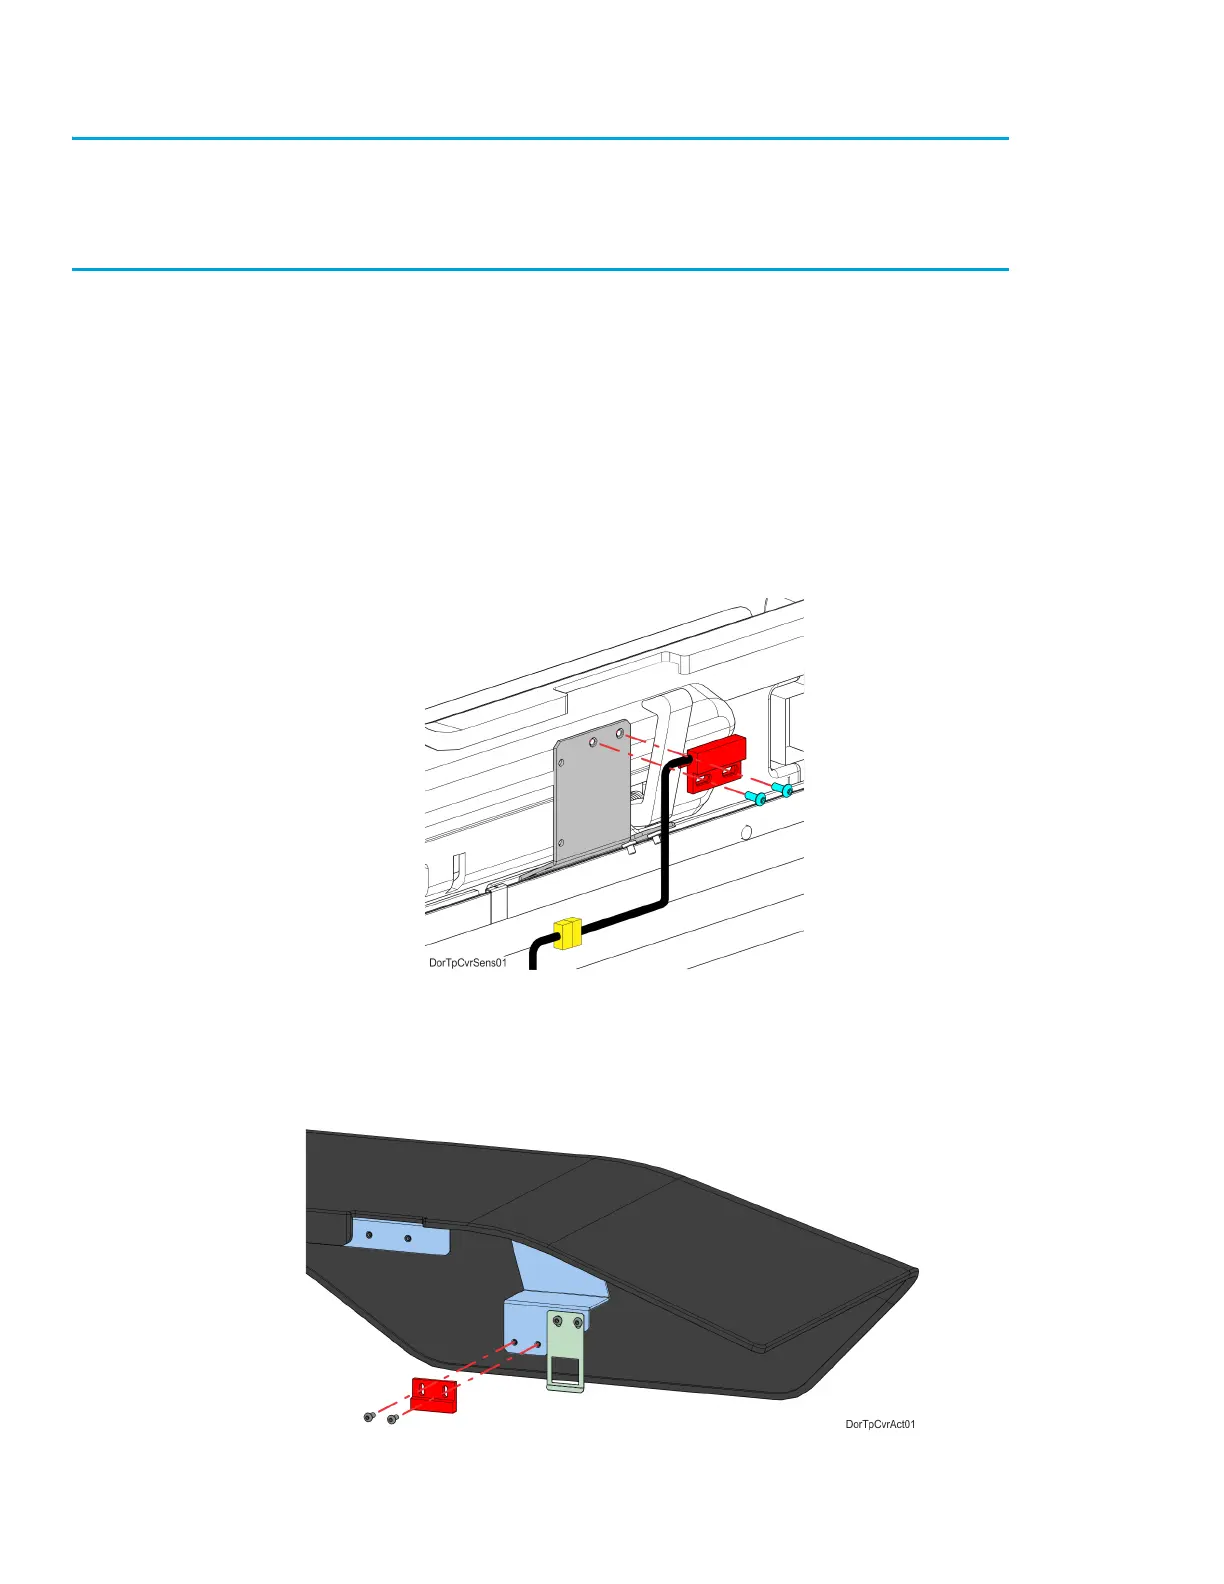
5. Use a 2 mm hex wrench to remove the sensor mounting screws (2). See Figure 7-44.
6. Remove the top cover sensor from the mounting bracket.
Figure 7-44: Top Cover Sensor Mounting Screw Locations
7. Use a 2.5 mm hex wrench to remove the top cover actuator mounting screws (2). See Figure 7-45.
8. Remove the top cover actuator.
Figure 7-45: Top Cover Actuator Mounting Screw Locations