Finding a Remedy Troubleshooting Issues and Solutions
Page 72
© Copyright 2022 Stratasys. All rights reserved.
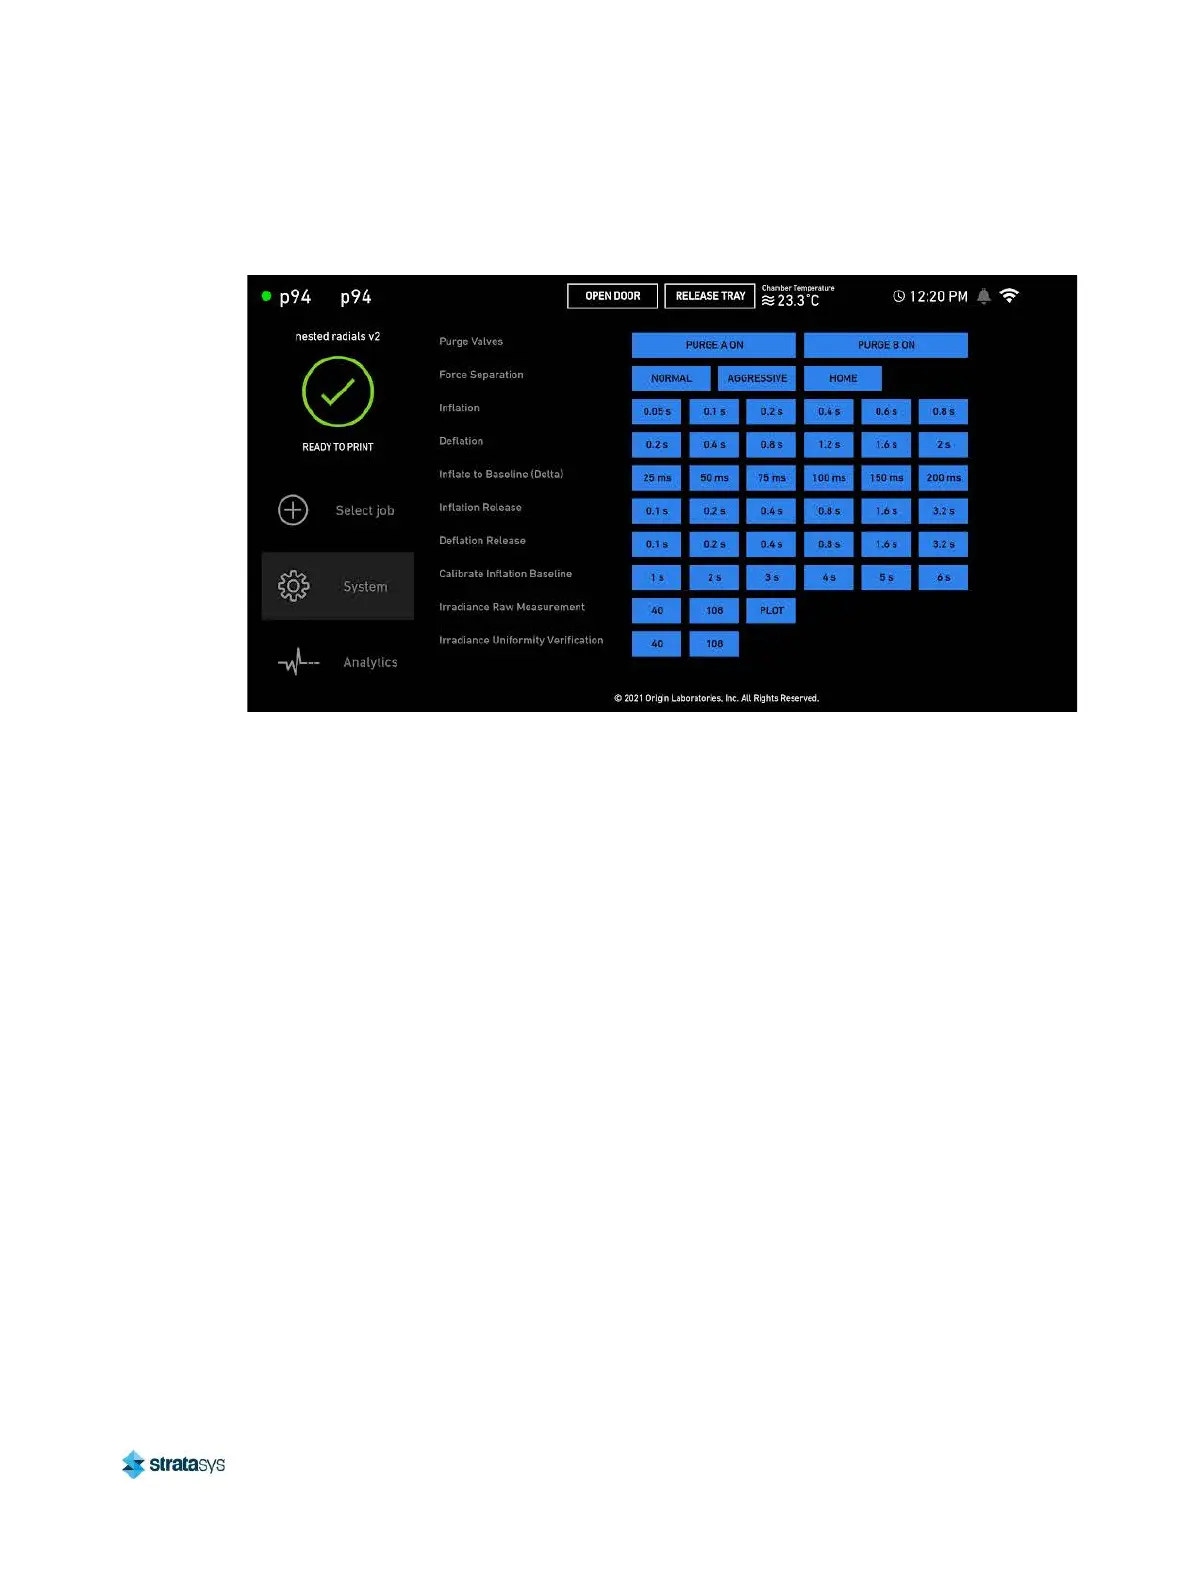
4. Locate the pneumatic controls: Force Separation, Inflation, and Deflation buttons.
Figure 3: Pneumatic controls
5. Deflate by pressing 2s using the Deflation controls. Wait two seconds before moving onto
the next step.
6. Two seconds after deflating, inflate by pressing 0.8s two times using the Inflation controls.
7. Repeat the deflation and inflation process three times.
8. After inflating and deflating three times, press AGGRESSIVE in the Force Separation
controls.
9. Reboot the printer.
10. If the build head homes, clean the build head and sanitize the tray.
11. If the build head does not home, repeat the procedure.
12. Contact Stratasys Customer Support to disable the printer's Dev Mode.
Solutions for First Layer Adhesion Issues
Issue: The part fails to adhere to the build head or the part detaches from the build head
mid print.
Possible root causes include the following: Insufficient first layer projector exposure
duration, Insufficient first layer projector exposure delay time, build head calibration issues,
separation forces are too high, irradiance degradation issues, build job not properly
oriented to the platform (build prep error).
1. Insufficient first layer projector exposure duration.
• Parts require sufficient first layer projector exposure duration to ensure adhesion to the
build head. If the first layer projector exposure duration is too low, then parts will not
adhere properly.