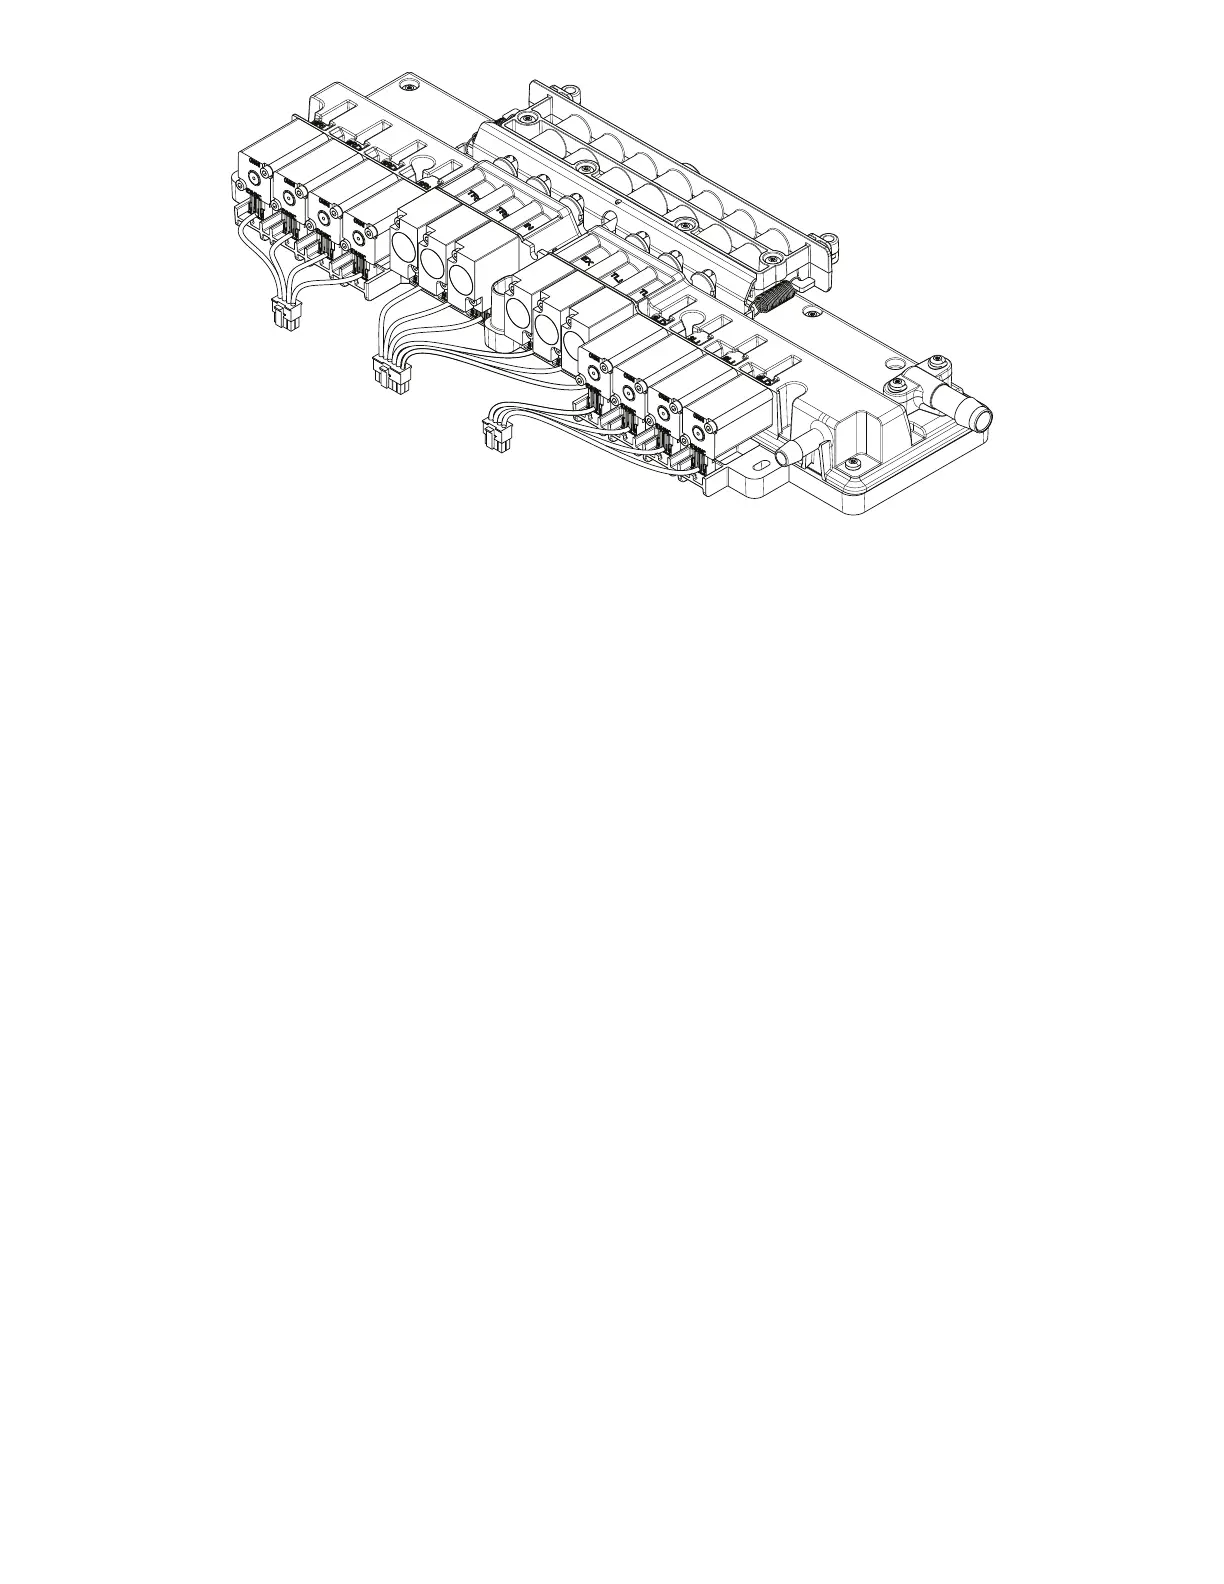
FFiigguurree 1122 –– SSoolleennooiidd vvaallvvee
4. Remove the solenoid valve.
5. Disconnect the connector for the solenoid valve.
NNoottee -- Inspect the replacement solenoid valve to make sure that the O-ring is in place. If the O-ring is not in place,
transfer the O-ring from the removed solenoid valve to the supplied solenoid valve.
6. Discard the solenoid valve.
7. Reverse steps to reinstall.
NNoottee
• During reinstall, make sure to align the Velcro® patches.
• After installation, remove the zipper pull tool or equivalent from the zipper.
• Make sure that the watershed covers the zipper.
8. Verify proper operation before returning the product to service.
PPoowweerr ssuuppppllyy rreeppllaacceemmeenntt
TToooollss rreeqquuiirreedd::
• Zipper pull tool or equivalent
• T10 Torx driver
• ESD system
PPrroocceedduurree::
1. See
Foot box cover access
(page 31).
2. Properly ground yourself (see
Protecting against electrostatic discharge (ESD)
(page 25)).
3. Remove the wires for the fans and DC power from the wire clip (A).
4. Disconnect the DC power connector from the main board (AR) (connector R) (Figure 13).
2971-009-002 Rev D.0 35 EN
 Loading...