69
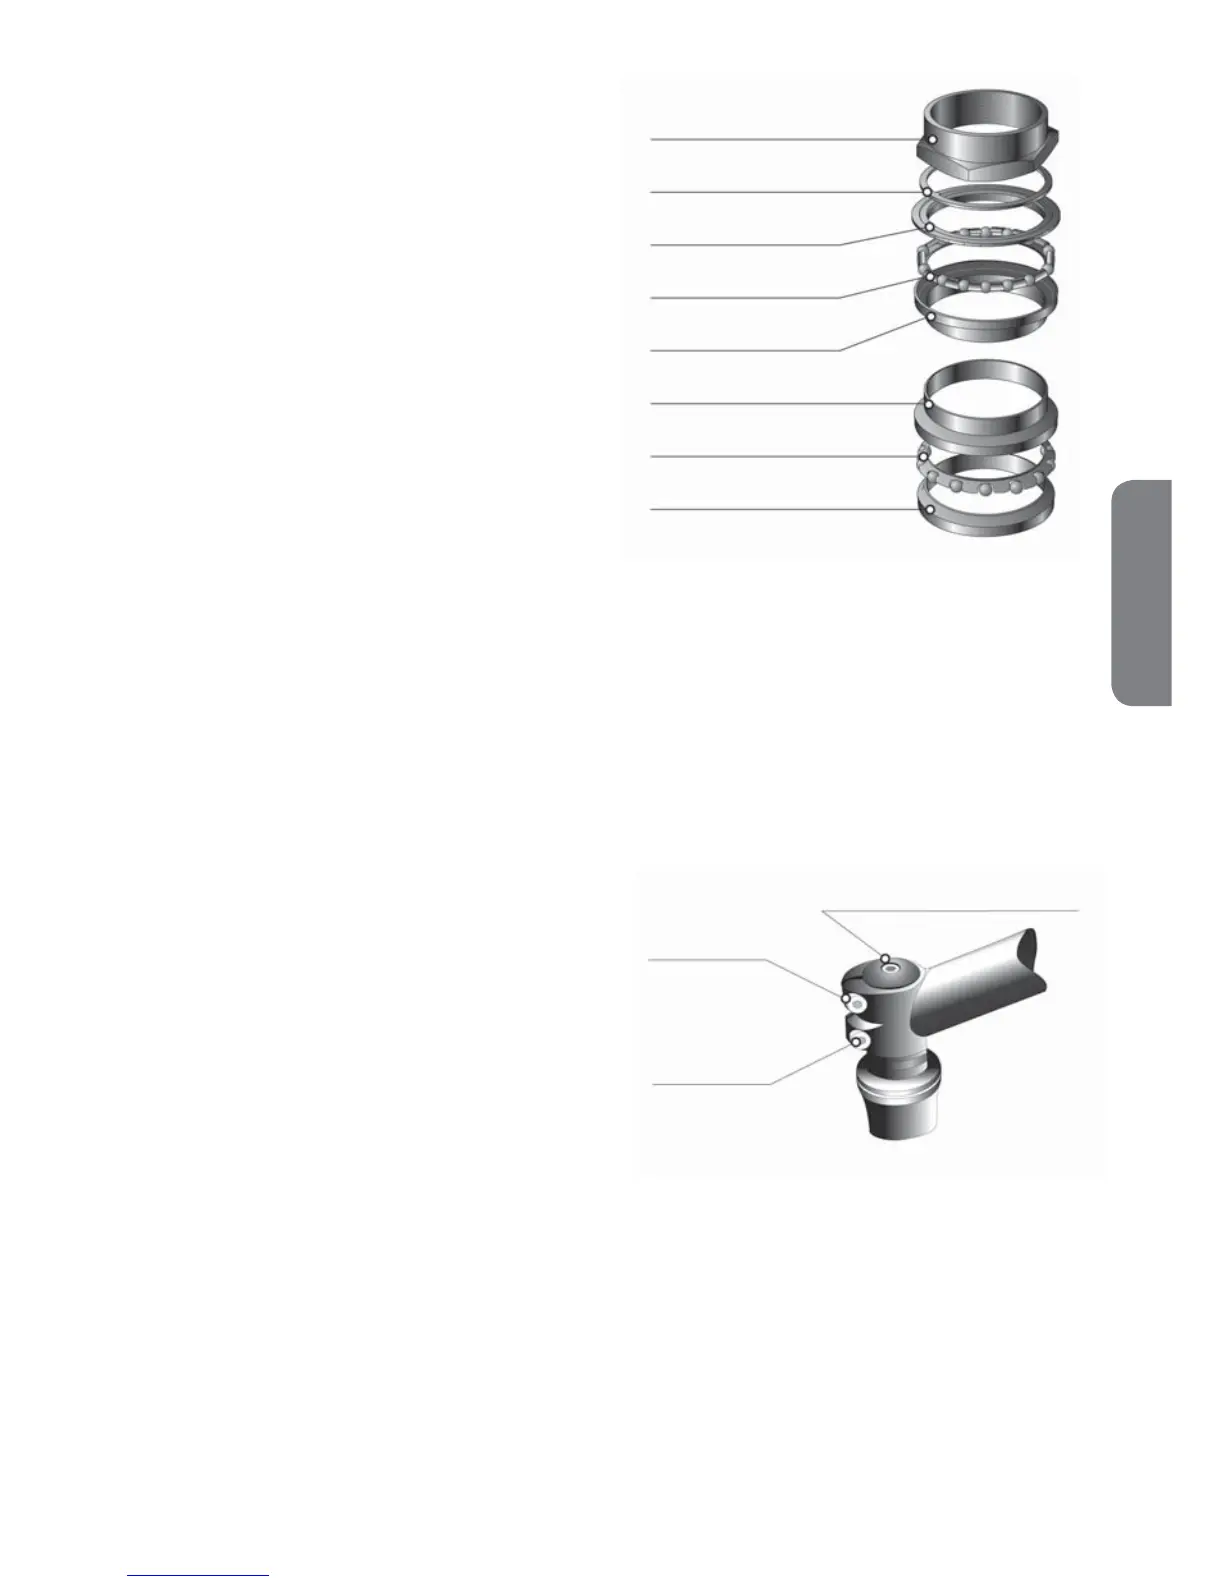
Locking nut
Spring washer
Adjustable pan
Ball ring
Stationary cone
Fixed pan
Ball ring
Cone with channel
ADJUSTMENT OF THE BEARINGS
Your mountain bike is provided with four sets of bearings that
require adjustment and lubrication.
1) Quill assembly
2) Bottom bracket assembly
3) Wheel hub bearings
4) Pedal bearings
Inspect the bearings frequently, in particular after riding over
rough terrain. The service interval depends on the number of
kilometres covered and the riding conditions. Even if the bearings
are sealed effectively, the sealings used on the bike are not fully
resistant to water. You should be able to lubricate and adjust the
bearings by yourself with some skills and the appropriate tools.
QUILL ASSEMBLY
• Remove the front wheel to inspect the adjustment. The fork should allow free rotation; however without backlash.
• If the bearings require adjustment, loosen the locking nut with two side spanners. Tighten or loosen the adjustable ring. Install
the locking nut and perform a check.
• Disassemble the handlebar for lubrication of the bearing. Remove the locking nut and the adjustable ring. Pull the fork out of
the frame and remove the two ball cages. Clean the lubricant off all the components and inspect the bearing paths for wear and
the presence of rust. Lubricate all the components again, in particular cover the ring sealing sufficiently. Install one ball cage
on the fork. Insert the fork back into the frame and make sure that the ring has fitted back on the bottom of the stationary ring.
Install the other ball cage on the stationary cone. Screw down the adjustable ring until a play exists. Screw in the locking nut.
AHEAD QUILL ASSEMBLY TIGHTENING
• Loosen the bolts in the stem and the quill assembly bolt.
• The handlebar is perpendicular with respect to the front wheel.
• Tighten the quill assembly bolt in the stem and all stem bolts
firmly.
• Check to ensure that the tightening is correct by holding
the front wheel between your legs and trying to turn the
handlebar.
HUBS
• Remove the quick-release mechanism.
• Unscrew the axle locking nut, spring washer and the cone from one side of the axle. Pull the axle freely out of the hub core and
remove the ball bearings.
• Check to ensure that the ball paths are not damaged or corroded (replace them if necessary).
• Lubricate the hub box and insert the bearings.
• Put back the axle. Screw the cone in until it touches the ball bearings. Put back the spring washer and locking nut.
Try to turn the axle. It should rotate without backlash or dragging. Readjust if necessary and tighten the locking nut.
Re-install the quick-release mechanism.
1. Loosen
3. Tighten (until play is limited)
2. Loosen
4. Tighten
5. Tighten
ENGLISH
 Loading...