10
Section 4 - Programming/Operation
4.1 Introduction
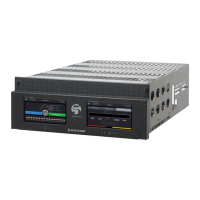
The System III can be programmed manually using
the front panel; from a local computer using the
Debug Output located on each line card behind the
front panel; or remotely using the TCP/IP network
and System III Console software. The Debug output
is intended as a testing and troubleshooting tool.
Manual programming allows the user to program all
of the System III options for remote and local opera-
tion. Manual programming does not support the
grouping of line cards into hunt groups or line pools.
4.2 System III Console Software
The System III Console software is intended to be
the primary method of programming the system,
refer to the System III Console User Manual for
details.
4.3 Debug Programming
The debug output is another method of accessing
the line card's programmed options and diagnostics
features. A debug cable is required to connect by
serial communication from the line card to a stan-
dard PC running Windows 95 or higher software.
NOTE: Debug programming only affects options in
profile “0”.
ALL PROGRAMMING WITH THE DEBUG SETUP IS
LOST WHEN THE SYSTEM IS POWERED DOWN OR
WHEN LINE CARDS ARE REBOOTED OR REMOVED
FROM THE RACK.
4.3.1 Debug Cable Connectivity
• Connect the RJ-45 end of the debug cable to the
debug jack on the front of the line card.
• Connect the female DB-9 connector to the serial
port of a computer.
4.3.2 Debug Software Setup
• Using Windows 95 or higher, point and click on
the button.
•Then select Programs Accessories Commu-
nications HyperTerminal. Once in the Hyper-
Terminal window, point and click on the
'Hypertrm.exe' icon.
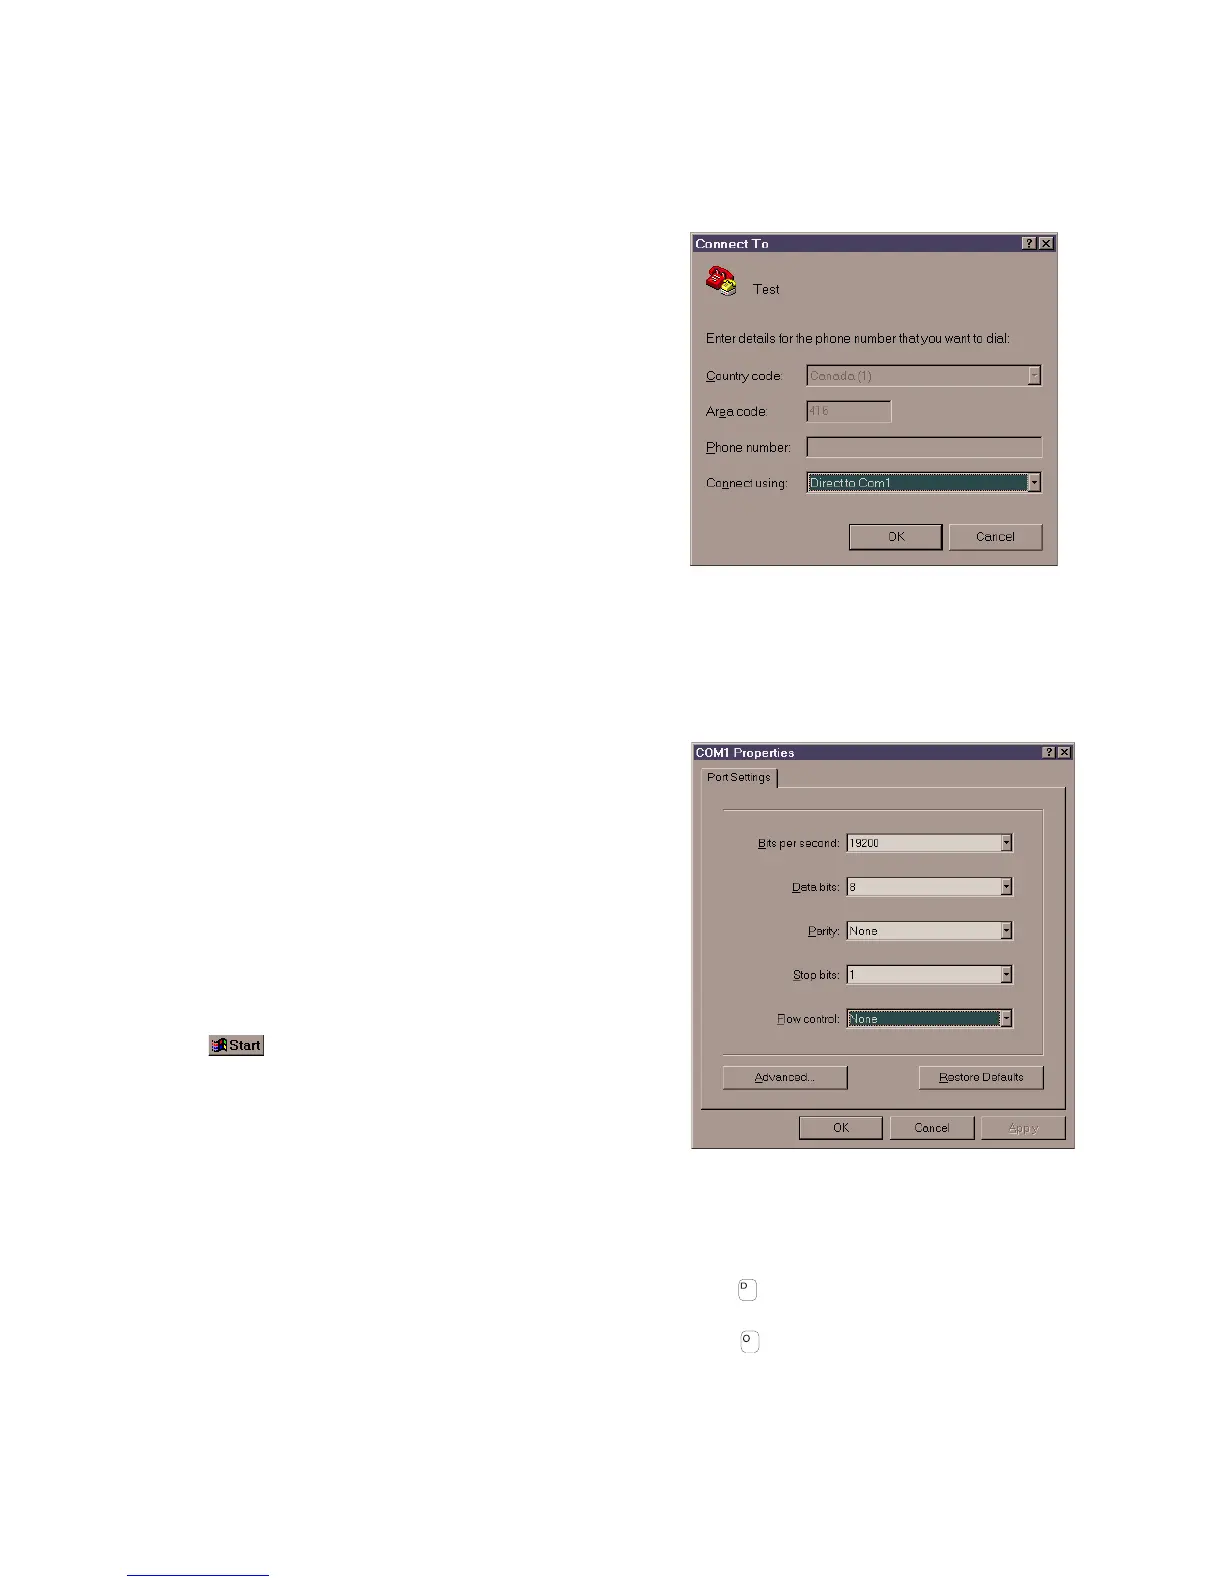
• A connection description window should appear. A
prompt should appear on the 'Name' category.
Type a name. Point and click on the 'OK' button.
• A phone number window should appear. Choose
the direct to COM port required for connection
and point and click on 'OK'.
Figure 4-1
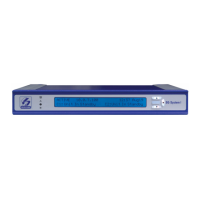
• The COMx properties windows should appear. The
configuration should be:
Figure 4-2
• Click on the 'OK' button after setting the configura-
tion.
• The HyperTerminal window should appear. Press
any key. The debug menu will be displayed.
Keyboard Commands
• The key will initiate the download of a file to the
line card.
• The key will enable the user to dump the cur-
rent programmed options of the line card or set an
option to a particular value.
Bits per second:
Data bits:
Parity:
Stop bits:
Flow control:
19200
8
None
1
None