You can put title names on the
titles and change the names from
this menu.
The names you put on the titles
will be displayed on a Title List.
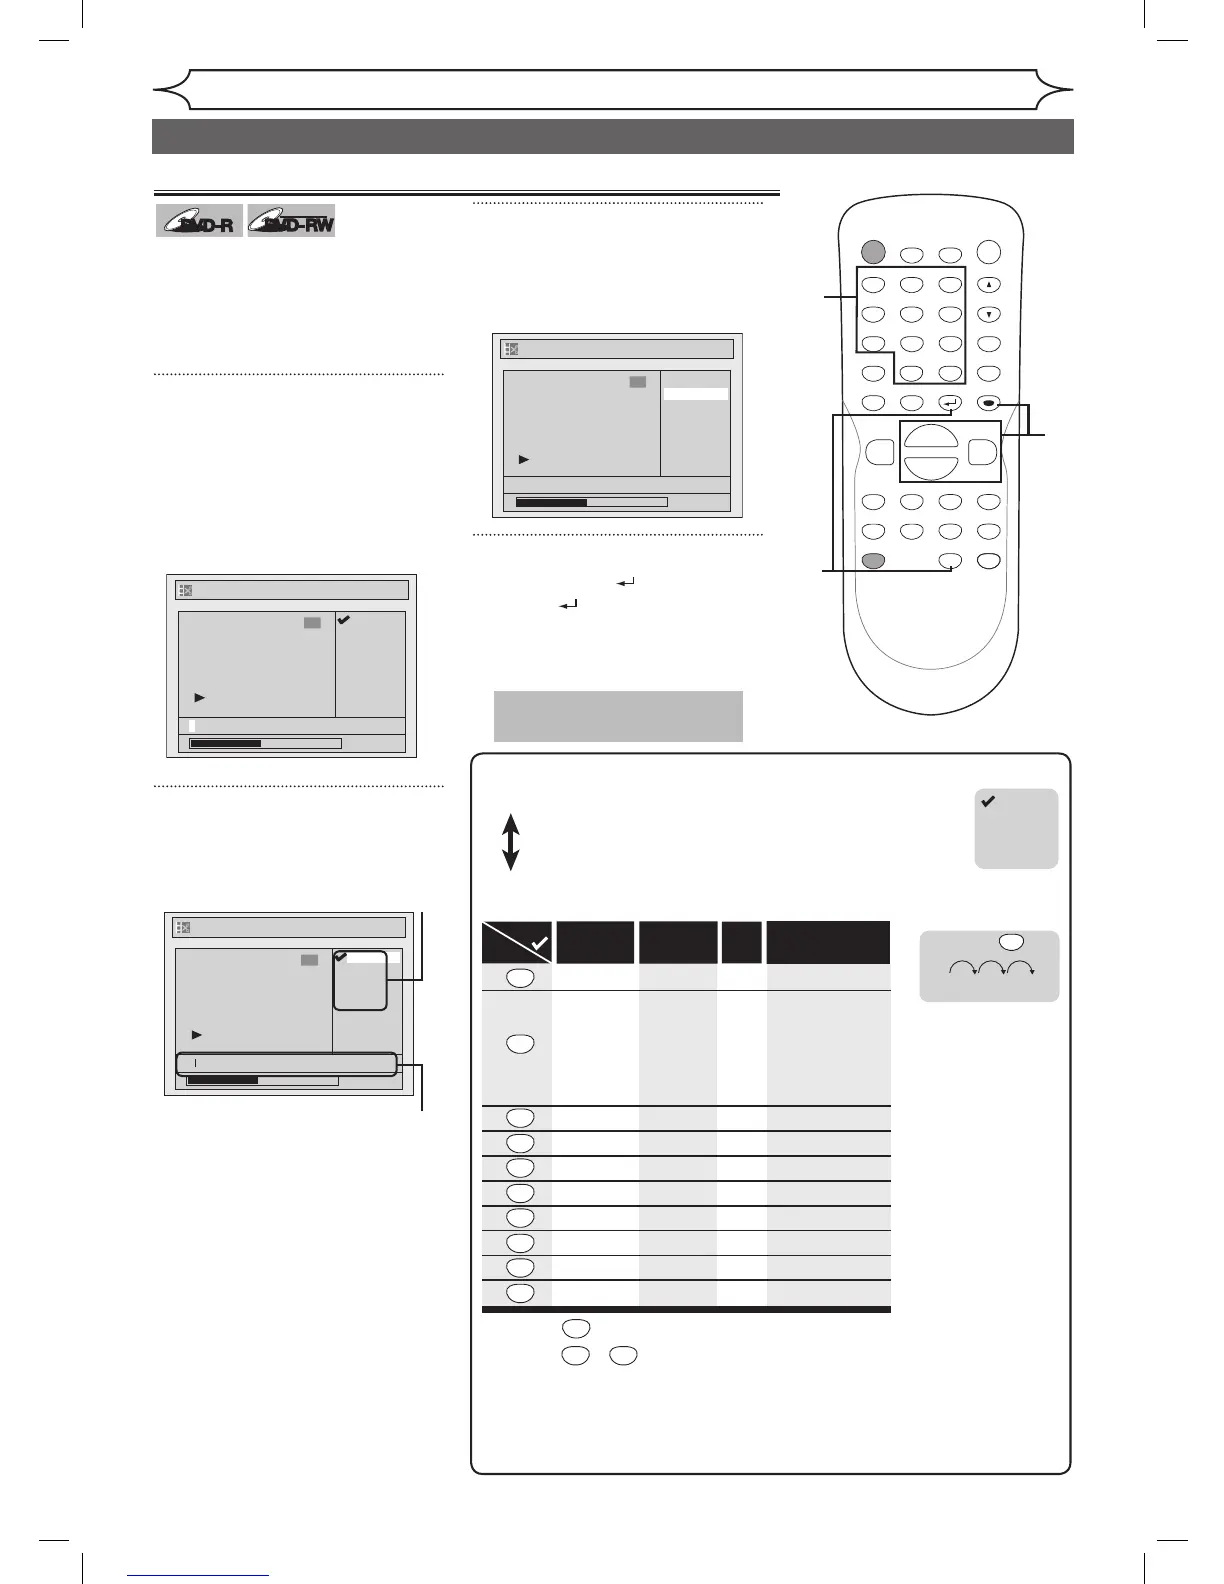
1
Follow steps 1 to 3 on page 51 to
display the Edit menu.
Using [K / L], select “Edit Title
Name”. Press [ENTER].
A window for entering a title name
will appear.
2
To enter a title name, follow
the steps for “Guide to edit title
name” on this page.
character set
area for entering title names
When you finish entering a title
name, press
[ENTER].
Confirmation window will appear.
3
Using [K / L], select “Yes”.
Press [ENTER].
The name you entered will be
activated for the title.
4
Press [RETURN ] and then
[RETURN ] or [STOP C] to
exit.
Data will be written onto the disc
momentarily.
Putting names on titles
Press
ABC
DEF
GHI
JKL
MNO
PQRS
TUV
WXYZ
<space>
abc
def
ghi
jkl
mno
pqrs
tuv
wxyz
<space> <space>
! ” # $ % & ’ ( )
*
+ , - . / : ; < = >
? @ [ ] ^ _ { | }
2
3
4
5
6
7
8
9
0
1
ABC abc
Select
@ ! ?
123
1
1
2
2
3
4
5
6
7
8
9
9
0
*1
Press
, character set will be changed to the
“ @
!?
” mode automatically.
*2
Press
to
, character set will be changed to the
previous input
mode
automatically.
[
Step1
]
:
[
Step2
]
: Follow the list below, press the Number buttons
repeatedly until the desired letter appears.
Select a desired character set using [K
/
L], then
press [ENTER].
[
Guide to edit title name
]
A B C
a b c
1 2 3
@ ! ?
• To delete letters, press [CLEAR] repeatedly. Holding [CLEAR] to delete
all letters.
• Press
[s /
B
] to move the cursor to the left or right.
• You can enter up to 30 letters.
(*1) (*1)
(*2)
(*2)
(*2)
(*2)
(*2)
(*2)
(*2)
(*2)
e.g. character set :
A B C
A B C A
...
press
2
Note:
Undefined letters in a
title name are shown
by “
*
”. If you delete
them, adjoining letters
letters may change to
“
*
” or other.