EasyManua.ls Logo

Teknatool Nova Voyager DVR - User Manual

Teknatool Nova Voyager DVR
37 pages
Print Icon
To Next Page IconTo Next Page
Loading...
Voyager DVR
Pillar drill
USER MANUAL
Model: 58003 (EU model)
500-15-902, ENG
Original user manual
All rights reserved.

Other manuals for Teknatool Nova Voyager DVR

Questions and Answers

  • D
    Danny ThompsonAug 18, 2025
    Why does my Teknatool Power Tool show 'RP State Error'?
    • E
      Elizabeth WalkerAug 18, 2025
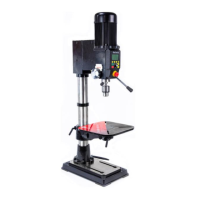
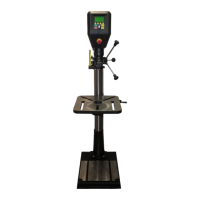
      The 'RP State Error' on your Teknatool Power Tool indicates a fault with the rotor position state. This means the optical sensors providing spindle position feedback are either obscured, damaged, disconnected, or covered in dust. To resolve this, try spinning the spindle by hand to create a draught that might clean the sensor. If the error persists, power off and disconnect the machine. Remove the upper rear cover and vacuum any wood dust, being careful not to get too close to the electronics. Also, vacuum dust from the vent on the front of the headstock underneath the spindle. Repeat this process a few times. You can also try blowing the dust off with a vacuum or compressed air pistol before replacing the cover.
  • R
    Rachel AndersonAug 20, 2025
    What to do if my Teknatool Nova Voyager DVR Power Tool shows 'PFC Corrector' error?
    • K
      Kimberly McconnellAug 21, 2025
      If your Teknatool Power Tool displays a 'PFC Corrector' error, it means the built-in voltage and temperature sensors have detected a fault. First, check the temperature of the lower section of the headstock. If it's very hot, turn off the main switch and let the machine cool down. If the temperature isn't high, the computer might have detected an under- or overvoltage from the mains power. Turn off the machine and reboot it. The DVR motor has a high level of protection and constantly checks conditions.
  • B
    Brian MorrisAug 23, 2025
    What to do if Teknatool Power Tool shows Rotor Fault?
    • C
      Christine ThomasAug 23, 2025
      If your Teknatool Power Tool is showing a 'Rotor Fault', press the button, then switch off the main switch. Wait one minute, then switch the machine back on. Ensure that the spindle is not blocked.
  • Z
    zguzmanAug 26, 2025
    Why is my Teknatool Nova Voyager DVR vibrating excessively?
    • L
      Leslie CruzAug 26, 2025
      Excessive vibration in your Teknatool Power Tool can be addressed by: 1. Ensuring the workpiece is securely mounted. 2. Tightening all connecting screws. 3. Leveling the stand and adding weight if needed; bolting to the floor may be necessary. 4. Using a sharper drill bit or sharpening blunt tools. 5. Referring to the speed chart.
  • F
    fcuevasAug 28, 2025
    How to fix a Teknatool Nova Voyager DVR Power Tool when the attached tool does not run true?
    • A
      Andrew CampbellAug 28, 2025
      If the attached tool on your Teknatool Power Tool doesn't run true, the solution depends on where the run-out is detected: 1. Inside the spindle: Replace the entire spindle assembly. 2. Morse taper tool/arbour: Clean all contact surfaces. If the tool still doesn't run true after cleaning, try replacing it. 3. Chuck: Replace the chuck. 4. Attached tool: Ensure the tool is properly mounted on the chuck.
  • L
    Lisa PorterAug 30, 2025
    What to do if Teknatool Drill shows RP State Error flashing?
    • D
      David CurtisAug 30, 2025
      If the Teknatool Drill displays an 'RP State Error' flashing, it indicates a rotor position state fault, potentially due to obscured, damaged, or disconnected optical sensors, or dust accumulation. First, try spinning the spindle by hand to generate a draught that might clean the sensor. If the error persists, turn off the machine, disconnect it from the power, remove the upper rear cover, and vacuum any wood dust, being careful around the electronics. Also, vacuum dust from the vent on the front of the headstock under the spindle. Repeat this process a few times. You can also try using compressed air to blow the dust off. Then, replace the cover.
  • L
    lindseychadSep 2, 2025
    What to do if Teknatool Drill shows PFC Corrector flashing?
    • Y
      Yvonne StevensSep 2, 2025
      If the Teknatool Drill displays a 'PFC Corrector' error, it means the built-in voltage and temperature sensors have detected a fault. Check the temperature of the headstock's lower section. If it's very hot, turn off the main switch and let the machine cool down. If the temperature isn't high, the computer may have detected an under- or overvoltage from the mains power. Turn off the machine and reboot it. The DVR motor is designed with a high level of protection and continuously monitors conditions.
  • J
    Jessica HansenSep 4, 2025
    Why Teknatool Drill does not start (screen doesn't light up)?
    • E
      Emily ZhangSep 4, 2025
      If the Teknatool Drill does not start and the screen remains unlit, ensure all connectors are properly seated. If the screen still doesn't light up, the main board may be damaged. Contact customer service for further assistance.
  • J
    Jeffrey RussellSep 7, 2025
    What to do if Teknatool Drill shows Rotor Fault flashing?
    • C
      chris25Sep 7, 2025
      If the Teknatool Drill displays a 'Rotor Fault' message, press the button, then switch off the main switch. Wait one minute, then switch the machine back on. Ensure the spindle isn't blocked.
  • S
    Stephen PetersonSep 9, 2025
    How to fix excessive vibration in Teknatool Drill?
    • R
      Richard BakerSep 9, 2025
      To address excessive vibration in your Teknatool Drill: 1. Ensure the workpiece is securely mounted. 2. Tighten all connecting screws. 3. Level the stand and add weight if needed; consider bolting it to the floor. 4. Use a sharper drill bit or sharpen existing blunt tools. 5. Refer to the speed chart.

Summary

CONTACT

Worldwide (except USA)

Contact information for Teknatool International Ltd. outside the USA.

Europe

Contact information for Felder KG in Europe.

Symbol legend

Introduction

Copyright

Warranty

Intended use

Making changes and modifications to the machine

Basic health and safety instructions for power tools

Workplace safety

Guidelines for maintaining a safe and organized work environment during operation.

Electrical safety

Precautions for safe handling of electrical components and connections.

Personal safety

Essential safety practices for the operator to prevent injury.

Health and safety instructions for pillar drills

Wear personal protective equipment (PPE)

Mandatory protective gear required for safe operation of the pillar drill.

Safe Workplace and Environment

Ensures a safe operating environment by covering clothing, workplace cleanliness, and conditions.

Operational Safety Precautions

Key safety measures during operation, including preventing unintentional starts and securing the workpiece.

Pre-Operation Checks and Adjustments

Procedures for checking settings, making adjustments, and handling fuses before operation.

Use and care of the power tool

Service

Safety devices

Chuck guard

Explanation and function of the pillar drill's chuck guard for safety.

EMERGENCY STOP function

Location and operation of the emergency stop button for immediate shutdown.

Technical data of the pillar drill

Dimensions and specifications

Detailed physical dimensions and specifications of the pillar drill.

Motor specifications

Technical details regarding the motor, including power, speed, and voltage.

Operation and storage conditions

Operating;room temperature

Recommended temperature ranges for machine operation.

Storage;transport temperature

Recommended temperature ranges for storing and transporting the machine.

Humidity (non-wetting)

Humidity level requirements for proper operation and storage.

Noise emissions

Measurement and values

Details on noise measurement standards and emission levels during operation.

Pictograms, signs and labels

Warning labels on the machine

Identification and explanation of pictograms and labels affixed to the machine.

Features of the NOVA Voyager DVR

Motor and Drive System

Details on the DVR motor, direct drive, variable speed, and rotation control.

Table and Depth Control

Information on the stable cast iron table and electronic depth stop functionality.

Convenience Features

Highlights features like self-start for enhanced user convenience.

Transport package content

Assembling and adjustment of the pillar drill

Unpacking and preparing the pillar drill

Steps for unpacking and preparing the machine for assembly.

Attaching the column to the base

Instructions for securely connecting the column to the base.

Mounting the table arm and the rack

Procedure for assembling the table arm and rack components.

Mounting the drill chuck and chuck arbour

Positioning the table

Tilting the table

Quill lock

Using the mechanical depth stop

Adjusting the chuck guard height

Connection to the power supply

Attention! (Power connection warnings)

Critical safety warnings and requirements for connecting the machine to power.

Fuse protection

Information on required fuses and residual-current circuit breakers.

Installation of the pillar drill

Location selection factors

Considerations for choosing an optimal and safe location for the pillar drill.

Operating the pillar drill

Switching on

Procedure for powering on the NOVA Voyager DVR pillar drill.

Setting the language of your pillar drill

Steps to change the display language of the pillar drill interface.

Calibrating the height sensor

Instructions for calibrating the height sensor for accurate depth measurements.

Display elements on home screen

Controls

Start;Stop and Navigation Buttons

Functionality of ON, OFF, ZERO/Confirm, and MENU/Cancel buttons.

Function (F1-F4) Buttons

Usage of F1-F4 buttons for favorite speeds or custom functions.

Speed adjustment

Button functions and navigation

Safety and Operational Notes

User interface

Running the pillar drill

Steps for starting the motor, stopping, and setting depth zero point.

User interface menu navigation

How to navigate and interact with the pillar drill's menu system.

Menu items

<Speed Chart>

Using the speed chart for recommended drill bit speeds based on material and size.

<User Set Depth>

Functionality for setting a precise drilling depth with audible alerts.

<Self Start>

Description of the self-start feature for automated drilling cycles.

<Advance Modes>

<Pilot Hole>

Function to drill pilot holes by automatically adjusting speed based on load.

<Tapping Mode>

Information on the two tapping modes for thread cutting operations.

<Chip Breaker>

<Pwr Spindle Hold>

<Edit F Shortcuts>

<Favourite speeds>

<Direction: FORWARD;REVERSE>

<Configuration>

<Interface Settings>

Options for units, display modes, sound, and language settings.

<Motor Performance>

Settings for maximum RPM, power limit, braking, load sensor, and vibration sensor.

<Adv. Motor Params>

<Set Password>

<Update FW (Firmware)>

<Version Info>

<Factory Reset>

Care and maintenance

Maintenance after each use

Cleaning procedures to be performed after each use of the pillar drill.

Monthly maintenance

Regular maintenance tasks performed monthly for optimal machine condition.

Half yearly maintenance

Lubrication and maintenance tasks to be performed every six months.

Decommissioning

Recommended speeds

Speed chart for drilling operations

Reference table for recommended spindle speeds based on tool diameter and material.

Troubleshooting

Mechanical issues

Troubleshooting steps for common mechanical problems like run-out and quill retraction.

Excessive vibration

Diagnosing and resolving issues related to excessive vibration during operation.

Electrical issues

Pillar drill does not start

Steps to diagnose and resolve issues when the pillar drill fails to power on.

Error messages

Explanation and solutions for common error messages displayed by the pillar drill.

Guarantee conditions

Exploded diagram - headstock

Exploded diagram - stand and table

Parts list - pillar drill

Wiring diagram

Declaration of Conformity

UKCA - Declaration of Conformity

Teknatool Nova Voyager DVR Specifications

General IconGeneral
Swing Over Bed16" (406mm)
Distance Between Centers20" (508mm)
Tailstock TaperMT2
Spindle TaperMT2
Index Positions24
Swing Over Tool Rest10 inches
Spindle Thread1" x 8 TPI

Related product manuals