Maintenance
TPS2000 Series Digital Storage Oscilloscopes Service Manual
6-- 11
Remove each front-panel knob by firmly grasping the knob and pulling it off of
the front panel. If necessary, insert a screw driver between the front panel and
knob and lift up.
Install the front-panel knobs by aligning the keyed knob with the shaft, and then
press the knob onto the shaft.
You will need a torque-limiting Torx T-15 screwdriver and 16 mm (5/8 inch)
deep socket for this procedure.
Removal. To remove the front case, refer to Figure 6--4 on page 6--13 and follow
these steps:
1. Remove the front-panel knobs. Follow the procedure on page NO TAG.
2. Place the oscilloscope with its rear case down on a soft surface, such as an
anti-static mat.
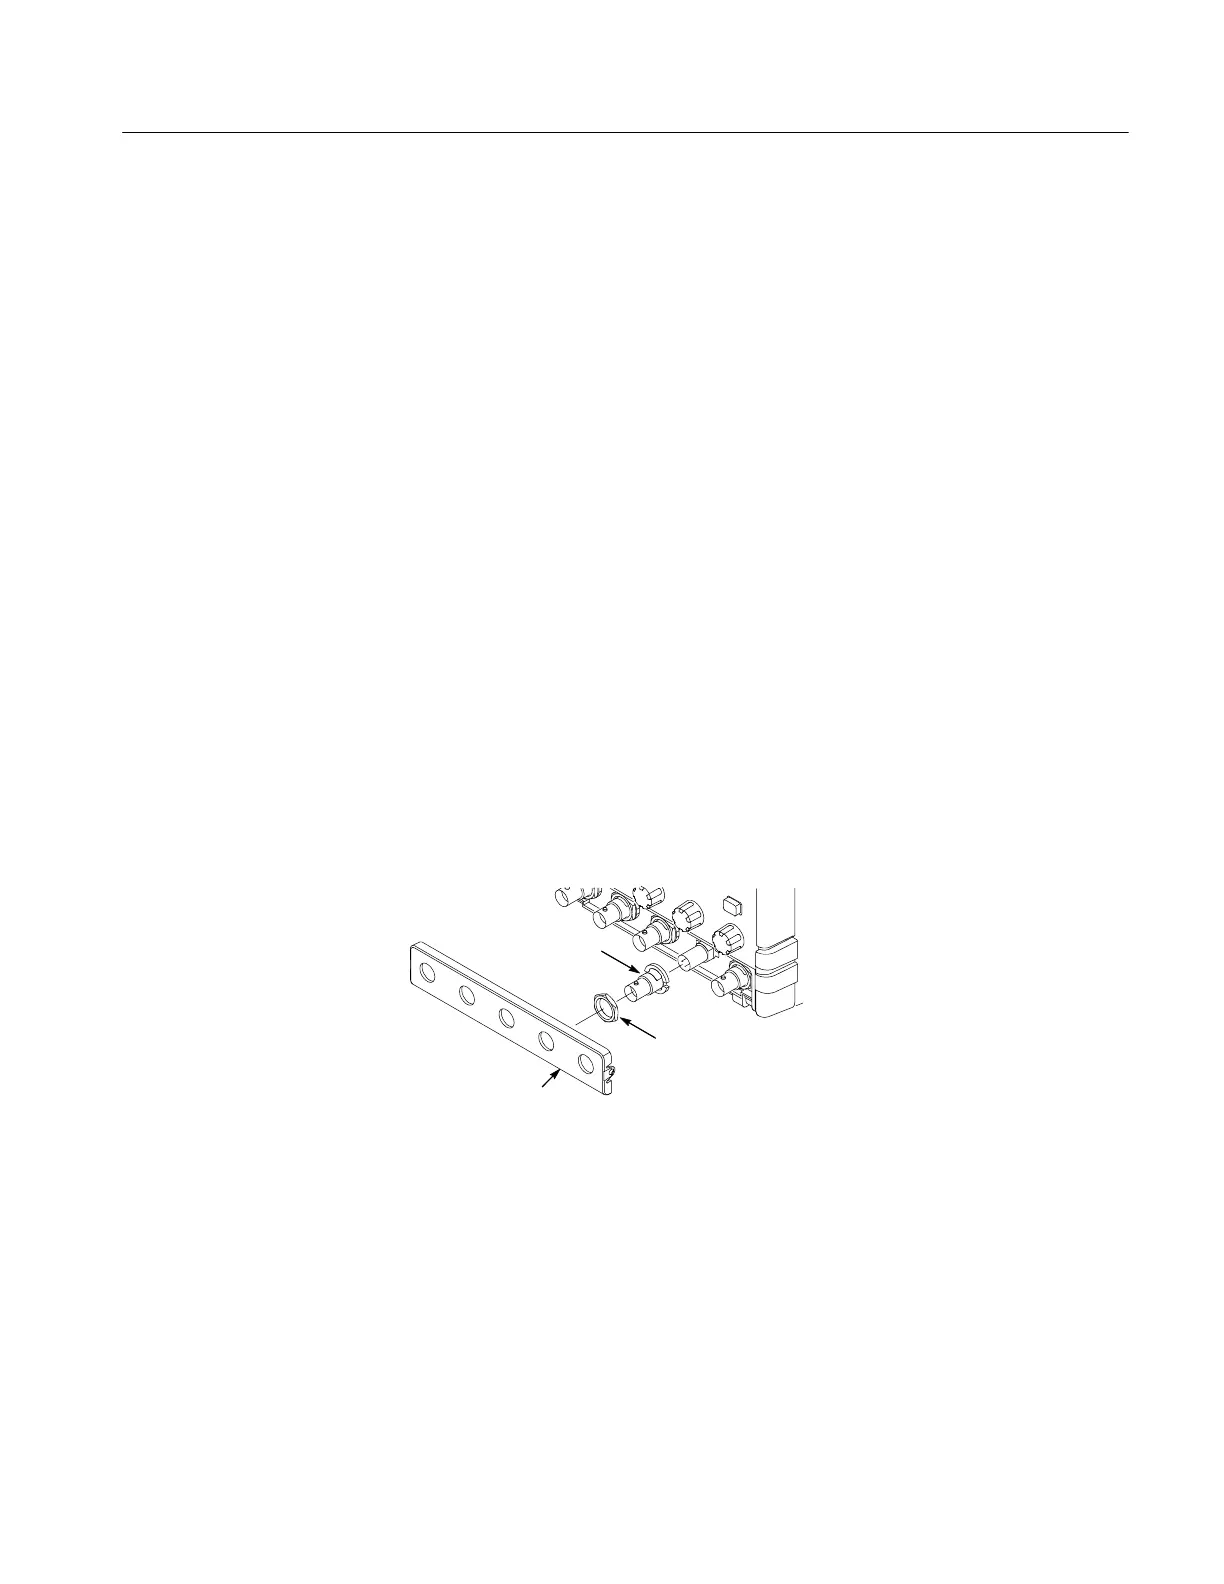
3. Remove the BNC cover by prying up on the exposed edge.
4. Use the 16 mm (5/8 inch) deep socket to remove the nuts from the BNC
connectors.
5. Remove the plastic BNC shells from the BNC connectors. Grasp the BNC
shell with your fingers and pull up to remove the shell. See figure 6--3.
BNC cover
0.625” BNC nut
Plastic BNC shell
Figure 6--3: Removing the BNC cover, shell, and retaining nuts
6. Follow the procedures on page 6--7 to remove the rear case.
7. Remove the four screws from the internal chassis that attach the chassis to
the front cover. See Figure 6--4.
8. Lift the chassis off of the front case.
Front-Panel Knob
Front Case
 Loading...