Compact Track Loader
8. Hydraulic Reservoir Disassembly and Assembly
8-4
Figure 8-12
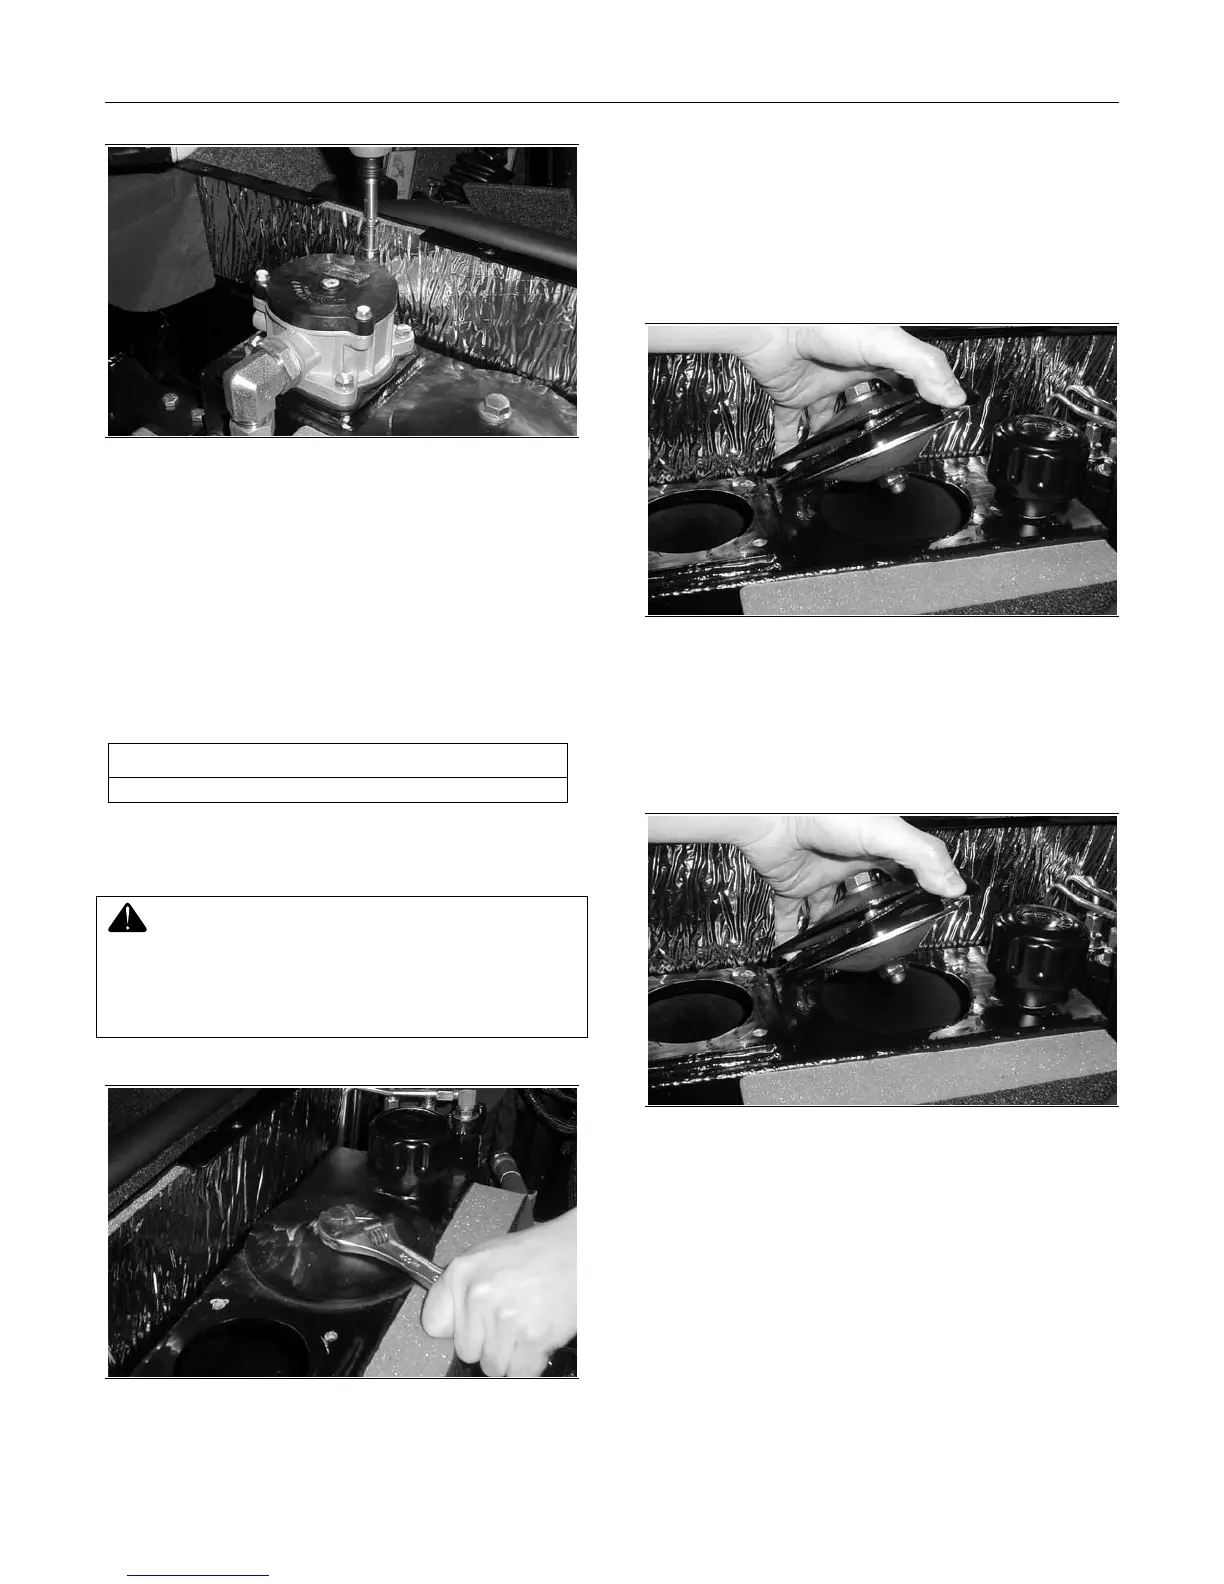
6. Install the cap bolts and tighten to secure.
Access Cover Removal and
Installation
The tools required for access cover removal and
installation are listed in Table 8-2. Use manufactur-
er-recommended tools whenever possible.
Table 8-2
Required Tools
Combination Wrench
Access Cover Assembly Removal
Hot oil can cause personal injury. Make sure the
oil is cool before removing any components or lines.
Remove the oil filler cap only when the engine is
stopped and the machine has been allowed to cool
thoroughly
Figure 8-13
1. Slightly loosen the access cover bolt to separate
the upper cap from the oval-shaped clamping
disk on the underside of the assembly. This will
allow the assembly to be removed. Do not re-
move the bolt entirely or the oval-shaped clamp
will fall into the reservoir.
Figure 8-14
2. Remove the access cover assembly from the
reservoir.
Access Cover Assembly Installation
Figure 8-15
1. Insert the access cover assembly with the
clamping disk extending completely through the
opening in the top of the reservoir and into the
tank.