Compact Track Loader
12. Undercarriage Disassembly and Assembly
12-8
2. Align the grease hole of the bearing flange with
zerk and the grease track on the bearing as
shown in figure 12-28.
3. Ensure that the concave side of the washer is
contacting the sprocket.
4. Torque castle nut is to 270 ft-lb (366 Nm) and
then rotate until the next hole is visible to install
the cotter key.
Sprocket Roller Removal and
Installation
The tools required for sprocket roller removal and
installation are listed in table 12-4 below. Use
manufacturer-recommended tools whenever
possible.
Sprocket Roller Removal
Table 12-4
Note: The rollers should be inspected every 50 hours for
rotation and wear-through. The rollers on the drive
sprocket are easily replaceable. The track DOES NOT
need to be removed to replace these rollers.
Note: In order to remove the sprocket rollers and pins, you
must remove the torsion axle retaining bolts and washers,
then slide the undercarriage away from the chassis slightly
(approx. 1”, 2.54 cm). This will provide clearance for the
sprocket bolts to be removed for roller/pin replacement.
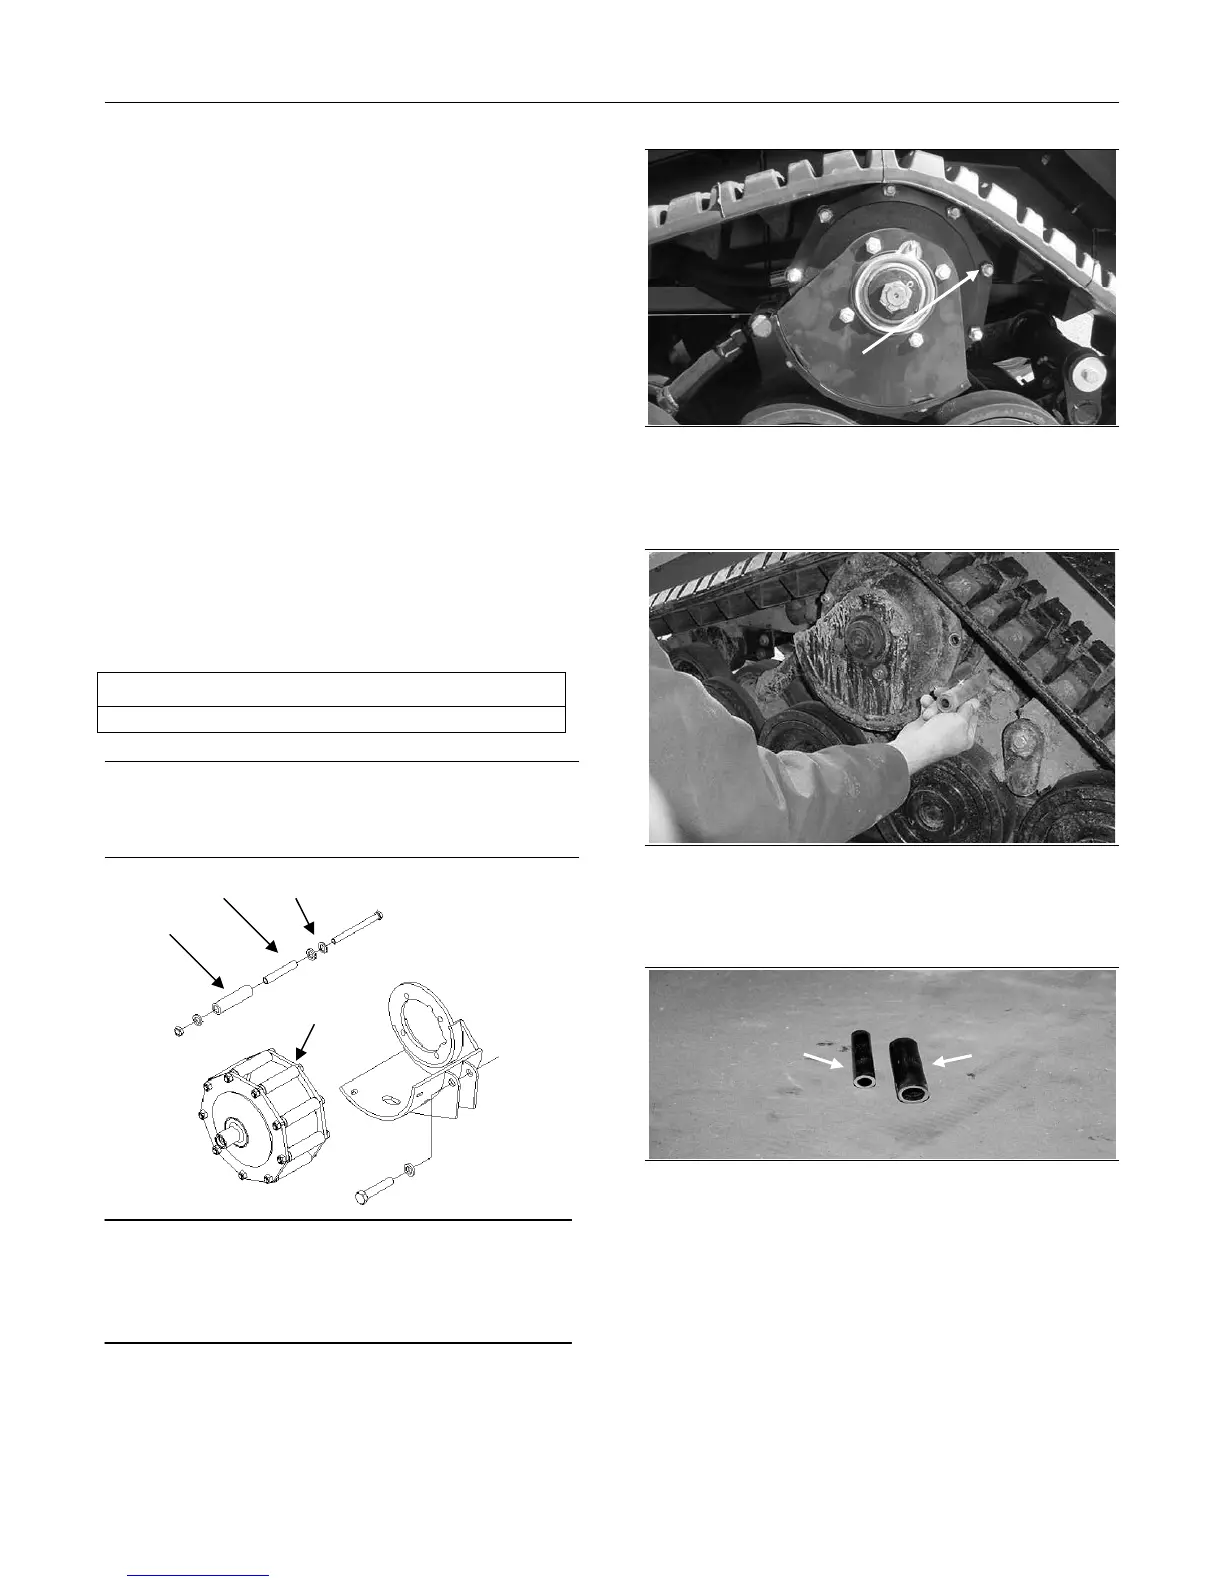
Figure 12-29
Figure 12-30
1. Rotate the drive sprocket to allow access to the
sprocket roller bolt. Remove the bolt.
Figure 12-31
2. Remove the roller and steel pin from the drive
sprocket.
Figure 12-32A
3. Inspect the rollers for wear and replace as
necessary. The steel pin will normally not need
replacing unless the roller has worn completely
away and the steel pin is worn from engaging
the track (fig. 12-32A & B).
Required Tools
Socket/Combination Wrench
Position Drive
Sprocket to
ccess Roller
Roller
Steel Pin
Roller
Sprocket


 To Next Page