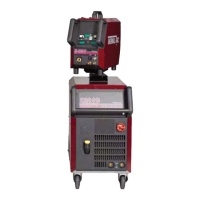
POWERMASTER 500, 500P, 350, 350P
6-14
March 17, 2006
Capacitor Board tests:
The capacitors can be checked using the diode checker
function on a digital multi-meter, with the power
disconnected from the machine. A good capacitor will
initially show a short and then go to an open circuit as the
capacitor charges up. If the meter leads are then reversed
the capacitor will again show a short and go to an open as
the capacitor charges with the opposite polarity.
Note:
Check the IGBTs and input rectifier first. If an
IGBT is shorted it will have to be disconnected
from the capacitor board before the capacitor
can be checked.
Check the four capacitor banks using the diode checker
function on the meter with power disconnected from the
machine as follows:
C1 to C2E1 top IGBT.
C2E1 to E2 top IGBT.
C1 to C2E1 bottom IGBT.
C2E1 to E2 bottom IGBT.
The capacitor banks should have the follow voltage
readings when power is applied to the unit, by switching
the front panel CONTROL POWER switch ON.
Note:
The voltage must be checked with the OUTPUT
CONTACTOR control OFF.
C1(+) to C2E1(-) top IGBT: 140 to 180 VDC
C2E1(+) to E2(-) top IGBT: 140 to 180 VDC.
C1(+) to C2E1(-) bottom IGBT: 140 to 180 VDC.
C2E1(+) to E2(-) bottom IGBT: 140 to 180 VDC.
All readings should be within 15 VDC of each other.
DANGER:
Use extreme caution when making
measurements internal to the machine.
Primary voltage is present inside the machine
even with the CONTROL POWER switch in the
OFF position. Do not touch exposed metal or
wiring connections if the main wall disconnect
is activated. After power has been removed
allow 2 minutes for the voltage to decay on the
capacitor banks.
6.08 Semiconductor Replacement
Requirements
The following guidelines must be followed when replacing
one of the power semiconductors. This includes the input
rectifier module, output diode, or IGBT module.
1. Remove the failed component and thoroughly clean
the heat sink area where the part mounts.
2. Apply a thin layer of heat sink thermal compound to
the semiconductor module.
3. Tighten and torque the mounting screws and terminals
per the chart below.
Note:
It is important to follow the torque
requirements to avoid possible damage to the
component.
Component Torque
Output Diode
Center mounting screw 15 in-lbs
Outer mounting screws 35 in-lbs
Terminal screws 35 in-lbs
Input Rectifier
Mounting Screws 27 in-lbs
Terminal Screws 27 in-lbs
IGBT Module
Mounting Screws 35 in-lbs
Terminal Screws 27 in-lbs
Table 6-2: Semiconductor Torque Requirements
 Loading...