1-6
GEAR PUMP 1.2
Start the gear pump removal procedure by removing any
attachment, raising the boom arms and engaging the
boom support pins. Shut off the engine.
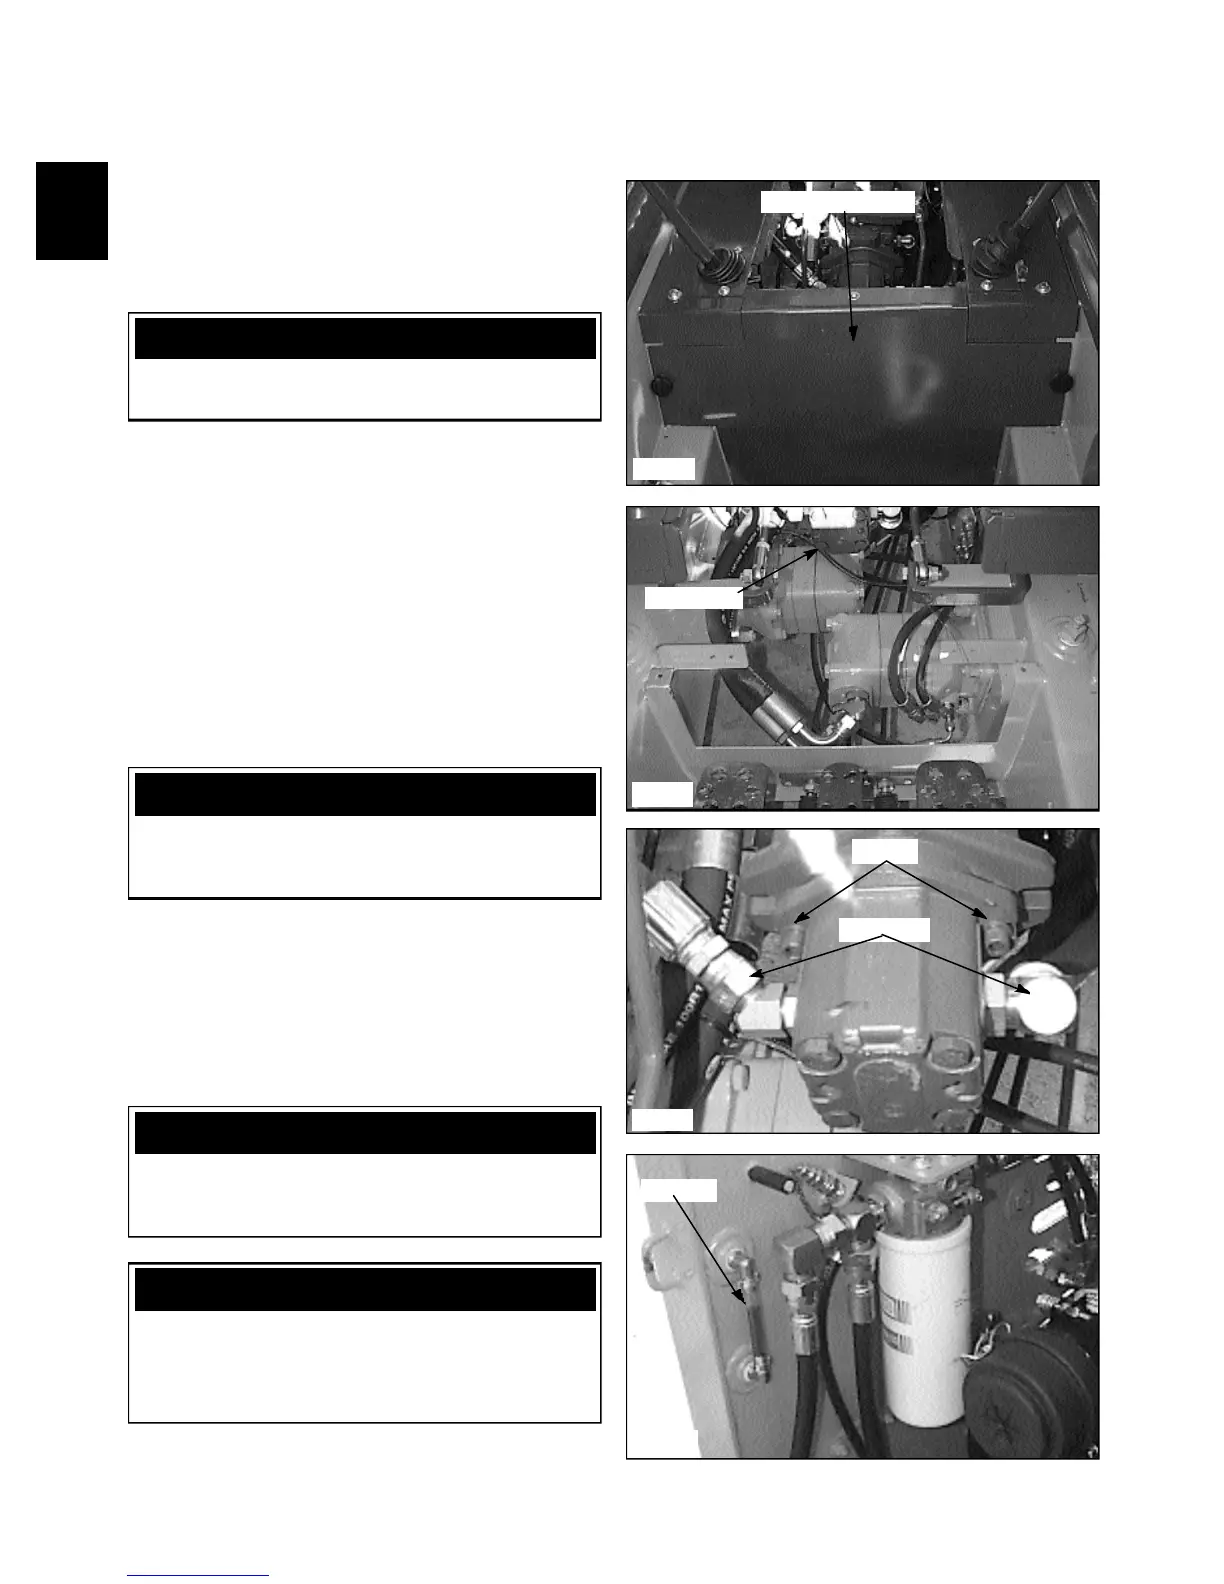
1 Remove the seat and hydrostatic shield. (fig. C2358,
C2360)
2 Attach a vacuum system to the hydraulic oil reservoir
filler location. Or drain the oil reservoir. Seal the threads
on the drain plug, if removed, with teflon tape or a liquid
form of pipe sealant before installing.
3 Disconnect the hydraulic hoses from the gear pump.
(fig. C2353) Remove the pump fittings. Cap all open
hoses to prevent contamination. After capping ends you
may unhook vacuum system from oil reservoir.
4 Remove the 2 bolts holding the gear pump to the
hydrostatic tandem section. (fig. C2353) Remove the gear
pump. Check the seal. Replace if required.
5 Replace gear pump in reverse order.
6 Start the engine and check for leaks. Do not use your
hands to find leaks.
7 Check the fluid level in the hydraulic oil reservoir
and replenish as required. (fig. C2354)
8 Follow the Start Up Procedure upon completing
repairs. See next page.
C2358
C2360
C2353
C2354
Gear pump
Screws
Hydrostatic shield
Oil level
Replacement
WARNING
To prevent personal injury, never work under the
boom arms without the boom supports engaged.
WARNING
Use caution when dealing with fluid under pressure.
Escaping fluid under pressure can penetrate the skin
and cause serious injury.
IMPORTANT
If gear pump replacement is being done because of
failure, the hydraulic system and oil should be
checked for contamination. See section 2.7.
IMPORTANT
When making repairs to the hydraulic system, keep
the work area and parts clean. Use caps and plugs on
all open lines and ports. Follow the torque chart
when tightening lines and fittings.
Hyd. lines